Trying to understand astrophotography equipment can be extremely hard for beginners.
It’s very hard to know where to start. Can I use my basic camera? Do I need a telescope?
In this article, we provide an easy-to-understand beginner’s guide to what equipment you need for astrophotography. Let’s get into it.
Equipment for Astrophotography
What astrophotography equipment you need depends on what you are shooting. There are broadly three types of astrophotography:
- Landscape Astrophotography – taking pictures of the stars and Milky Way over features on the Earth
- Planetary Astrophotography – taking pictures of the planets in our Solar System, as well as the Sun and Moon
- Deep Sky Astrophotography – taking pictures of far-off objects like galaxies and nebulae
Each of these requires different astrophotography setups. Let’s look into each now.

Landscape Astrophotography Equipment
For landscape astrophotography you will need:
- A DSLR or mirrorless camera
- A wide-angle lens
- A tripod
The camera needs to be able to be controlled in manual mode for the control of the settings that you will need and be able to have different lenses attached. Our research into the Best Cameras for Astrophotography also shows that full frame sensor cameras are best. However, this is not essential and they are more expensive.
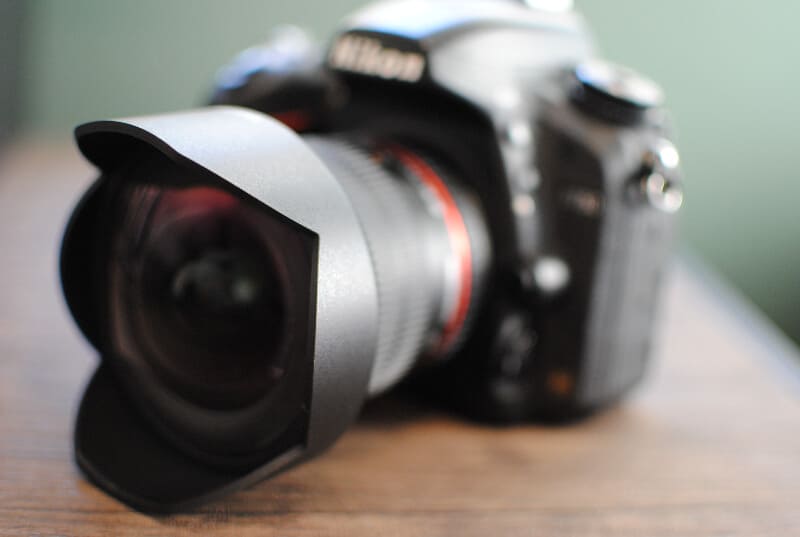
The lens should have a wide angle (indicated by low millimeters, e.g. 14mm) to enable you to capture a wide expanse of the sky. It should also be as “fast” as possible. This is indicated by a low f-number, like f/1.8 or f/2.8. The lower this number, the better it will be at capturing light under dark skies. See the Best Lenses for Astrophotography.
The tripod should be sturdy to minimize any wobble that will ruin long exposure images. See the Best Tripods for Astrophotography.
An additional optional item is a star tracker. This piece of gear enables you to take longer exposures and is for intermediate to advanced astronomy photographers. See the Best Star Trackers for Astrophotography to learn more.
You can read more about each of these pieces of gear below. We also have a guide to Landscape Astrophotography for Beginners that you can go to.

Planetary Astrophotography Equipment
For planetary astrophotography you will need:
- A DSLR/mirrorless camera or a dedicated astronomy camera
- A telephoto lens or telescope and mount
- A tripod
DSLR and Mirrorless cameras can be used for astrophotography and having a full-frame sensor is less desirable than it is for landscape astrophotography (meaning that a cheaper APS-C camera can work).
This camera can then be combined with a telephoto lens of 85mm to 300mm for a high magnification and narrow field of view to closely crop a planet.
You will then of course need a tripod and a star tracker will take you to the next level.
Those using telescopes as part of their astrophotography setup will often use a dedicated astronomy camera. See our guide to the Best Planetary Cameras for more on this.
There are also telescopes that are especially good for photographing planets (these tend to have long focal lengths). Read more about this in our guide to the Best Telescopes for Planetary Imaging.
The telescope will be best combined with a quality Astrophotography Mount.

Deep Sky Astrophotography Equipment
For deep sky astrophotography you will need:
- A dedicated astronomy camera
- A telescope
- A telescope mount
The dedicated astronomy camera for deep space imaging will have different characteristics to one for planetary imaging. See the Best CCD and CMOS Cameras for Astrophotography for more on this.
The telescope will also ideally be suited to shooting deep sky objects (DSOs). See the Best Telescopes for Astrophotography.
For deep sky imaging, the mount takes on another level of importance since it will be required to accurately track the astronomical object you are capturing for much longer periods. See our research on the Best Telescope Mounts for Astrophotography.
Note that none of this is exclusive and there are many different ways of combining different equipment to shoot what you want for your astronomy imaging.
For example, deep-sky photography can be done with a DSLR, telephoto lens, and star tracker but, for the most part, having the right gear will make it easier and give you the best chance of capturing great images.
Now we’ll go into more detail on each item.
Astrophotography Equipment List
Cameras
The easiest way to get going in astrophotography is to use a good, regular DSLR or Mirrorless camera.
By “regular” we mean that it could be used for any other type of photography, and by “good” we mean that it has to be capable of having the camera settings changed manually.
It doesn’t have to be the best camera on the market, especially when you are first starting out. We recommend any beginner first get an entry-level DLSR or similar and learn to push it to its limits.
If you already have a camera like this but are unsure if it is good enough for astrophotography, give it a try first. You’ll learn the limits of your camera and be better able to take advantage of any improvements when you upgrade in the future.
The key things for the camera you need for astrophotography are:
- it can have different lenses attached, and
- that you can have full control over key settings like shutter speed, aperture, focus, and ISO.
For more detail on what camera you need and some recommended models, see our article on the Best Cameras for Astrophotography.
For more advanced deep sky and planetary astrophotography, most will use a dedicated astronomy camera, like a CCD or CMOS camera.
CCD stands for Charge-Coupled Device, and CMOS is Complementary Metal-Oxide-Semiconductor. These are dedicated astrophotography cameras.
If you’ve never seen one before you’ll notice that there are no buttons or controls of any kind, no screen or viewfinder. They are merely small metal boxes that can be a little hard to get your head around.
A CCD camera cannot be autonomously controlled like a regular camera but has to be connected to a computer and operated via software, like a webcam for example.
CCD cameras can capture exposures that can last from minutes to hours and because of this they are well suited for deep sky astrophotography – where you need to gather a lot of light to get an image of an extremely far-off object. Once the exposure has finished, the data is sent to the computer for digitization and post-production.
For case studies of CCD astrophotography see Leonardo Orazi and Ken Crawford in our interviews with the best astrophotographers. They describe in step-by-step detail what equipment they use and how they capture images.
CMOS cameras have traditionally been cheaper and less powerful alternatives to CCDs. In recent years though, the performance of CMOS cameras has caught up so are likely to become more common in the future.
See our article on the Best CCD and CMOS Cameras for Astrophotography.
Lenses
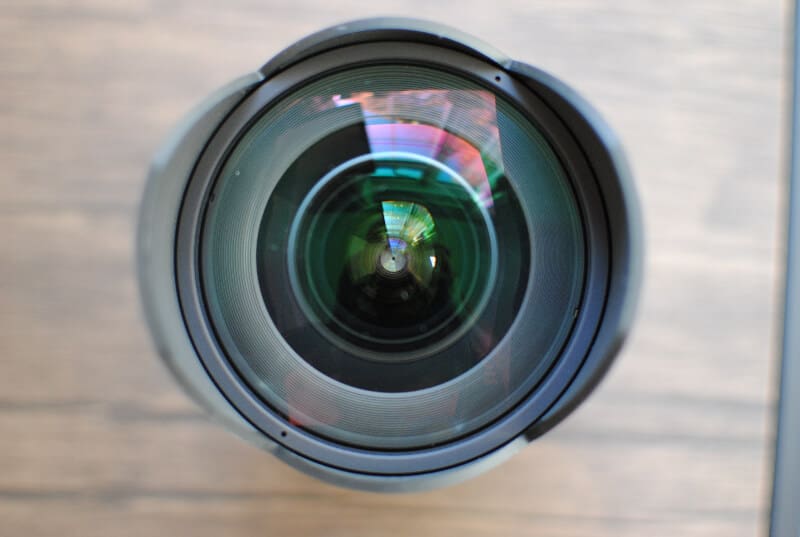
The next most important piece of astrophotography equipment is the lens that you attach to the camera.
Lenses that are a fixed focal length (for example, 24mm) are known as prime lenses. Lenses that are a variable focal length (for example, 18-55mm) are known as zoom lenses.
In general, prime lenses are better quality than zoom lenses of similar cost but lack the flexibility of being able to shoot at different focal lengths.
Most entry-level DSLR cameras come with a standard lens. This is referred to as a “kit lens” and is usually a zoom lens of 18-55mm.
Whilst you can certainly use this lens for astrophotography (and it is definitely worth trying before you buy anything else), it is not perfect for our purposes of shooting amazing pictures of the stars and planets.
Depending on what you want to shoot, you will either need:
- a wide-angle lens, for shooting landscape astrophotography, or
- a telephoto lens, for lunar and planetary photography
See here for recommendations on the Best Lenses for Astrophotography.
Tripods
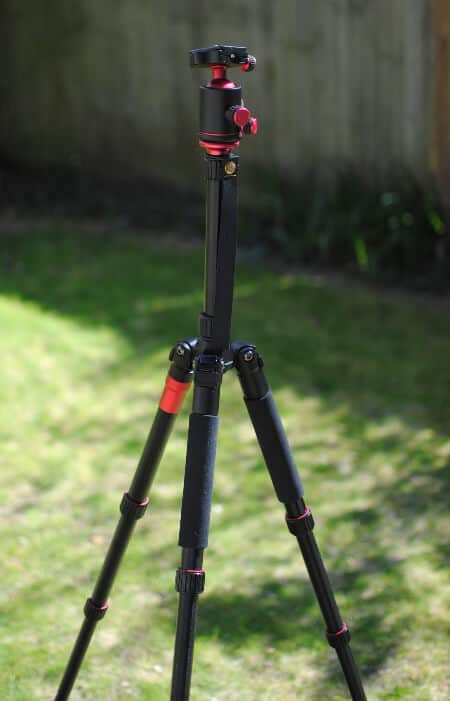
Having a good, sturdy tripod is vitally important for astrophotography.
When taking astronomy images you will be taking long exposures which means that your camera will need to stay perfectly still or the image will suffer from distortion. Even the tiniest camera shake can ruin your images.
Carbon fiber tripods are widely considered the best as they are lighter to carry than aluminum alternatives but don’t lose any sturdiness. They do tend to be a little more expensive though.
See here for our recommendations on the best tripods for astrophotography.
Star Trackers
When you photograph an astronomy object you are (obviously) pointing your camera at it from your position on Earth and shooting.
Because you are aiming into a dark sky, what you are doing is trying to gather as much light as possible in order to get the best image. Therefore, the longer the exposure, the better the resulting picture because more light has been gathered.
However, because the Earth is constantly rotating it means that what you are photographing is effectively moving while you shoot it (in fact, both you and the object are moving).
This means that if your exposure time is too long you will get distortion on the image. This could be a blurring on a planetary image or trails when photographing stars.
We’ll cover settings and how to best take astronomy images below, but there are ways to work out exactly how long you can have your exposure time based on the camera and lens that you are using. It can range from 5 seconds up to a minute.
Tracking mounts provide a solution to this. They fit between your camera and your tripod and slowly adjust where your camera is pointing according to the rotation of the Earth.
This allows you to stay focused on the object you are photographing longer, and therefore produce better, sharper images.
When combined with a tracking mount, deep sky astrophotography is also possible with a telephoto lens.
An example of a popular astrophotography tracking mount is the iOptron SkyGuider Pro. (See some case studies of it used by expert astrophotographers here).
See our overview here of the Best Star Trackers for Astrophotography.
Intervalometers
An intervalometer is a programmable remote shutter that you can use to set exposure time, the interval between photos, the total number of photos to be taken, and the time delay of the first picture.
This extra functionality can be priceless as you may want to take multiple pictures of the same object in succession. The purpose of this is to then “stack” the images in post-production after (more on this later).
This is a good practice that can bypass the need for a star tracker, although both methods have their merits.
See here the Best Intervalometers for different cameras.
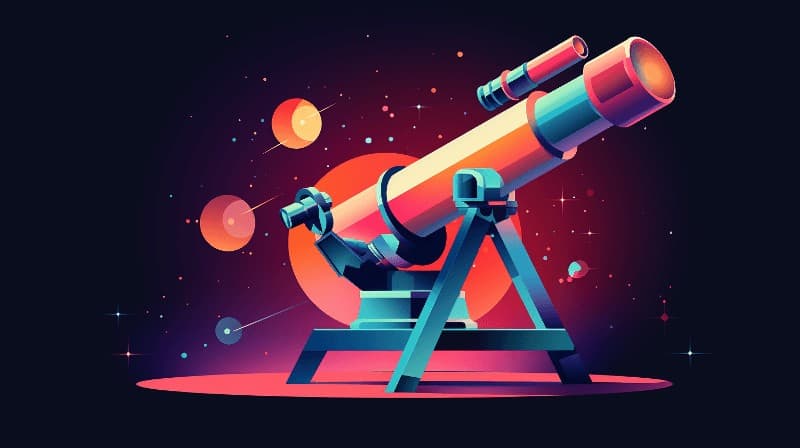
Telescopes
To attach a camera to a telescope for astrophotography you need a couple of things called a T-ring and a T-adapter. This is called the T-mount system (the “T” stands for equipment manufacturer Tamron which devised the system in the 1950s):
- The T-Ring is the object which fits into your camera where the lens would normally go.
- The T-Adapter is the object that will connect your telescope or lens to your camera.
These pieces of equipment will be different depending on your camera and telescope types so be sure to get the right ones for you.
See our article on the Best Telescopes for Astrophotography.
Telescope Mounts
A mount is an instrument that fits between your tripod and telescope and very slowly moves where your telescope (or camera) is pointing to compensate for the Earth’s rotation, just like the tracking mount for a camera covered above.
As touched on before, our planet is constantly moving and rotating and to take photos of astronomical objects in the sky you need to focus on them for extended periods of time. This can be anything from a few seconds to minutes or even weeks and months for more advanced deep-sky photography.
A mount allows you to focus on an object and then track it to allow you to focus on it and photograph it for a longer period.
This is why it is one of the most important pieces of equipment. See the quote below from an advanced astrophotographer:
“The most important piece of equipment in astrophotography is the mount. We recommend buying the best mount you can afford. You can take a nice image with a great mount and a decent lens but if you had a crappy mount and bad tracking, even the best lens is not going to take a decent image.” – Tolga
See our guides to the Best Astrophotography Mounts and the different types of telescope mounts.
Other Astrophotography Gear
Headlamps
A useful bit of kit for when you are out photographing the sky at night time is a headlamp.
Using one of these enables you to have your hands free to operate your camera and set up your equipment in the dark. Nothing fancy is needed and they can be picked up for relatively cheap.
The only feature you will want will be for it to be able to shine red light. This is because under the night sky your eyes adjust to the dark but normal light from a headlamp, torch or phone will ruin your night vision. Red light does not do this.
Clothing
Depending on your location and time of year, you will need to wrap up warm for extended sessions outside.
Fingerless gloves are recommended so you can still press the buttons on your camera. Just use your common sense and dress appropriately.
Weatherproof Bags
To store and carry all your equipment and protect it if you are caught in the rain or other adverse conditions.
Battery backups and safety equipment
This will depend on your circumstances, but, for instance, if you are driving off on your own in the middle of the night to a dark sky site you will want to make sure you are well prepared to get back and stay warm.
You should consider what you would do if your phone battery dies, or there is no cell reception, etc.
What if your car won’t start when you want to head home? Do you have enough water and blankets to keep you warm if you have to hunker down in your car until it’s light? etc etc.
Astrophotography Equipment FAQs
Astrophotography Gear for Beginners
Overall then, the simplest way to get started with astrophotography is to have:
- A DSLR or Mirrorless Camera
- A wide-angle lens (e.g. 14mm)
- A tripod
However, many smartphones these days have very good astrophotography modes and so can be the simplest and cheapest (if you already have the phone) way to have an initial go.
They cannot yet really compare with even mid-range DSLR/Mirrorless cameras yet though, and so to progress you’ll need to get one of those.
For further information here are two great resources:
- Our analysis of the gear used by the winners of Astronomy Photographer of the Year
- Astrobin’s Equipment Explorer lets you see the most commonly used astrophotography equipment for the planetary and deep sky images that they host
