Astrophotography can be an expensive hobby but there are ways to cut costs and save money whilst still being able to produce amazing images.
In this article, we present the best budget astrophotography setups so that you can get shooting the stars without breaking the bank.
Putting Together a Cheap Astrophotography Setup
There are some essential bits of equipment that you need for astrophotography and these will differ depending on what it is that you want to shoot.
When starting out on astrophotography on a budget, it is best to choose one type of astrophotography and build your setup for that, since different gear is required for shooting different things.
In this guide, we are going to break this into two main categories:
- Landscape astrophotography – think shots of the milky way above the Earth. This is how most people get started with astrophotography mostly because it is closer to regular landscape photography and uses much of the same gear.
- Deep sky or planetary astrophotography – do you want to capture images of galaxies and nebulae or our moon and planets of our solar system? If so, the gear you will need will be different from landscape astrophotography.
Let’s explore each of these in turn.
Landscape Astrophotography on a Budget
If you want to capture images of the starry skies and other objects above the Earth then you are going to need three bits of essential gear, plus one optional that you can add later if you choose:
- Mirrorless or DSLR Camera
- Wide-angle Lens
- Tripod
- Star tracker (optional)
Best Budget Camera for Astrophotography
In our article on the best camera for astrophotography, we analyzed what cameras are most successfully used by leading astrophotographers today.
We found that full-frame sensor cameras lead the way.
The downside of this is that these are more expensive than entry-level DSLRs (with crop sensors).
Check out that article for specific model recommendations and the best budget pick but a good option is the Canon EOS RP.
Our recommendation is to get one of these cameras second-hand as they are really as good as any for astrophotography and won’t hold you back, whereas a new entry-level DSLR will.
Best Budget Lens for Astrophotography
Our analysis shows that 14mm is the best focal length for landscape astrophotography and there is a great budget astrophotography lens available that fits the bill – the Rokinon 14mm f/2.8.
This lens from Rokinon (also known as Samyang) is the perfect budget astrophotography lens.
The focal length is optimal for capturing wide expanses of the sky (when combined with a full-frame camera (above)) and the aperture at f/2.8 is plenty fast for night sky photography.
This is the lens that many budding astrophotographers start out with and there are a few different options.
Given that we are on a budget, you can save money by choosing the cheaper option without automatic focus – you will only be using the manual focus for astrophotography, and the original model over the Series II – the main difference on that is that you can lock the focus ring which is not essential for us.
Check prices and availability here:
- Rokinon 14mm f/2.8 lens for Canon
- Rokinon 14mm f/2.8 lens for Nikon
- Rokinon 14mm f/2.8 lens for Sony
See the best lens for astrophotography for more details or the best 14mm lenses for more options.
Best Budget Tripod for Astrophotography
Often a bit of an afterthought compared to camera and lens etc, but the tripod is very important for astrophotography.
You need a sturdy model that will stay completely still while you take your long exposure shots.
The upside is that you don’t need the best-of-the-best in your budget setup. What you need is a tripod with enough weight capacity to carry your equipment, which in our case is relatively little.
If we check the weight of the above-recommended gear we have:
- Canon EOS R8 – 1lb (0.4 kg)
- Rokinon 14mm f/2.8 lens – 1.2lbs (0.5kg)
This comes to just 2.2 lbs (0.9kg)
You may want to add a star tracker later (see below), but our recommended budget option (the Move Shoot Move Nomad) weighs just 0.9 lbs (0.4 kg) and so our total budget astrophotography setup weighs in at 3.1 lbs (1.3 kg).
At this weight, you can get a good budget tripod – see the best tripods for astrophotography.
Best Budget Star Tracker for Astrophotography
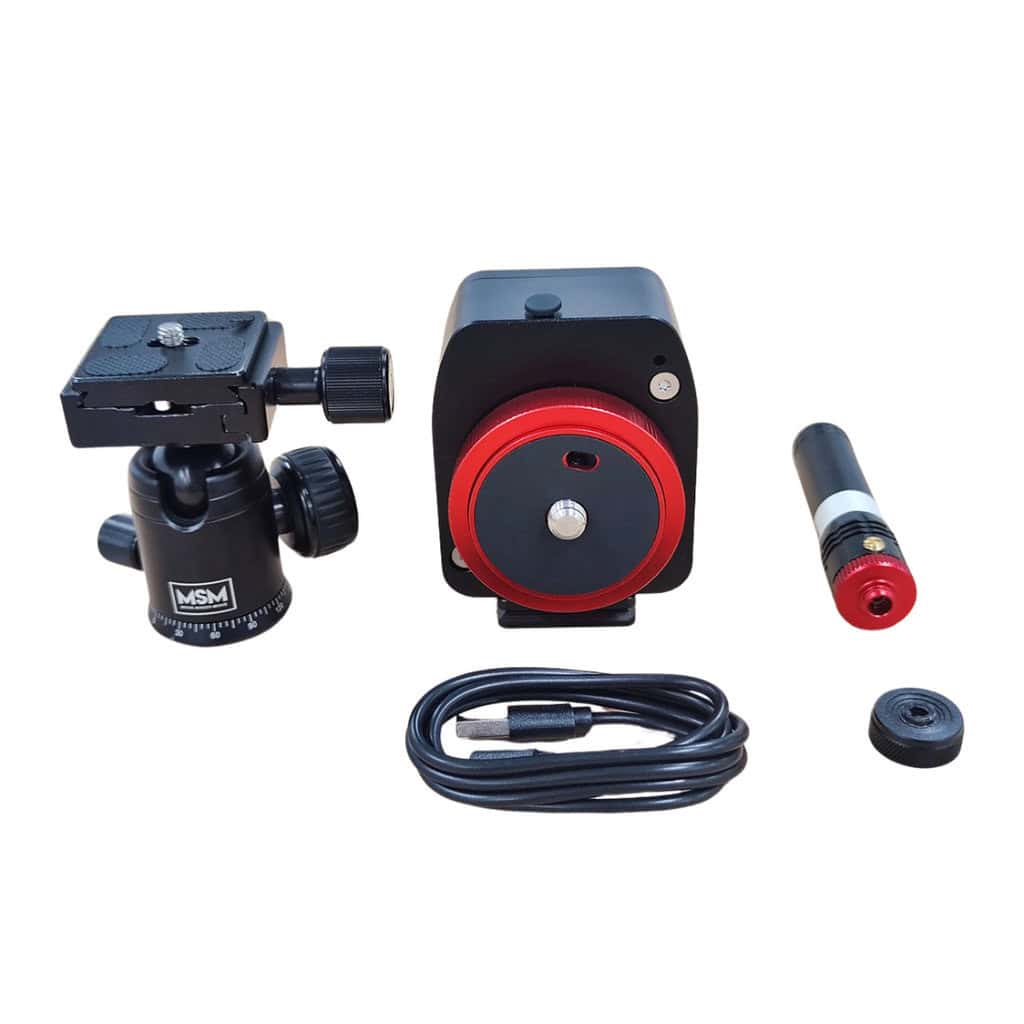
Star trackers are pieces of equipment that sit between your camera and tripod and move your camera at the speed of the rotation of the earth. This allows you to shoot much longer exposures and, in turn, get better astrophotography images.
The reason this is optional is that with the right conditions you can capture good pictures of the starry skies in one shot (with your exposure time calculated with the NPF rule).
Also, you can take multiple photos and stack them later using software. Doing this you can take, say, eight images for 18 seconds each and then put them together for a much better image.
However, there are advantages to using a star tracker. Mostly that it gives you a much better chance of getting a great shot in one exposure and reduces the need to spend time stacking and post-processing.
The best budget star tracker would be the Move Shoot Move Nomad.
It is a mechanical tracker that you wind up by hand – making it cheaper but also cutting out the need to think about a power supply. It retails at around $250 (although check live prices).
If you want to learn more, see the best star trackers for astrophotography.
Budget Landscape Astrophotography Setup Costs
So overall then, let’s see what this setup might cost (these prices are estimates and will vary):
- Canon EOS RP – $900
- Used Rokinon 14mm f/28 lens – $300
- Budget tripod – $50
- Move Shoot Move Nomad – $250
This totals $1500 with the star tracker or $1250 without.
Now obviously “cheap” or “budget” are relative terms and perhaps spending around $1000 is too much for you, but a setup like this can be as good as any for landscape astrophotography – i.e. it will not hold you back in any way from taking amazing images.
We actually did an analysis of what equipment was used by 1000 images shortlisted for Astronomy Photographer of the Year in the past seven years and much of this gear featured right up there, so you are really buying the best without paying for the best.
See further on in this article though for other tips on how to save money.
Deep Sky & Planetary Astrophotography on a Budget
If you want to capture images of the planets or deep space objects like other galaxies then you are going to need four main things:
- Camera
- Telescope
- Tracking mount
- Tripod
Best Budget Deep Sky & Planetary Camera
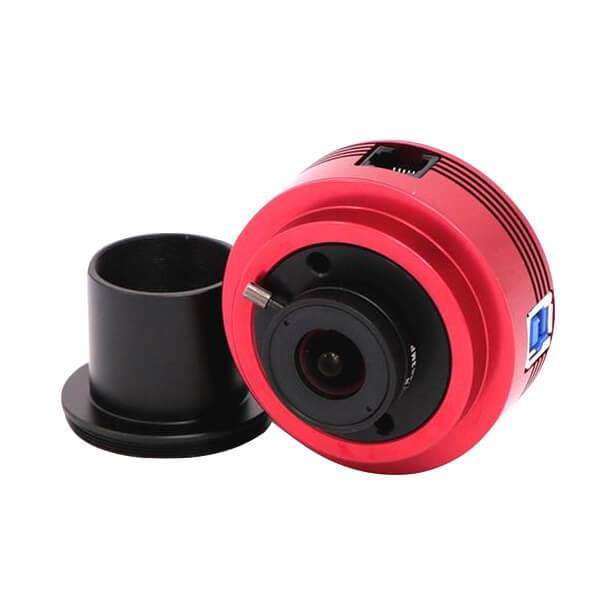
With deep sky and planetary astrophotography, you can use a regular DSLR but a cheaper option is a CCD/CMOS astronomy camera like this ZWO ASI120MC.
Obviously, if you already have a DSLR or mirrorless camera then it would be even cheaper to just use what you have without buying anything new.
Best Budget Telescope for Astrophotography
What you want is an astrophotography telescope in the ‘apochromatic refractor’ range.
These are small telescopes that will not work for just looking through and observing, but they are the best budget option for imaging.
A great option is the Sky-Watcher Evostar 72. You can see more options in our article on the best telescopes for astrophotography.
If you have a telephoto lens for your DSLR/mirrorless camera of say 100mm and above, then you can use that instead of a telescope.
If you don’t have one but would rather use a lens than a telescope (perhaps for ease of use and so you can use it for other types of photography) then the Rokinon 135mm is a good option and in roughly the same price bracket as the telescope above.
Best Budget Tracking Mount for Astrophotography
The tracking mount is a key piece of gear for deep-sky photography and not really optional in the way it is for landscape astrophotography.
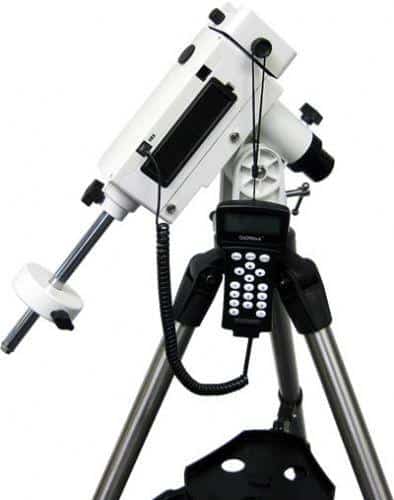
The iOptron SmartEQ Pro Mount is probably the cheapest GOTO equatorial mount around.
Potentially cheaper is to go for one of the better star trackers – either the iOptron SkyGuider Pro or the Sky-Watcher Star Adventurer. These cost in the region of $350-600 but could also be found cheaper used.
The advantage of this is that you then have the best star tracker around for use with landscape astrophotography as well.
The downside is that they are not GoTo – i.e. they won’t find objects in space for you and so are harder to use.
The other piece of equipment is the tripod which we have covered above. You just need to make sure you have a model that can comfortably take the combined weight of your equipment. With our setup here it would be:
- ZWO ASI120MC Camera – 0.2 lbs (0.1 kg)
- Sky-Watcher Evostar 72 Telescope – 4.3 lbs (1.9 kg)
- Sky-Watcher Star Adventurer Tracker – 3.2 lbs (1.5 kg)
This totals 7.8 lbs (3.45 kg) and so you can see that a fairly good tripod with a payload capacity of over 8 lbs should suffice (like the K&F model above).
Budget Deep Sky / Planetary Astrophotography Setup Costs
Overall, our budget astrophotography setup for deep-sky or planetary astrophotography would cost (again, these prices are estimates and will vary):
- ZWO ASI120MC Camera – $150
- Sky-Watcher Evostar 72 Telescope – $500
- Sky-Watcher Star Adventurer Tracker – $400
- Budget tripod – $60
This totals $1110, so again, perhaps this isn’t what everyone would think of as “cheap”, but some deep-sky setups can cost in the tens of thousands and this set of gear is more than capable of getting great results.
5 Cheap Astrophotography Tips
Other than getting the best value gear, there are other ways to keep down the costs of our expensive hobby:
- Make the most of what you already have – If you have a standard DSLR and lens, or even a modern smartphone, then you can already get stuck in and shoot the stars. Use what you’ve got until you are sure what is limiting you – i.e. is your tripod too flimsy, your camera not full-frame, your lens too narrow, etc? There are many many examples of people getting great astrophotography images with basic gear.
- Aquire gradually and look out for deals – Rather than invest $1000 in a complete setup, upgrade your gear gradually when you know what you want. You can then look out for sales or scan what is available used on classifieds or sites like KEH Camera.
- Buy used and sell as you upgrade – Buying used equipment is a really good step, often the gear shows signs of wear on the outside but works as good as new and may cost half the price. Similarly, if, for example, you buy a used Nikon D750 for $700 today, it’ll probably still be worth a similar amount a year or two later if not dropped off a cliff, and so you can sell it and get most of the money back to invest in whatever camera you are upgrading to.
- Don’t add things you don’t need – For example, you may look at getting an external intervalometer for your DSLR camera, but many models (like the 6D and D750 recommended above) have this in-built, so you can use that and save $30ish. Similarly, do you really need that $100 backpack or do you have a bag that will suffice?
- Use free astrophotography learning resources – There is an ocean of great free material to help you on your astrophotography journey. See here the best YouTube astrophotography channels, and the best astrophotographers on Instagram. You can also read our beginners’ guide to astrophotography or any of the other content in our astrophotography hub.
Over to you – What are your tips for astrophotography on a budget?
We hope you found this useful information and have taken away some tips to help you save money.
Do you have any tips or equipment recommendations that you’d like to share for those doing astrophotography on a budget? If so, please let us know in the comments below.


Thank you for writing this article. for a beginner like me, it explains many things in detail and I value your helpful and unbiased recommendations to advance my hobby further.
You’re welcome Ian! Happy new year and thanks for your kind comment.