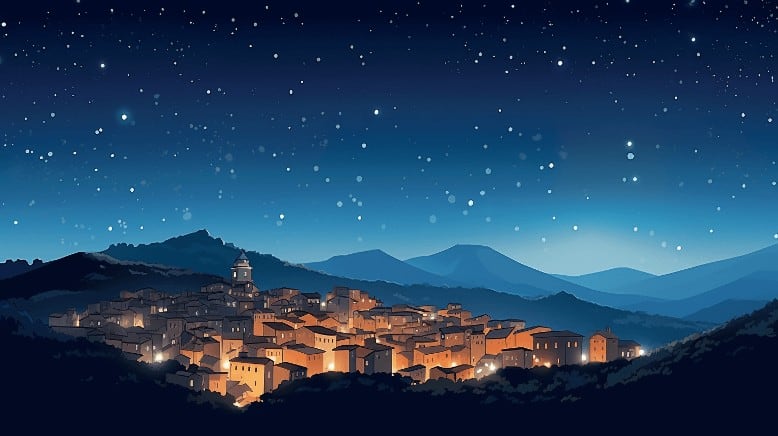
If there were no light pollution, it would be much easier to produce an astrophotography image with bright stars, planets, and deep sky objects bursting through.
However, if you live in or near a city or town, light pollution is getting worse and so you need to find ways to overcome this.
In this article, we are going to explain all you need to know about light pollution and astrophotography.
We are going to outline the tactics and strategies you can employ to overcome light pollution and take stunning night sky photos.
Let’s get into it.
What is light pollution and how does it affect astrophotography?
With each year, the starry night skies become increasingly obscured by light pollution.
We are going to examine this here from an astronomy and astrophotography perspective, but it’s worth noting that the impact that goes beyond this and has substantial environmental consequences, impacting wildlife behavior and ecosystems.
But what exactly is light pollution, and how does it interfere with astrophotography?
What is light pollution?
Light pollution is:
The brightening of the night sky caused by street lights and other man-made sources, which has a disruptive effect on natural cycles and inhibits the observation of stars and planets.
Essentially, light pollution is light from manmade sources like street lights and buildings that reduces the darkness of the sky and makes it hard to see, and photograph, stars and other astronomical objects.
There are a number of scientific categories of light pollution according to their source and/or impact, however Skyglow is the form of light pollution affecting astrophotography (the other types are glare, light trespass, and over-illumination).
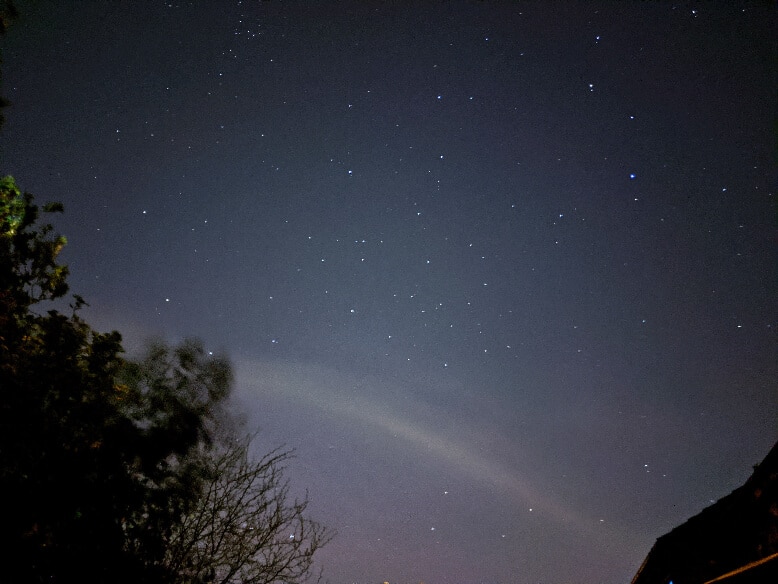
Skyglow is the combined light from all sources in an area, scattered by the atmosphere, obscuring the stars and other celestial bodies.
You can see it as the bright halo that appears over urban and suburban areas at night.
This makes it a significant problem for astrophotography, which relies on clear, dark skies.
Is light pollution getting worse?
According to scientific studies – and pretty much all anecdotal evidence – light pollution is getting worse around the world.
This makes logical sense as urban centers around the world are growing and producing more light.
A 2021 study by the University of Exeter found that global light pollution has increased by at least 49% over 25 years, and is by up to 270% if corrected for the effect of blue-rich LEDs.
The study also found that light pollution increased by 6% annually in North America from 1947 to 2000 and that light pollution is growing in most regions of the world, especially in Asia, South America, Oceania and Africa.
A more recent study released in 2023 by Globe at Night and published in Science found that:
“…the average night sky got brighter by 9.6% per year from 2011 to 2022, which is equivalent to doubling the sky brightness every 8 years.”
The Bortle Scale – how light pollution is measured
Light pollution is measured using a system known as the Bortle Scale.
It was created by John E. Bortle, an amateur astronomer, in 2001.
This is a nine-level numeric scale that measures the darkness of the night sky:
- Class 1: Excellent dark-sky site: The sky is very dark, with airglow visible along the horizon and the Milky Way casting shadows on the ground. Zodiacal light, a faint glow along the ecliptic, can be seen.
- Class 2: Typical truly dark site: The Milky Way appears highly structured, and the sky still appears very dark with faint airglow along the horizon.
- Class 3: Rural sky: The Milky Way still appears bright and shows complex structure. Some light pollution is evident along the horizon.
- Class 4: Rural/suburban transition: Light pollution domes from towns or cities are visible and the Milky Way is still visible but lacks most of its structure.
- Class 5: Suburban sky: Only brighter sections of the Milky Way (like the Galactic Center) are visible, and the sky within 35 degrees of the horizon glows grayish white.
- Class 6: Bright suburban sky: The Milky Way is barely visible near the zenith. The sky within 30 degrees of the horizon glows white-ish or even light gray.
- Class 7: Suburban/urban transition: The entire sky has a grayish or even yellowish glow. Only a handful of the brightest stars are visible.
- Class 8: City sky: The sky is brightly lit, with only a few stars visible, typically the ones in famous constellations like Ursa Major (the Big Dipper) or Orion.
- Class 9: Inner-city sky: The sky is bright, with perhaps only the Moon, Venus, and Jupiter visible to the naked eye.
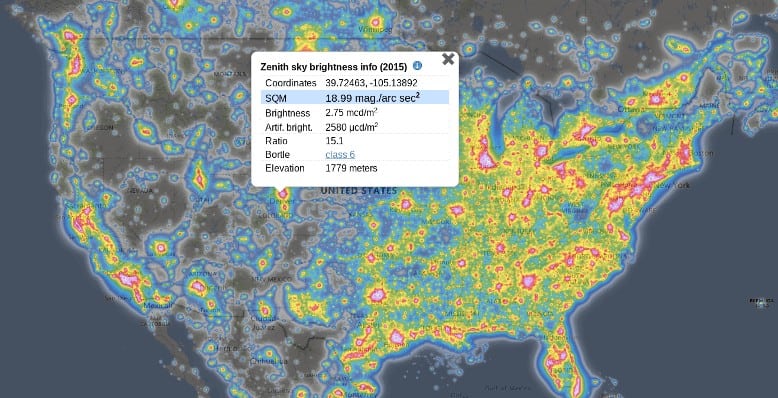
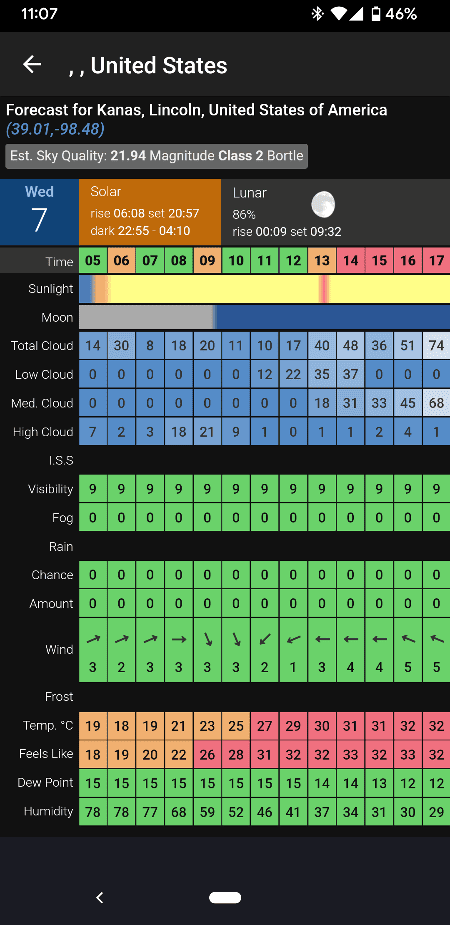
The easiest way to find out the bottle scale level of a particular place is to use a website like Light Pollution Map or an app like Clear Outside.
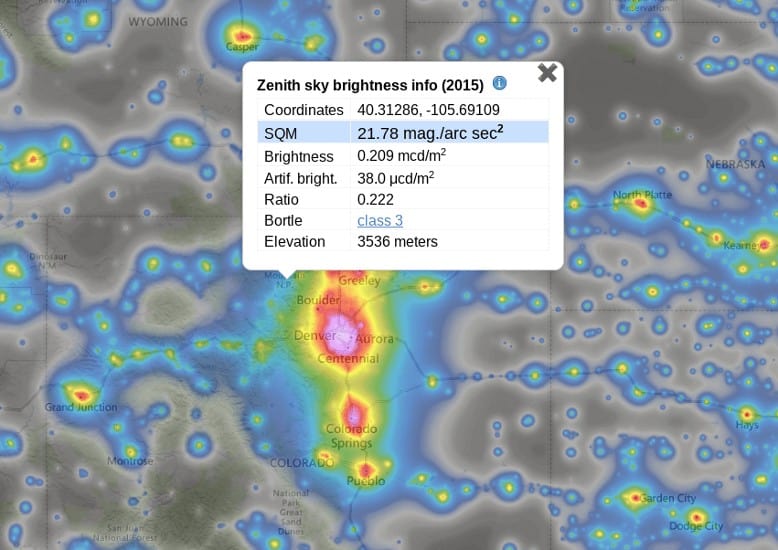
Here I have used Light Pollution Map to see that Denver, Colorado is a Class 6 on the Bortle Scale:
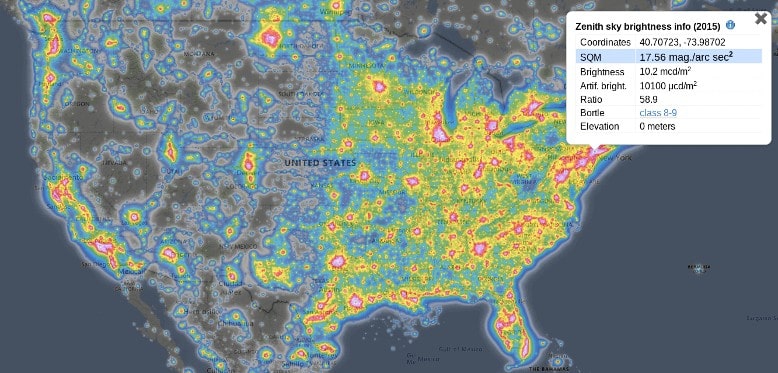
If we go further east, we can see that New York City is a class 8/9:
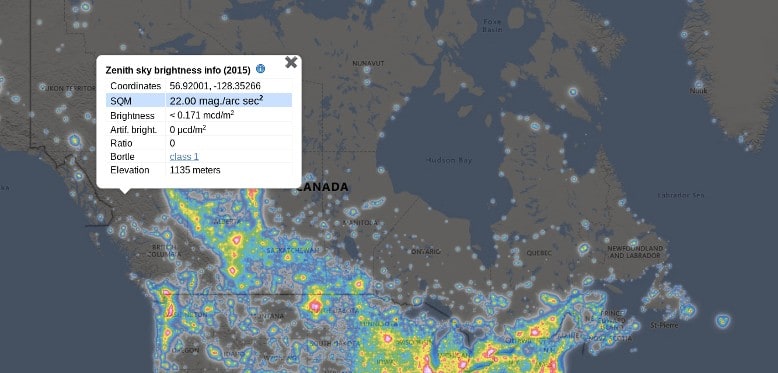
Unsurprisingly, if we look into the Canadian wilderness then we can find Bortle Class 1 skies:
How does light pollution affect astrophotography
Light pollution has significant and noticeable effects on astrophotography:
- Reduced Visibility of Stars and Celestial Bodies: The most direct impact of light pollution on astrophotography is that it washes out the light from stars, planets, galaxies, nebulae, and other celestial objects. In areas with severe light pollution, only the brightest stars and the moon are visible, which drastically limits the scope of objects that can be photographed.
- Decreased Contrast: Light pollution reduces the contrast between celestial objects and the sky. This means the sky may appear more like a faint gray than true black in photographs, and the fainter stars and galaxies may not be visible at all.
- Color Distortion: Different types of artificial lights emit different colors, which can lead to unnatural colors in night sky photographs. Sodium vapor lamps, for instance, give off an orange glow, while LED lights often produce a blue light. These can color the sky in ways that wouldn’t occur naturally, and these effects can be difficult to correct completely in post-processing.
- Increased Noise: To photograph faint celestial objects in light-polluted areas, photographers often have to increase the ISO setting on their camera, which amplifies the camera’s signal but also increases the digital noise. This noise can reduce the sharpness and clarity of the photograph.
- Limitations on Long Exposure: Long exposures, which are often used in astrophotography to capture more light from celestial objects, can also capture more light pollution. This can overexpose the image and wash out the details of the night sky.
How to deal with light pollution in astrophotography
There are three broad ways to deal with light pollution and still produce amazing astrophotography images:
- Finding and timing dark skies to avoid light pollution
- Utilizing certain shooting techniques and light pollution filters to mitigate light pollution
- Editing in post-process to remove light pollution
You may use one, two, or all three of these depending on your circumstances.
We’ll dive into them now.
Finding and Timing Dark Skies to Avoid Light Pollution
Finding Dark Skies
The first option to consider if where you live has high light pollution is to travel to somewhere with darker skies.
As mentioned above, there are good (and free) online maps that you can use to locate places with lower light pollution.
For example, we saw above that Denver is class 6 on the bottle scale. However, if we travel north to Rocky Mountain National Park, then we find class 3 skies:
There are also designated international dark sky places around the world that are certified by the International Dark Sky Association for having low levels of light pollution.
Overall, this is the most effective way of overcoming light pollution in astrophotography. You are literally going somewhere where there is little, or no, light pollution to interfere with your imaging.
However, it is also not realistic for many people to just be able to drive out into the middle of nowhere on any given night. This takes time, planning and money, and so let’s look at the techniques that can help you shoot closer to home.
Timing Dark Skies
Less related to manmade light pollution, but a key element of astrophotography is timing to avoid nights when the moon is bright.
You will probably know that the moon goes through phases over the course of a month, with:
- a full moon being the brightest, and
- a new moon being the darkest.
A bright moon lightens the night sky and impacts astrophotography in the same way as light pollution and so you want to check the moon phase and time your shooting to be on or around a new moon.
As mentioned earlier, the Clear Outside app is a great free tool that tells you the moon phase and also the Bortle Scale class for your location, or wherever you plan to shoot:
Using Shooting Techniques and Filters to Mitigate Light Pollution
Long Exposures and Stacking
Astrophotography commonly utilizes shooting with long exposures (often with star trackers).
This allows your camera sensor to gather more light and capture more stars and detail in the night sky. However, it can also increase the effects of light pollution.
To deal with this, astrophotographers often use a technique called “stacking”, where they take multiple short-exposure shots and then combine them using software.
This allows them to increase the signal (light from the stars) without overly increasing the noise (light pollution).
You can also experiment with other camera settings to mitigate light pollution.
For example, using a lower ISO to reduce noise, or adjusting the white balance settings to compensate for the color cast caused by artificial lights.
Light Pollution Filters
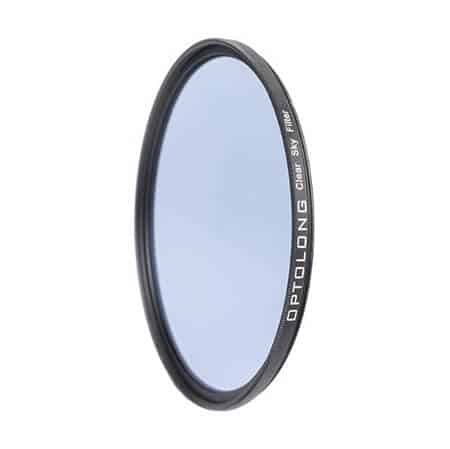
Light pollution filters are an additional physical component that you attach to the lens of your camera or telescope.
They block out certain wavelengths of light commonly produced by artificial lights while allowing the light from celestial objects to pass through.
They are relatively inexpensive and are particularly effective in areas with moderate light pollution.
Removing Light Pollution in Post-Processing
The final step is to use post-processing software to remove light pollution from your images.
There are a number of free and paid tools to allow you to do this, including:
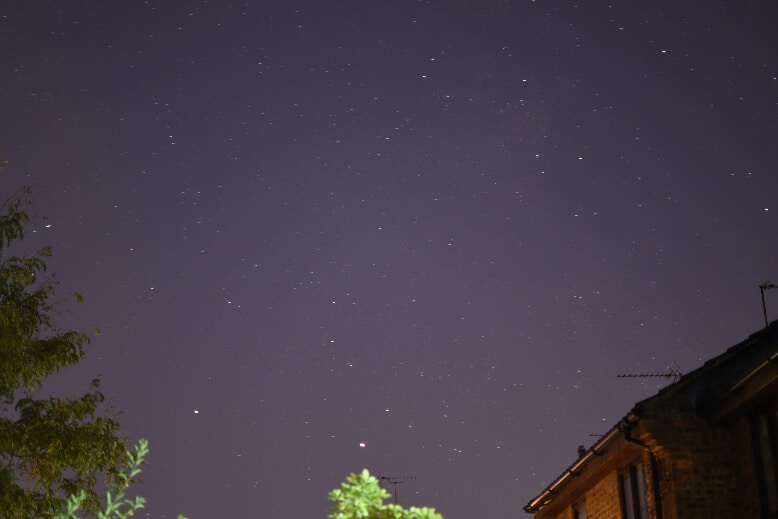
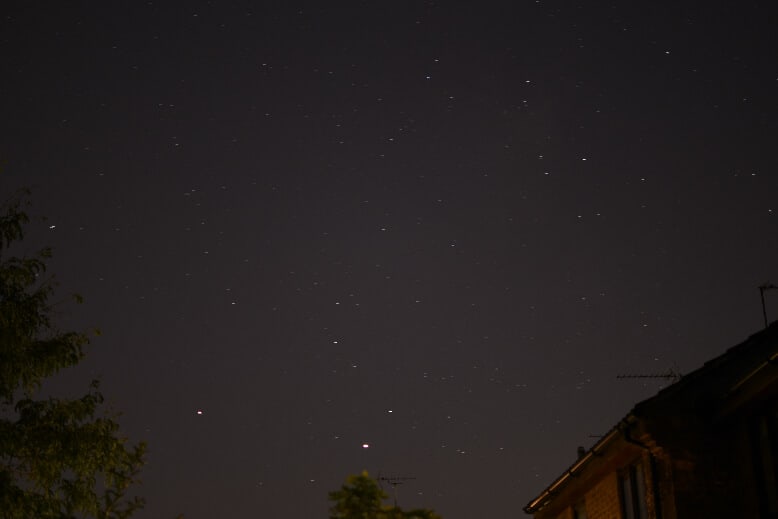
Here are two photos of mine – the first unprocessed to show the light pollution, and the second with just some basic processing to darken the skies:
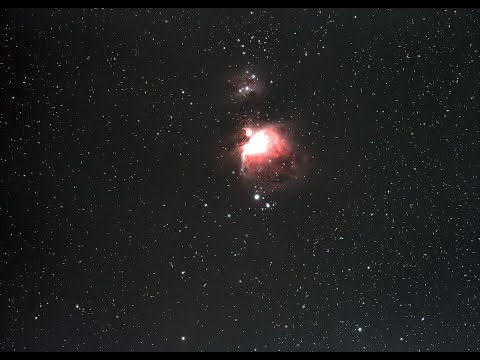
For a demonstration of how effective this can be with deep sky photography, here is a short video where GIMP is used to remove light pollution:
Astrophotography in the Age of Light Pollution
Light pollution is not going to go away and is only going to get worse.
This makes it harder for most people to just step into their backyard and take a great picture of the night sky, but – as we have laid out here – there are a number of techniques and tactics that can be employed to overcome this.
Ideally, you are able to plan a trip out to a dark sky site. If you can time this near a new moon and with clear skies free of clouds then you will have great astrophotography shooting conditions and minimize the need to employ other techniques.
However, this is not something I can do with any regularity – I have a job to do and kids to look after – and I’m sure this is the same for you.
Luckily, using a combination of stacked long exposures, a light pollution filter, and post-processing can work wonders and turn what at first seemed like an unusable image into something quite stunning.
For more on this topic, see our guide to Astrophotography in the City that includes additional techniques and tactics.
