The Vaonis Hestia is a brand new smartphone device that is used to enhance your phone’s astrophotography capabilities.
I put it through its paces for photographing the sun to see how it would perform. Here’s what I learned.
How to setup the Vaonis Hestia for Solar Imaging
The first thing is setting up the Hestia to take photos of the sun.
There are a few things that you need for this:
- Vaonis Hestia (obviously)
- Tripod
- ND Filter (Solar Filter)
- Solar Pointer
The solar pointer and solar filter come with the Hestia if you buy the Eclipse Pack, or else you’ll have to add them as accessories.
The Vaonis Gravity app helpfully walks you through the setup process but I found it skipped over a few steps, so here’s my guide.
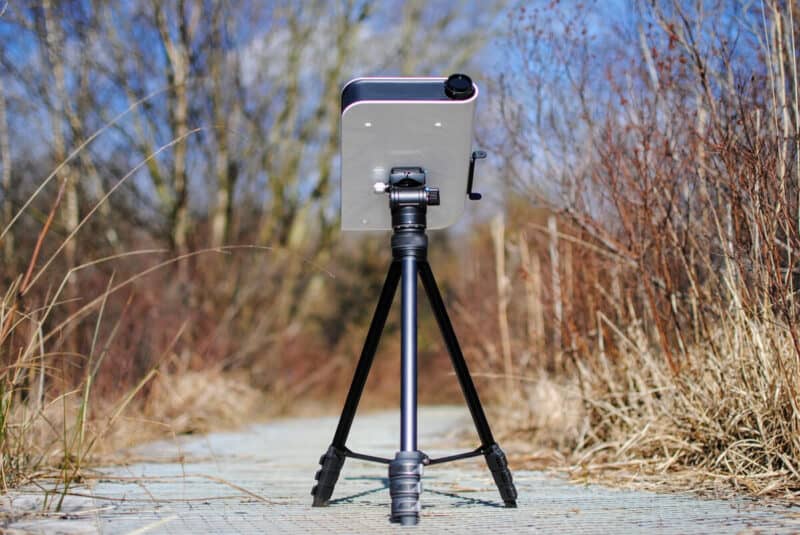
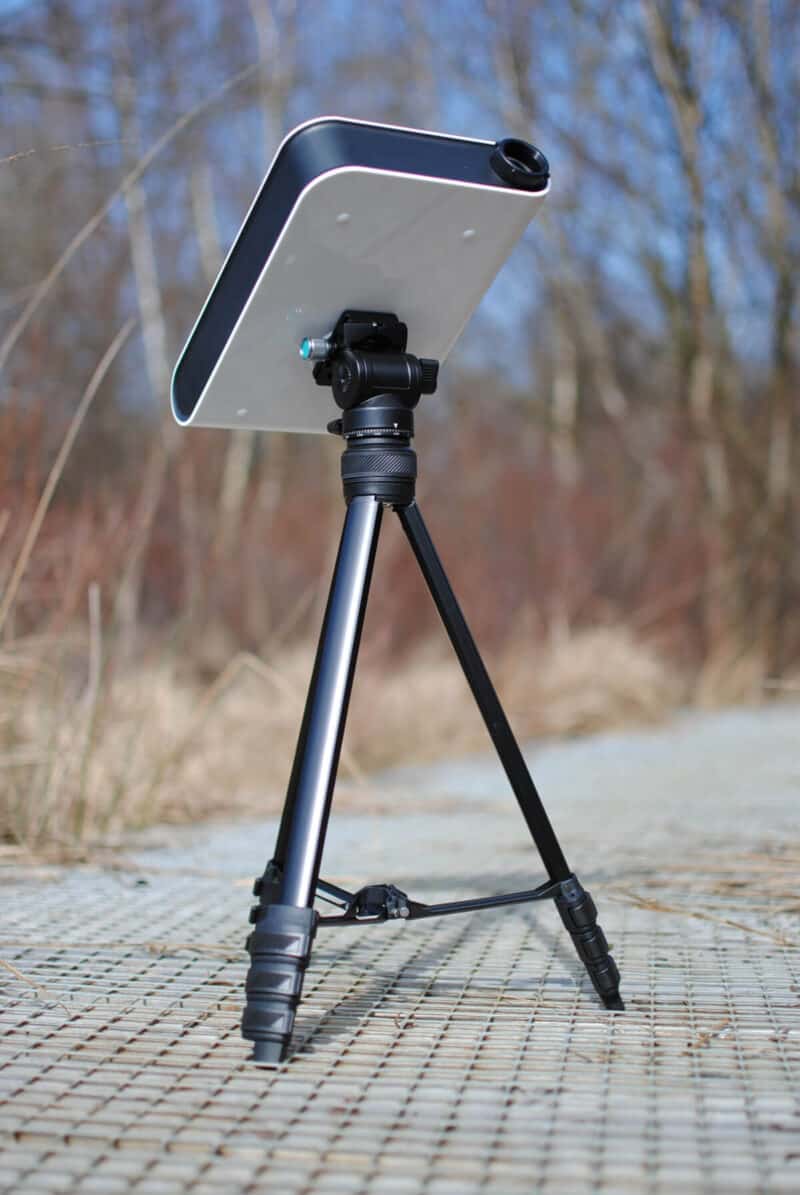
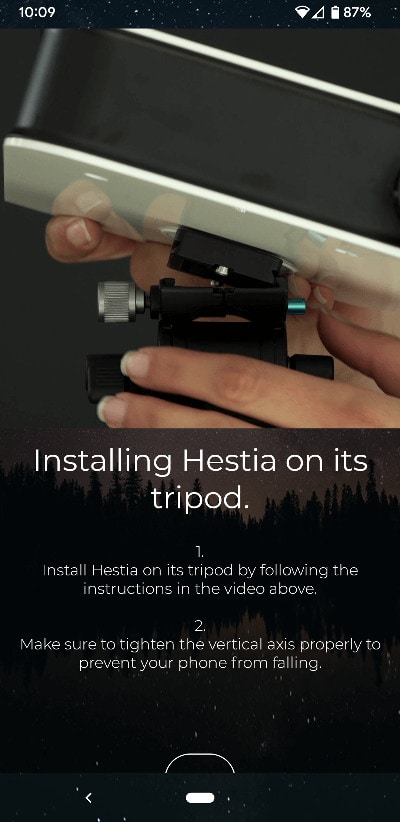
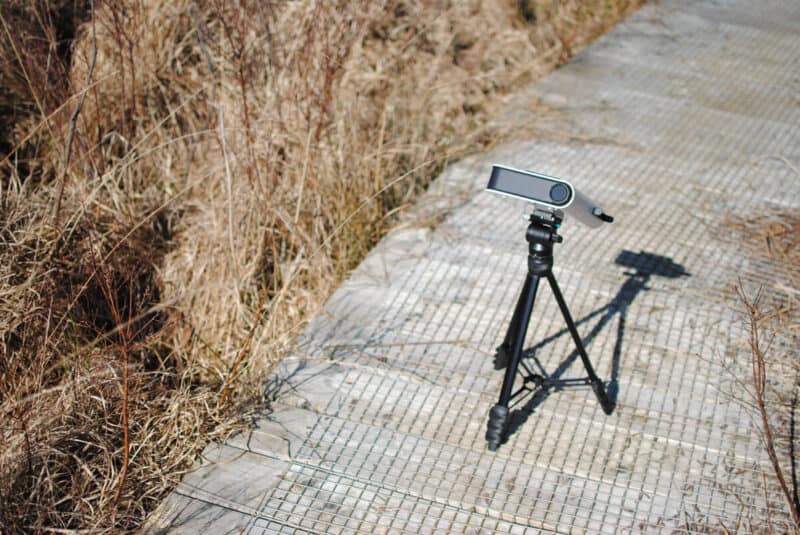
1: Attach Hestia to tripod
To attach the Hestia to the tripod you need to remove the quick release plate and screw it into the back of the Hestia.
You can then put the Hestia on the tripod by clipping it onto the tripod via the plate.
Make sure it is screwed tightly enough that you can move it around and it will stay in place.
Note, I found the tripod a little unsteady when the legs were fully extended so I opted to keep them short and just had to operate it lower to the ground.
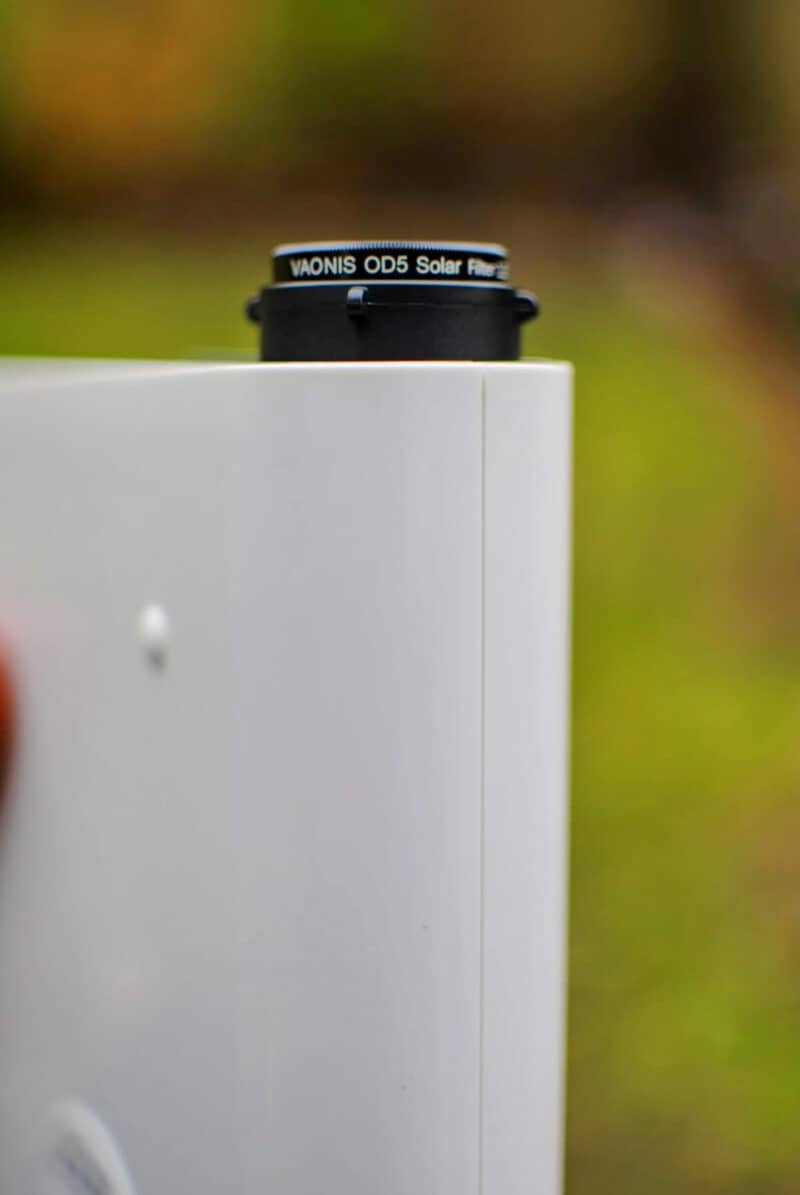
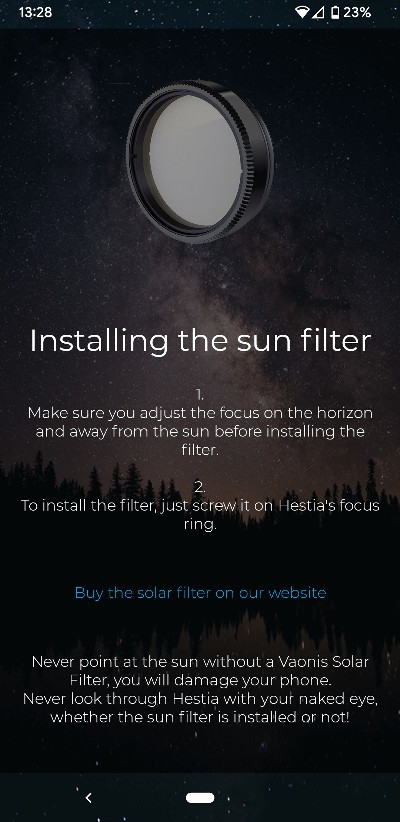
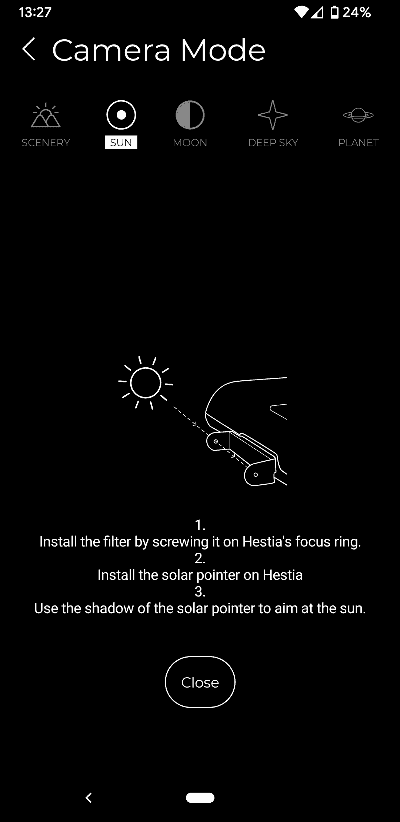
2. Attach the Solar Filter
The solar filter simply screws onto the focus ring at the top.
Make sure you do this before you point it at the sun.
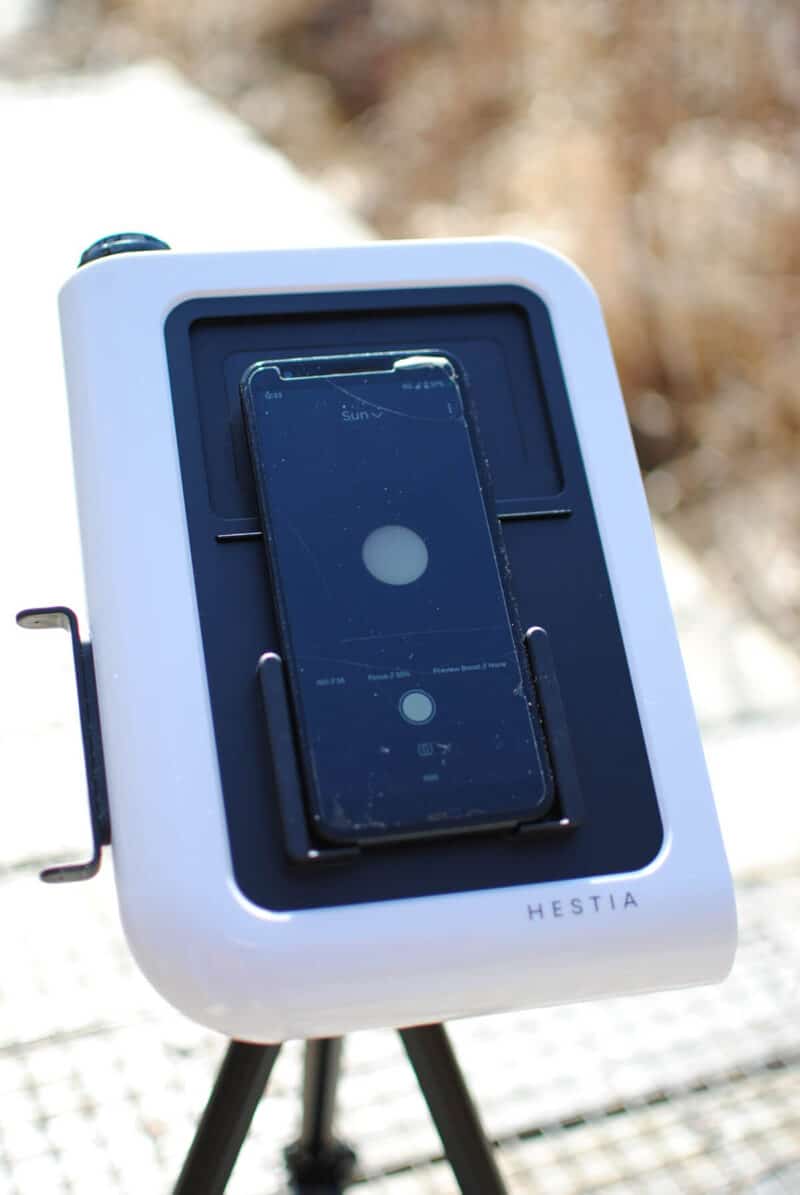
3. Attach the Solar Pointer
This little plastic component clips on to the side of the Hestia.
You can now use this to point your Hestia towards the sun.
When the sun light goes straight through the two holes and makes a single dot in the shadow you know that it is pointing correctly at the sun.
Now your gear is all setup and it’s time to use the app to take the photos.
4. Use the Gravity App Tutorials
It’s worth just running through the tutorials on the app to be confident you have all set up correctly for solar imaging:
- Open the Gravity app.
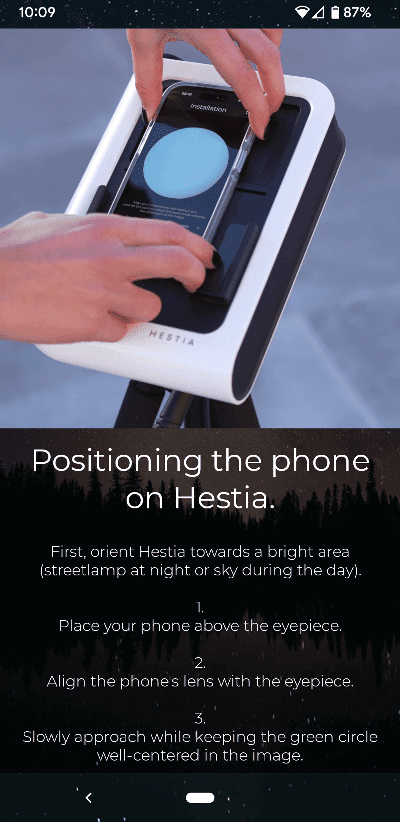
- Press the three dots at the top right and select ‘Open setup tutorials’. This takes you through attaching the Hestia to the tripod, attaching your phone to the Hestia, and adjusting the focus.
- On the main screen select ‘Sun’ at the top and then ‘Observe the Sun’ at the bottom.
- Press the three dots at the top right and select ‘Show tutorial’. This takes you through installing the solar filter and attaching the solar pointer.
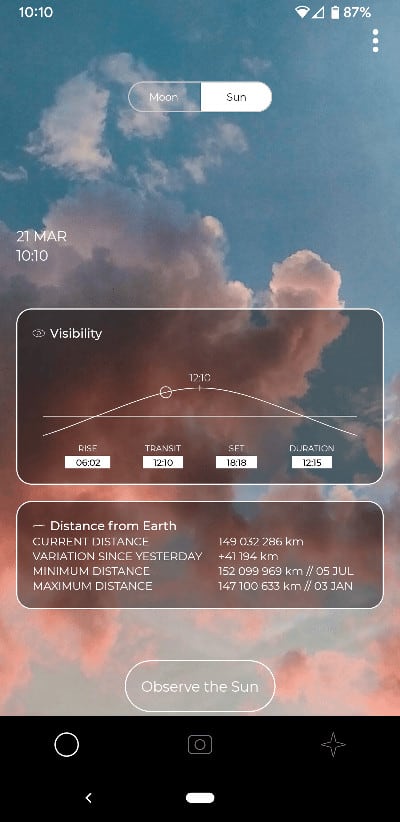
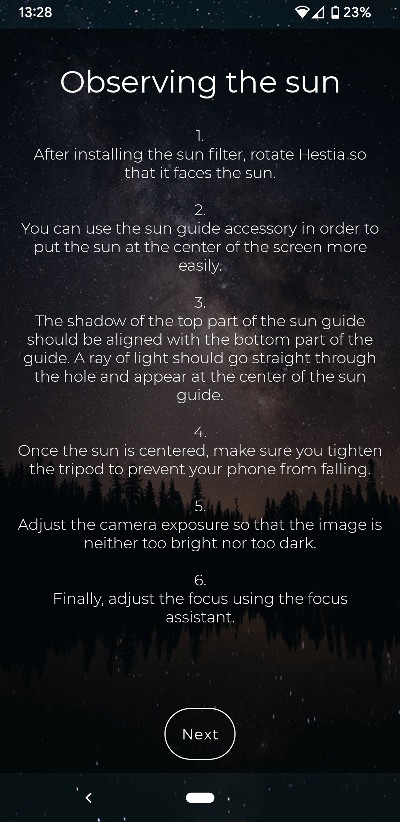
5. Adjust the Exposure and Focus
Click on ‘Expo’ at the bottom and either set it to ‘Auto’ and see if it looks ok, or ‘Manual’ and adjust the slider until it looks right.
You don’t want the sun too bright or too dark.
Click ‘Focus’ at the bottom and then either adjust manually or click ‘Focus assistant’ and let it run through its process wherby you select the sharpest image at the end.
7. Take the photo
Press the white circular button at the bottom to take the photo.
The gravity app should wait a few moments for the device to be stable and then capture the image, stack it, and then save it in your phone’s gallery.
The Results
The image that I ended up with following this process was this:
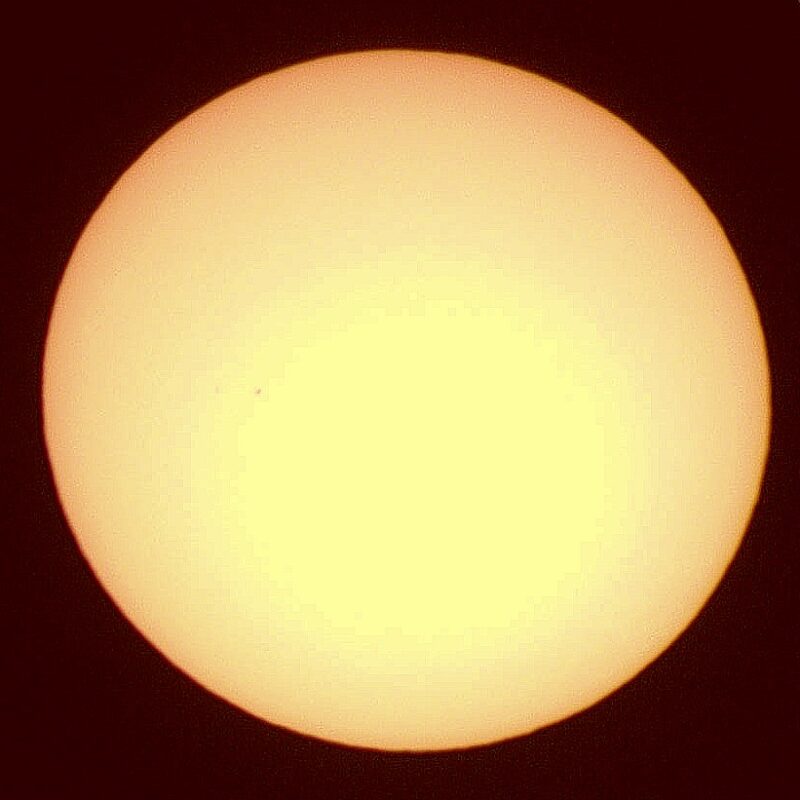
I did some very basic post-processsing of this image using a free online tool called Pixlr.
It’s not great, but it’s not terrible. You can see some sunspots and I’m sure with a bit more time invested better results will come.
It is, however, noticably not as good as what I produced with the Dwarf II in a similar amount of time.
I could definitely see how you could make this work for capturing an eclipse though.
You would just need to make sure that you had time for a few practice runs beforehand as the tracking is manual and so you cannot just set it up and relax like you would be able to with a regular smart telescope.
For more information on the Hestia, see my Vaonis Hestia Review and test of photographing the moon with the Hestia.
You can also find more content like this in our Smart Telescopes hub.
