Find out Imran Badr’s process for capturing and creating stunning deep sky images like this.

This is a fascinating overview of someone who has come a long way in a relatively short period of time.
He outlines his processes for planning, capturing, and processing in great detail.
So much to learn – enjoy!
Where are you and where do you do your imaging?
I live in the San Francisco Bay Area with my wife and three children.
By day, I work as an Embedded Systems Technology Manager; by night, I chase photons.
Most of my astrophotography is done from my Bortle 7 backyard in San Jose, California, though I take every opportunity to travel to darker sites whenever possible.
My passion for the night sky began in early childhood. I was born on the outskirts of Karachi, Pakistan, where the night sky was relatively dark.
Some of my fondest childhood memories involve lying on the rooftop, gazing at thousands of stars, and tracing imaginary shapes among them.
A few years after moving to the U.S., I purchased my first telescope—a 6″ SCT on an Alt-Az mount.
I was thrilled to see Saturn’s rings and even managed to capture a few frames with an old DSLR camera. That was back in 2008.
However, it wasn’t until the late summer of 2022 that I truly immersed myself in astrophotography.
I ordered my first equatorial mount, the ZWO AM5, along with a Sky-Watcher Esprit 100ED telescope and a ZWO ASI2600MC Pro one-shot color camera.
My primary image gallery is on Astrobin, and I also share my work on Instagram under @astrobayarea.
“Astrophotography is more than just a hobby for me—it’s a lifelong passion that continues to evolve with every clear night.”
What are your proudest achievements in astrophotography?
In just two and a half years, I have achieved several milestones in astrophotography, earning recognition for my work:
- NASA APOD: 1
- AAPOD2: 6
- Astrobin IOTD: 1
- ZWO ASIWeek: 3
- Numerous Top Picks and Top Pick Nominations on Astrobin
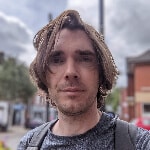
This image won the NASA APOD in June 2024. You can see more details about it on Astrobin.
This won Astrobin’s Image of the Day:
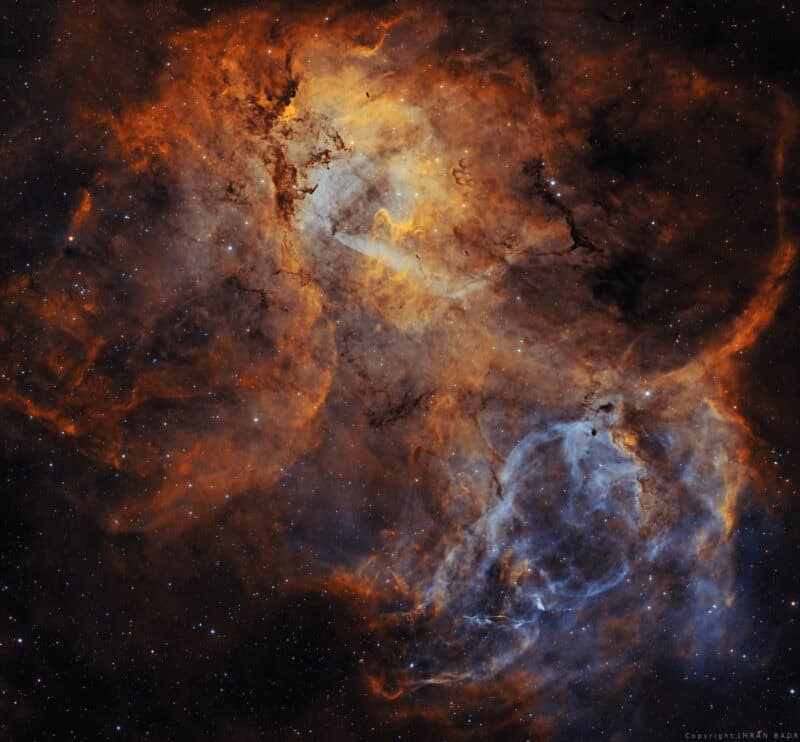
This image below is my longest integration project.
It is the result of 223+ hours of capturing faint light under the glowing sky of suburban San Jose, CA and many days of processing that large data-set.
See all the details on Astrobin.
Behind every photon of this illusive Oxygen-3 arc is a story of dedication, a triumph where passion outshines even the bright city lights
My Current Astrophotography Setups
I use multiple setups. Here’s setup 1:
- Mount: ZWO AM5
- Telescope: Sky-Watcher Esprit 100ED
- Camera: ZWO ASI2600MM Pro
- Guide Camera: ZWO ASI290MM Mini
- ZWO 7×2″ EFW
- ZWO OAG-L
- Antlia 3nm SII, Ha, OIII Filters
- Optolong LRGB Filter
Setup 2:
- Mount: ZWO AM3
- Telescope: Askar FRA300 Pro
- Camera: ZWO ASI2600MM Pro
- Guide Camera: ZWO ASI174MM Mini
- ZWO 7×2″ EFW
- ZWO OAG-L
- Antlia 2.5nm SII, Ha, OIII Filters
- Antlia V-Pro LRGB Filters
Setup 3:
- Mount: Sky-Watcher EQ6-R Pro
- Telescope: Celestron EdgeHD 9.25
- Camera: ZWO ASI2600MM Pro
- Guide Camera: ZWO ASI174MM Mini
- ZWO 7×2″ EFW
- Celestron OAG
- Antlia 2.5nm SII, Ha, OIII Filters
- Antlia V-Pro LRGB Filters
Setup 4:
- Mount: Sky-Watcher EQ8-R Pro
- Telescope: TS-Optics Carbon Tube 10″ Newtonian (ONTC1010)
- Camera: ZWO ASI2600MM Pro
- Guide Camera: ZWO ASI174MM Mini
- ZWO 7×2″ EFW
- ZWO OAG-L
- Antlia 2.5nm SII, Ha, OIII Filters
- Antlia V-Pro LRGB Filters
Astrophotography is more than just a hobby for me—it’s a lifelong passion that continues to evolve with every clear night.
How Do You Plan Your Projects?
Since I capture most of my images from San Jose, CA, my location is better suited for narrowband targets.
However, when conditions allow—such as moonless nights with excellent clarity—I take the opportunity to capture broadband data (R, G, and B).
For Luminance (L), I travel to a Bortle 3/4 location about two hours away.
I invest significant time in planning my imaging projects.
Several factors influence my decisions, including target brightness, elevation, imaging system speed, and weather conditions.
To optimize my imaging sessions, I use:
- Telescopius – To assess the suitability of a target with my telescope’s focal length and camera sensor size
- Stellarium – To check the target’s peak altitude and sky position at specific times and calendar days
- ZWO ASIAir – To automate the entire imaging process through its user-friendly interface and planning modes
How Do You Frame Your Targets?
Framing and composition are crucial, as they guide the viewer’s attention to the main subject.
Before imaging, I analyze multiple images of the target online and determine the best camera angle and rotation to maximize visual impact.
Exposure & Integration Time
The number of exposures and total integration time vary depending on the target. For example:
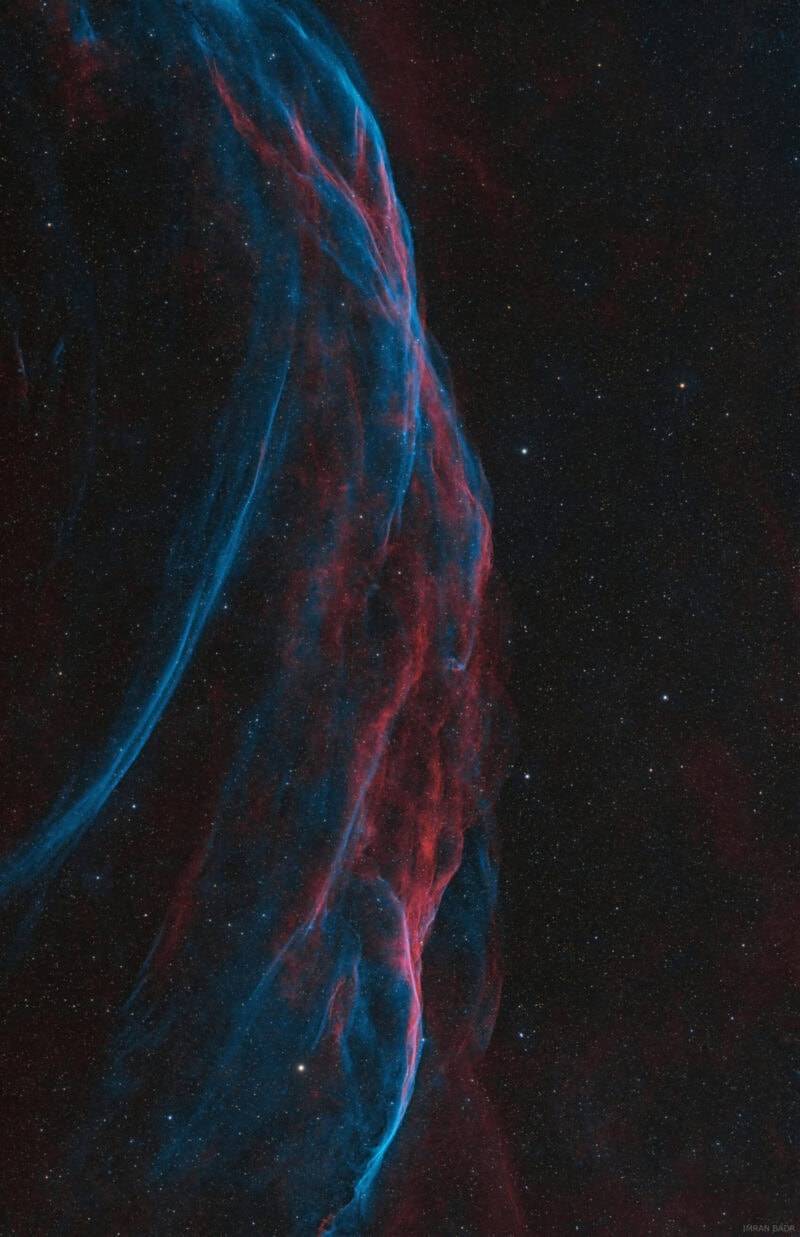
- Faint Targets – My OIII arc over the Andromeda Galaxy required 223+ hours of integration
- Bright Targets – The Orion Nebula required just a few hours
There is no fixed formula for integration time. It depends on sky brightness, seeing, transparency and target.
I progressively stack frames and evaluate the signal-to-noise ratio (SNR) to determine when additional data is needed.
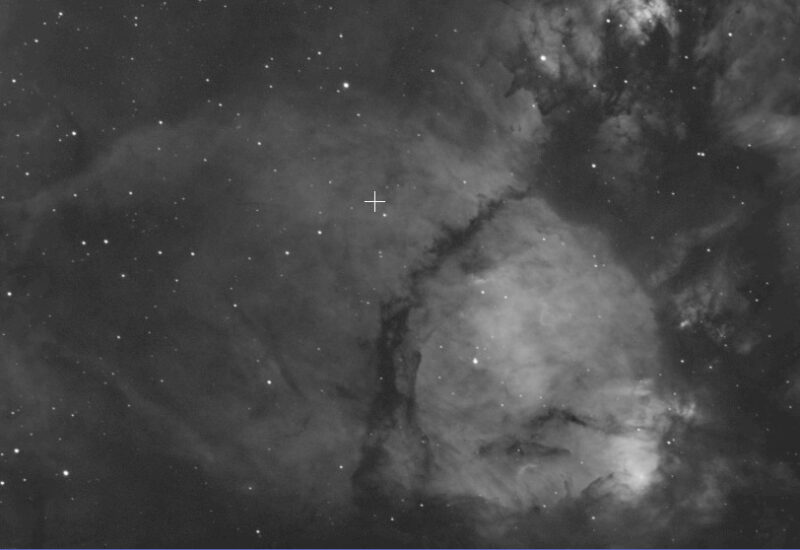
Here is an example from one of my projects where the initial signal was weak:
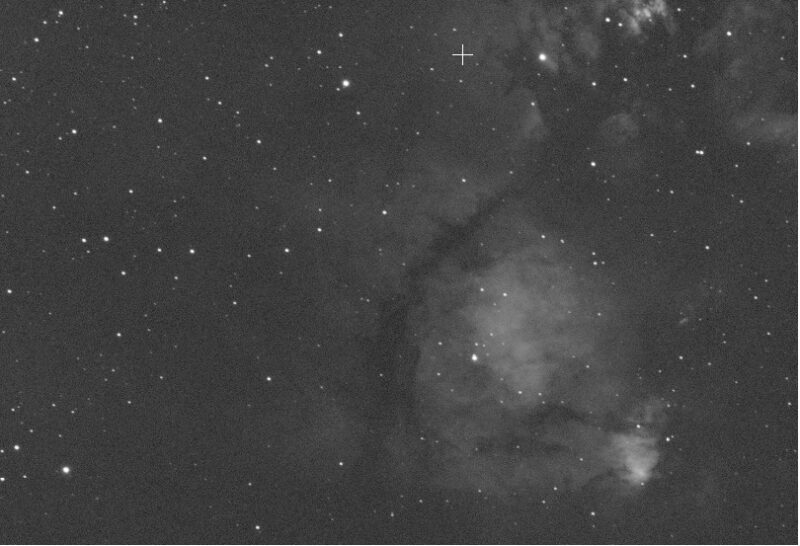
I continued capturing more frames to get the following master:
What’s Your Software & Processing Workflow?
I Use:
- WBPP (Weighted Batch Pre-Processing) in PixInsight
- RC Astro BlurXterminator, NoiseXterminator, StarXterminator
- Photoshop + Nik’s Photoshop Plugins
Pre-Processing
Before stacking frames in WBPP, I manually inspect each frame, discarding those affected by guiding errors, clouds, obstructions, or airplane trails.
I ensure that my darks, flats, and dark flats calibration frames are up-to-date before integration.
I use dithering (10-30 pixels) but selectively apply 2x drizzle only if my system is under-sampling.
You can check if you are under-sampling or over-sampling by entering specifics of your equipment here.
“Background extraction is a very crucial step in creating impactful images. A poorly extracted background will result in less contrast and dull image.”
Post-Processing
After I have created the masters, the post processing steps vary significantly whether I am processing a narrowband (such as SHO) or a broadband RGB/LRGB image.
There are some common steps though such as background extraction:
- I do background extraction on each narrowband master before combining them into a color image.
- For broadband composition, I perform background extraction after doing channel combination.
Background Extraction
Background extraction is a very crucial step in creating impactful images.
A poorly extracted background will result in less contrast and dull image.
Many of my colleagues use GraXpert but I have been getting excellent results using DBE (DynamicBackgroundExtraction in PixInsight).
GraXpert is relatively faster and quick way of extracting the background but I find that DBE gives me better controls and results.
Having said that, there is a learning curve for DBE and I would highly recommend Adam Block’s subscription based tutorials to understand how to use DBE more effectively.
There is extensive documentation available from PixInsight as well but there is nothing better than seeing its effectiveness in video-based tutorials.
My process of extracting background usually involves the following steps:
- Do Automatic background extraction using Function degree of 1 and create a new background extracted image
- Carefully observe the ABE’d image and put DBE control points in a balanced way across the entire image.
- Save the DBE process on PixInsight desktop.
- Close the ABE’s image and activate the original image.
- Double click/open the DBE process and perform DBE.
“Framing and composition are crucial, as they guide the viewer’s attention to the main subject.”
Broadband Post Processing
For RGB, I perform following steps:
- Combine R, G and B using Channel combination to create a color image
- Perform DBE as mentioned above
- Correct stars using BlurXterminator “correct-only” mode
- Calibrate colors using Spectrophotometric Color Calibration (SPCC)
- Sharpen stars using BlurXterminator by measuring PSF first
- Reduce noise using NoiseXterminator
- Separate stars using StarXterminator. Now you have two images: stars and starless.
- I use Generalized Hyperbolic Stretch (GHS) to stretch both stars and starless images.
- I make sure to use a delicate hand while using GHS. I keep an eye on the log graph and try to achieve a nice downward slope from left to the right. That makes sure that bright areas are under check and stretching is not overly brightening them.
- After I am finished stretching the stars and starless images then I take them to photoshop. I use stars image as a layer on top of starless image.
- Using Photoshop adjustments, I make changes to colors saturation and luminance of all layers using Camera Raw filter.
- For stars, I only adjust their saturation
- Once I am happy with the colors and saturation then I merge stars into starless image by screening option.
Narrowband Post Processing
Narrowband post processing is tricky and very hard to get the desired color balance.
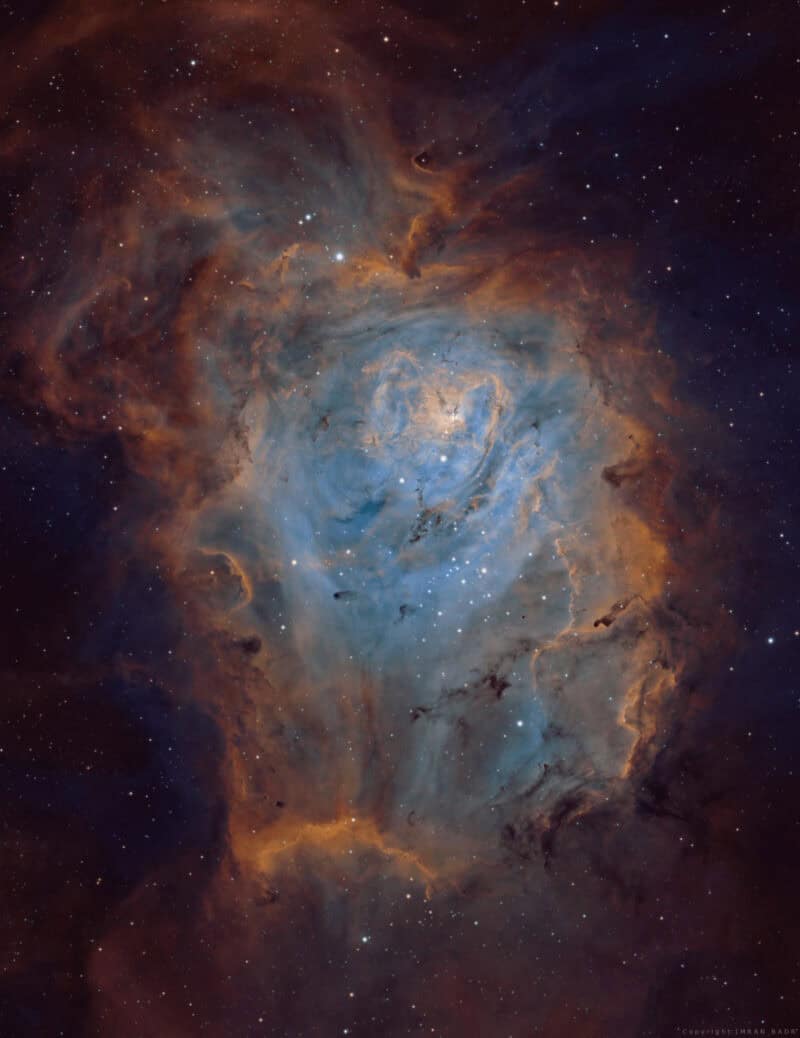
For my narrowband projects, I have combined narrowband channels both in linear (un-stretched) and non-linear (stretched) stages.
For the following Lagoon nebula image (an Astrobin Top Pick), I combined them at linear stage:
For the following Christmas tree nebula image (Astrobin link), I combined them at non-linear stage:
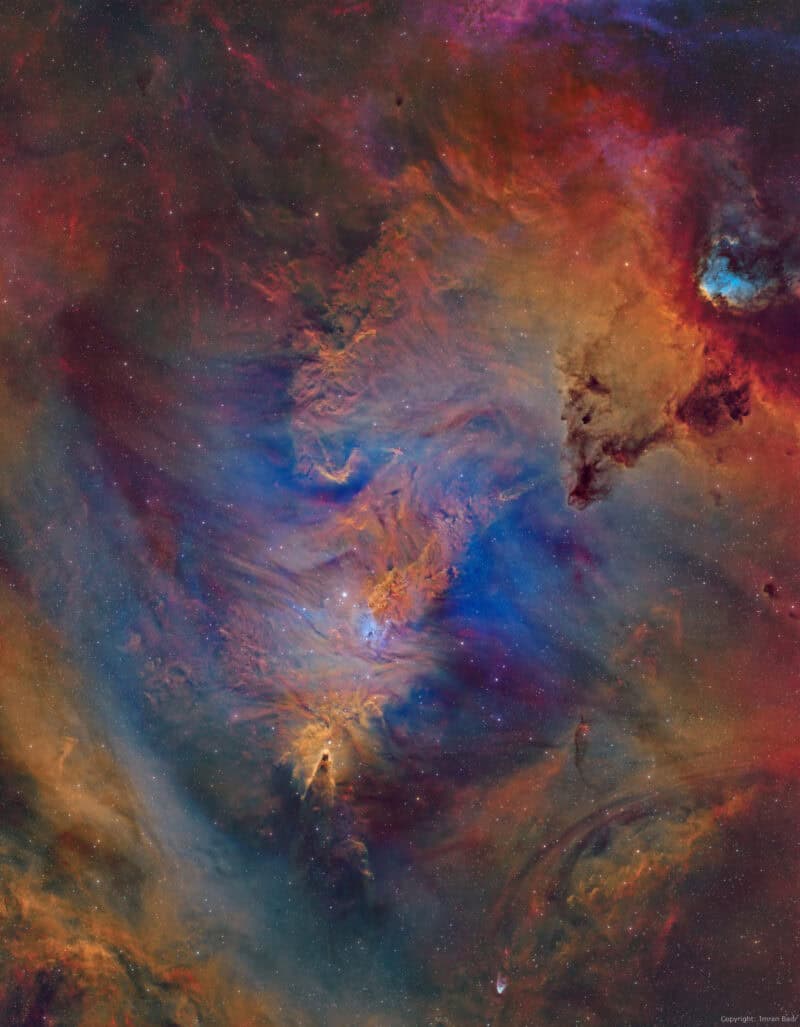
If I combine them at non-linear stage then I make sure that each channel’s histogram looks similar.
By that, I mean their black points are at almost identical point.
One thing I must mention here is that I do create synthetic luminance by doing image integration of all narrowband masters.
That gives a Lum channel with less noise and more details of each narrowband master.
I go through the standard DBE and stretching of the synthetic Lum.
Before combining narrowband masters, I sharpen them using BlurXterminator.
Once I have stretched and combined the narrowband channels, then I perform the following further steps:
- Apply synthetic Lum to the color image using LRGBCombination
- Further stretch them using GHS
After these steps, I have a color narrowband image that is ready for Photoshop.
In Photoshop I extensively use Camera Raw filter to adjust tones, structures, colors and hues. After this step, I open Nik’s plugin and add a small amount of tonal contrast to image.
Once I am happy with the image then I screen stars onto the narrowband image in the same way as I described in the broadband post processing section.
“Some of my fondest childhood memories involve lying on the rooftop, gazing at thousands of stars, and tracing imaginary shapes among them.”
What are your recommended learning resources?
I started deep space astrophotography in Sept/Oct of 2022. At that time, I had no idea of basic steps such as polar alignment, guiding and focusing etc.
Most of my learning was from watching YouTube videos and asking questions on Facebook forums such as ZWO Astrophotography.
I would highly recommend to watch YouTube videos on basics such as collimation, focusing, polar alignment and guiding etc.
For me, ASIAir was a blessing as it gave me these basic functions in a user friendly interface and got me started.
Please also join a local astronomy and astro-imaging club.
Local clubs arrange meetings and learning sessions which are very useful not only for the beginners but also getting deeper understanding on all aspects of astronomy and astrophotography.
For inspirations and understand images composition, details and colors, I would recommend to look at the images on Astrobin.
There is a wealth of information on Astrobin when it comes to scopes, exposure times, and composition. That really helped in achieving goals for my projects.
Once you are comfortable with basic operations and are able to image for a couple of hours and able to do stacking, post processing etc. then I would recommend to watch the advanced Adam Block tutorials for more in-depth understanding of post processing.