Your Samsung Galaxy phone has a dedicated astrophotography mode tucked inside the Expert RAW app. Once you know where to find it, shooting the Milky Way is pretty straightforward.
This guide walks through downloading Expert RAW, enabling Astrophoto mode, choosing the right capture length, and the Pro mode manual alternative if you want full control.
If you haven’t already read the pillar guide on how to photograph the Milky Way with a phone, start there for the basics on dark skies, timing and composition. This article drills down specifically into Samsung Galaxy phones.
Which Samsung Galaxy phones support Astrophoto mode?
Astrophoto mode via Expert RAW works on most mid-to-high-end Galaxy phones from the S20 series onwards.
The experience improves noticeably with newer hardware. The S22 Ultra and S23 Ultra are capable, but the S24 Ultra and S25 Ultra are the best Samsung phones for astrophotography right now. Better noise reduction and a larger sensor means you have more to work with when you come to edit.
If you’re not sure whether your model is supported, download Expert RAW and look for the constellation icon. If it appears, you’re good.
For a broader comparison across manufacturers, see our guide to the best phones for astrophotography.
Step 1: Download the Expert RAW app
Astrophoto mode does not come pre-installed in the standard Samsung Camera app.
You need to download Expert RAW separately from the Galaxy Store. It is free:
Expert RAW on the Galaxy Store
Once installed, you do not open Expert RAW directly to use Astrophoto mode. It integrates into your existing Camera app.
Step 2: Enable Astrophoto mode
With Expert RAW installed, here is how to get to Astrophoto mode:
- Open the standard Camera app
- Tap More (usually the last option in the mode list at the bottom)
- Select Expert RAW
- Look for the constellation icon in the top-right corner of the screen. That is the Astrophoto toggle.
- Tap it to enable Astrophoto mode
You will then be asked to choose a capture length.

How to access the hidden astrophotography mode on Samsung Galaxy, Google Pixel and iPhone.
Step 3: Choose your capture length
Astrophoto mode gives you three options: short (3 minutes), medium (6 minutes) or long (12 minutes).
The longer you shoot, the better the result.
Over the capture window, your phone takes a series of exposures, aligns them and stacks them automatically. Stacking reduces noise and pulls out more of the faint Milky Way detail. The 12-minute option gives noticeably cleaner results than the 3-minute one.
If conditions are good, dark skies and a stable tripod, go for 12 minutes.
The 3-minute option is worth having if clouds are moving through and you need to grab the image quickly, or if you’re still learning the process and want faster feedback.
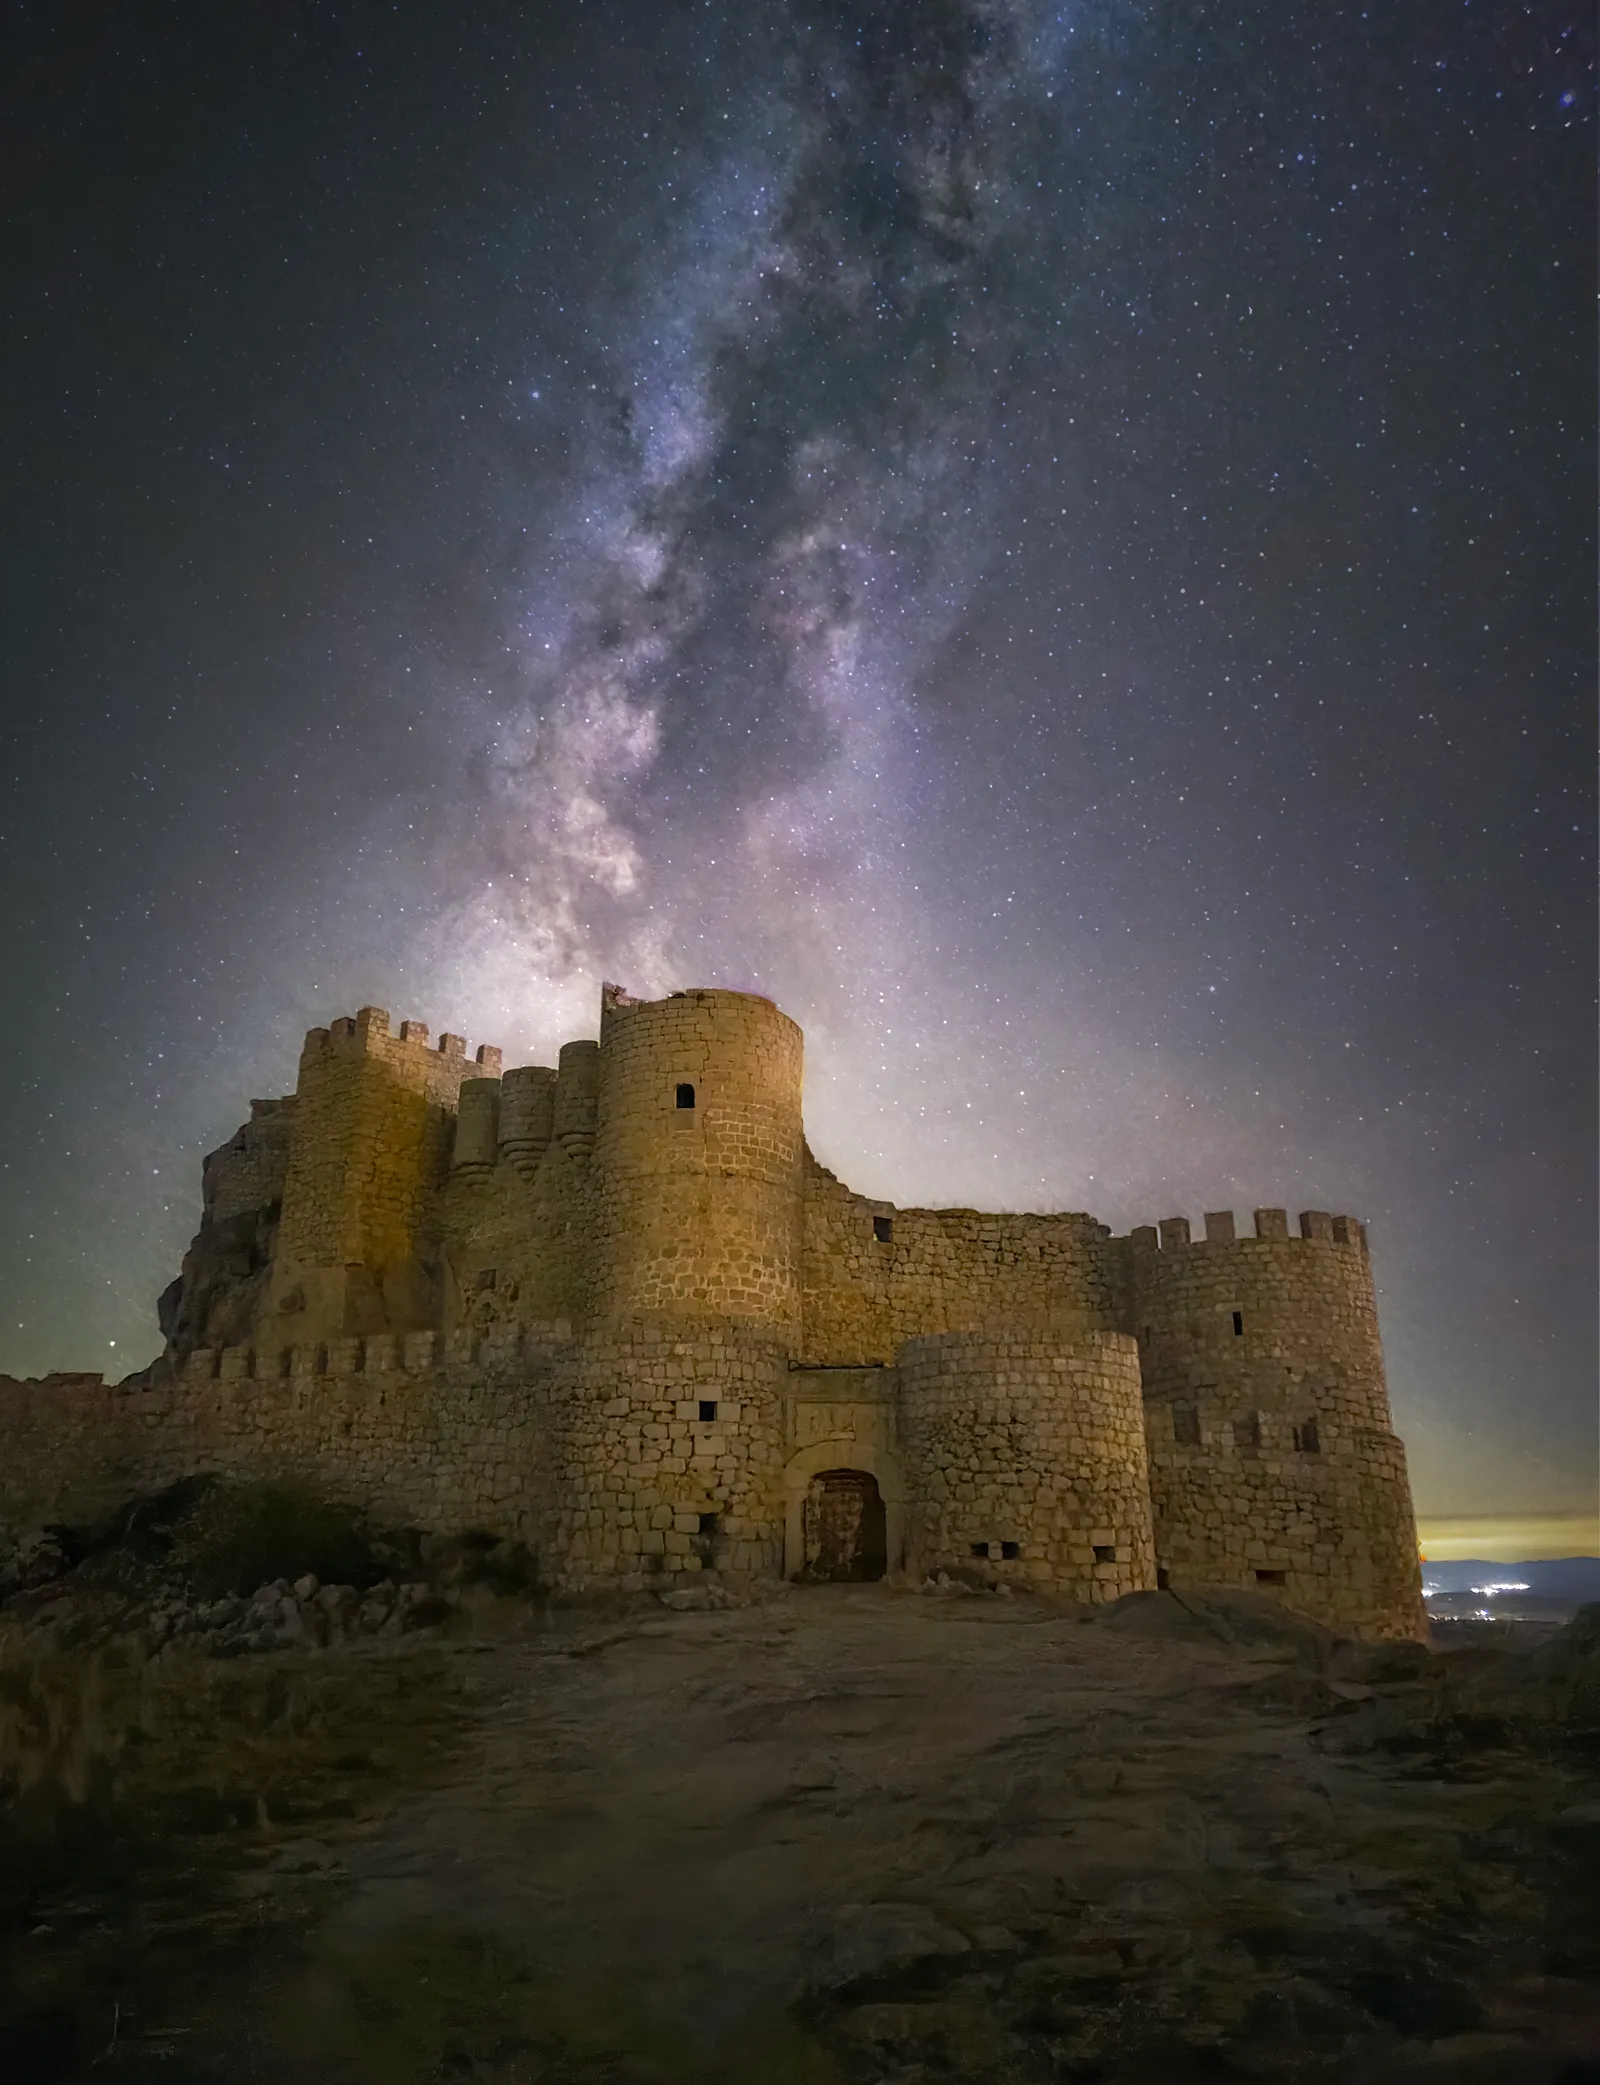 Samsung Galaxy S24 Ultra, Astrophoto mode, 3 minutes. Photo: Ivan Ferrero, Smartphone Astrophotographer of the Year.
Step 4: Keep it perfectly still
Astrophoto mode captures multiple exposures over several minutes. Any movement during that window, even a slight bump, ruins the stack alignment and introduces blur or ghosting.
You need a tripod. A basic phone tripod is fine and they cost very little. Set a 5-second self-timer before firing the shutter so any vibration from tapping the screen settles before capture starts.
Point the camera at the Milky Way core, frame your shot, start the capture, and leave the phone completely undisturbed.
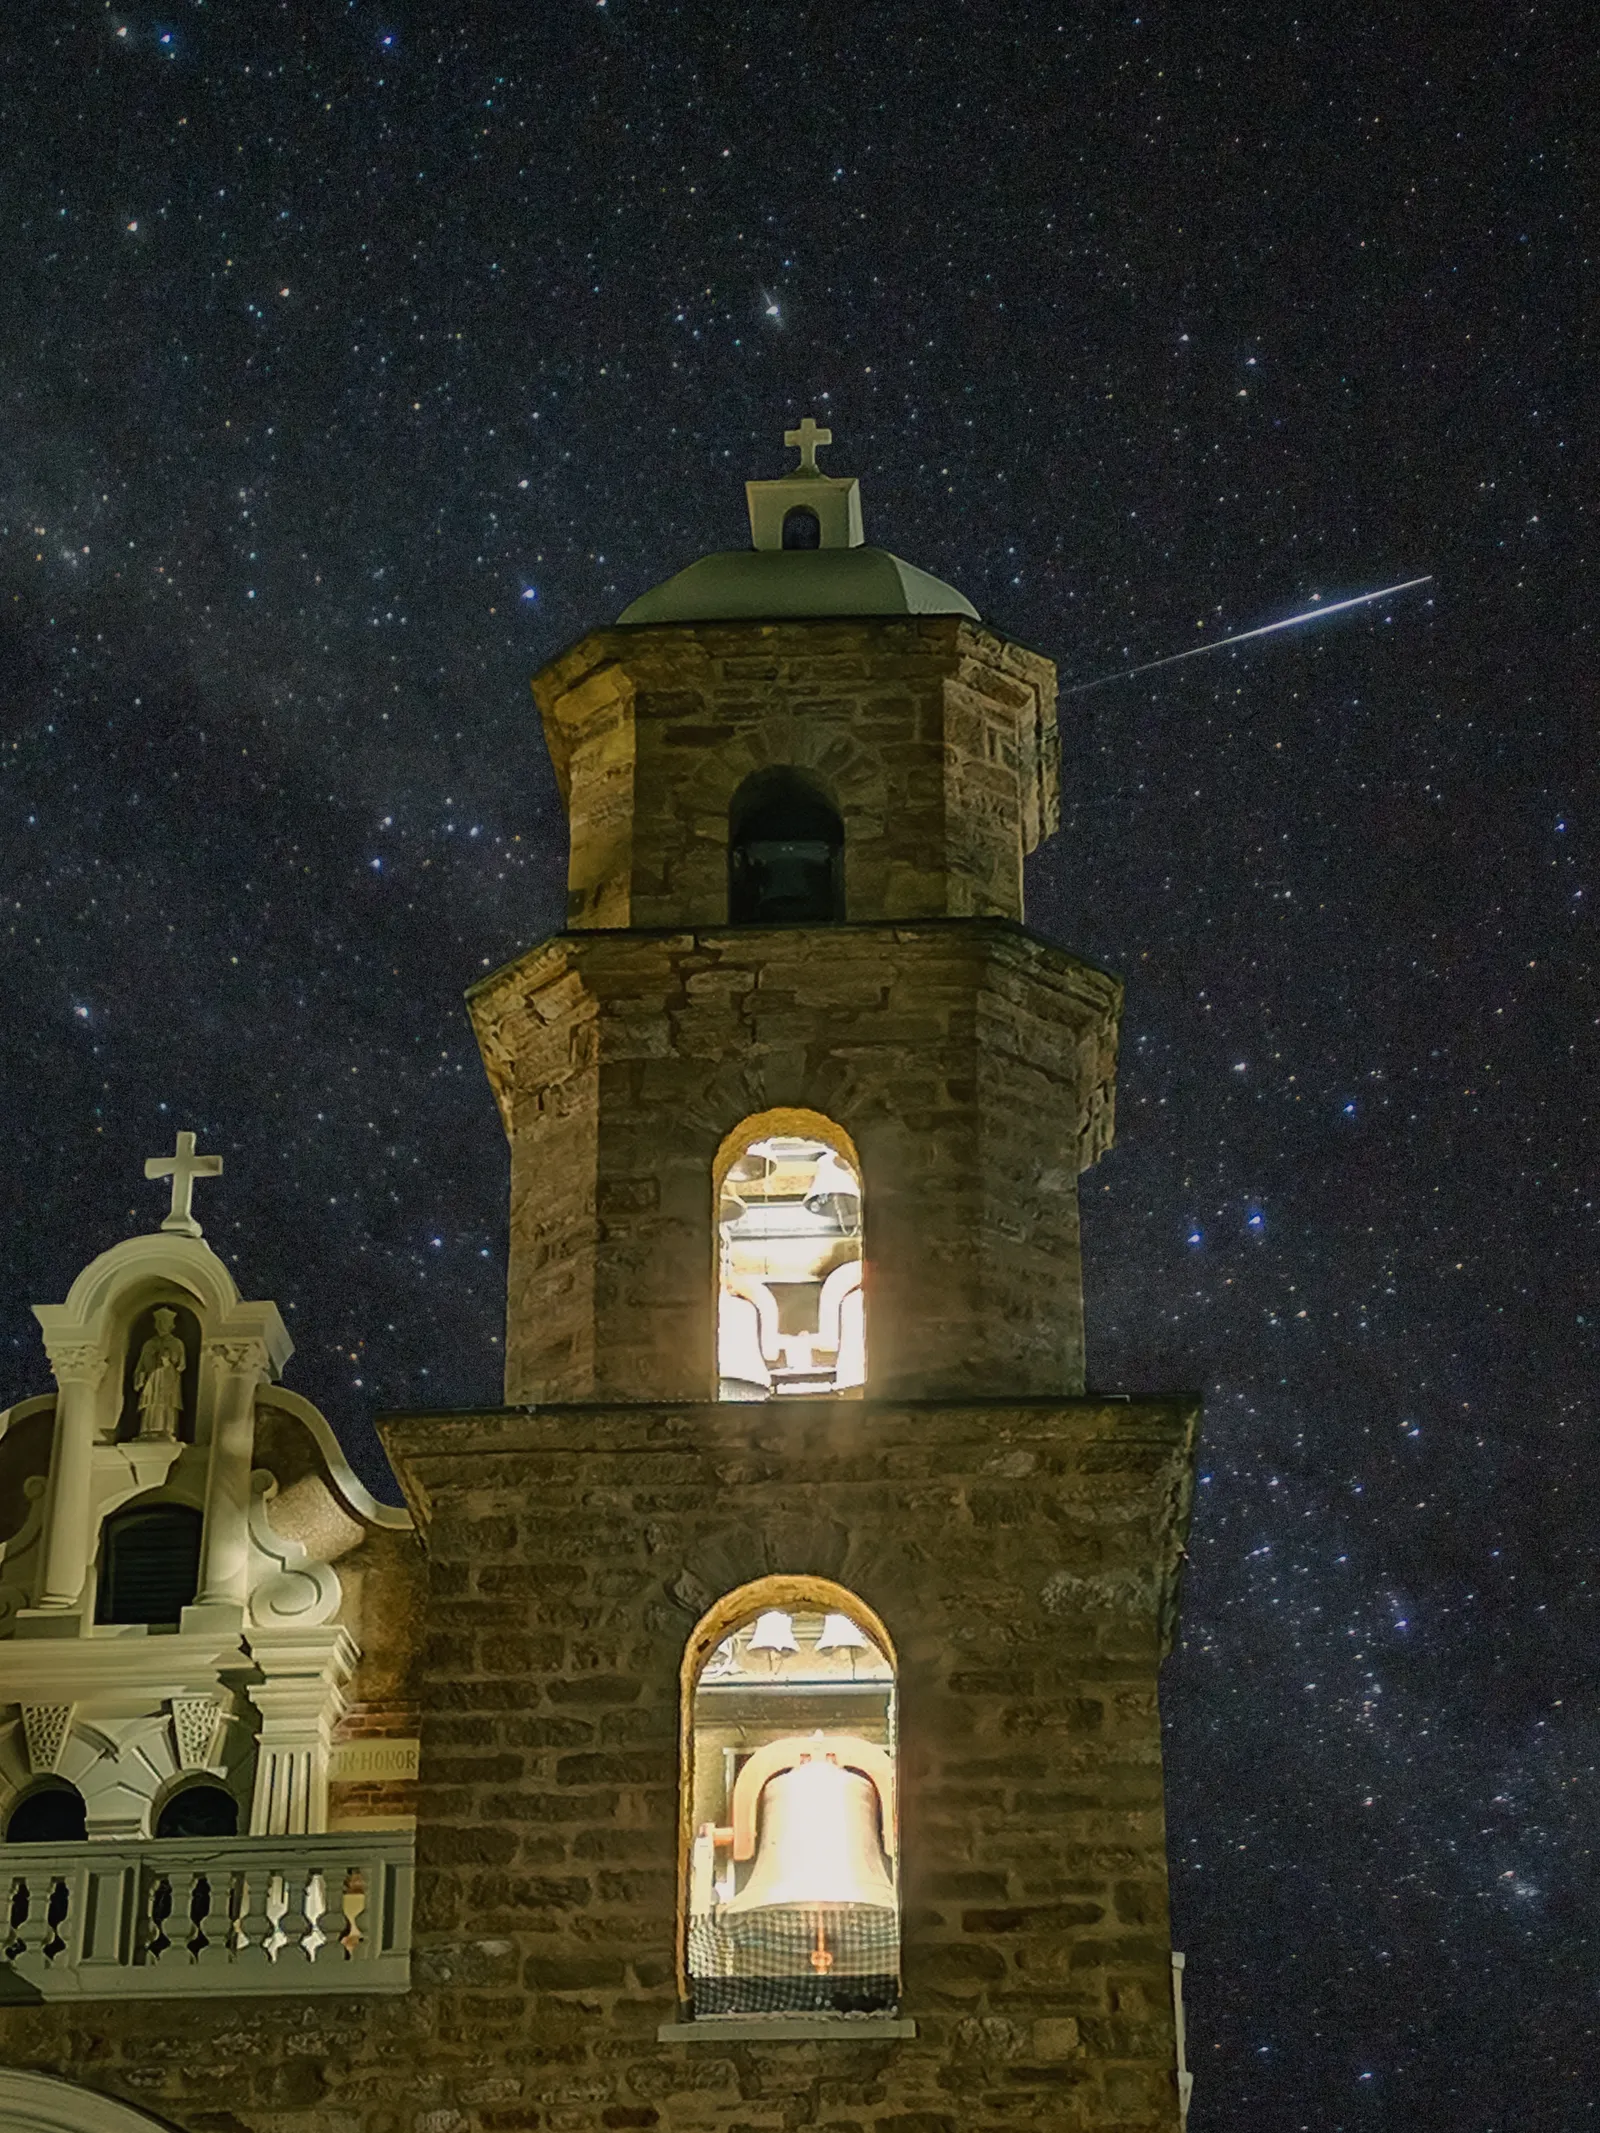 Samsung Galaxy S24 Ultra, Astrophoto mode. Photo: Tayla Lee, Smartphone Astrophotographer of the Year.
Step 5: The .dng RAW file
When Astrophoto mode finishes, your phone saves the result as a RAW .dng file.
RAW files preserve all the captured data without the compression and processing applied to a JPEG. At first glance the file may look flat compared to what you saw on screen, but there is far more detail sitting inside it. You just need to draw it out.
The two free editing apps most worth your time on Android are Lightroom Mobile (more control, better for learning the adjustments) and Snapseed (simpler, still capable). In Lightroom Mobile, start with Highlights, Shadows, Texture and Dehaze. Pulling Highlights down, lifting Shadows and boosting Texture is a solid first pass on most Milky Way shots.
If you have Lightroom or Photoshop on a computer, you can export the .dng and process it there.
More on editing is in the astrophotography apps guide.
Alternative: Pro mode manual settings
If you want full manual control rather than letting Astrophoto mode handle everything, Samsung’s built-in Pro mode is the way to go.
To access it:
- Open the Camera app
- Tap More
- Select Pro
Settings to start with:
- Shutter speed: 30 seconds (reduce if stars are trailing)
- ISO: 1600 (you can go higher, but noise increases quickly)
- White balance: 3500K to 4000K (fixable in editing, but set it now for a consistent baseline)
- File format: RAW (check Expert RAW settings via the cog, then “Save pictures in”, and select RAW or RAW + JPEG)
- Resolution: 12MP, not maximum (lower resolution gives less noisy results for night sky work)
Pro mode gives you a single exposure per shot, no automatic stacking. The results can still be excellent. Branko Nadj shot the image below on a Samsung S23 Ultra using exactly those manual settings.
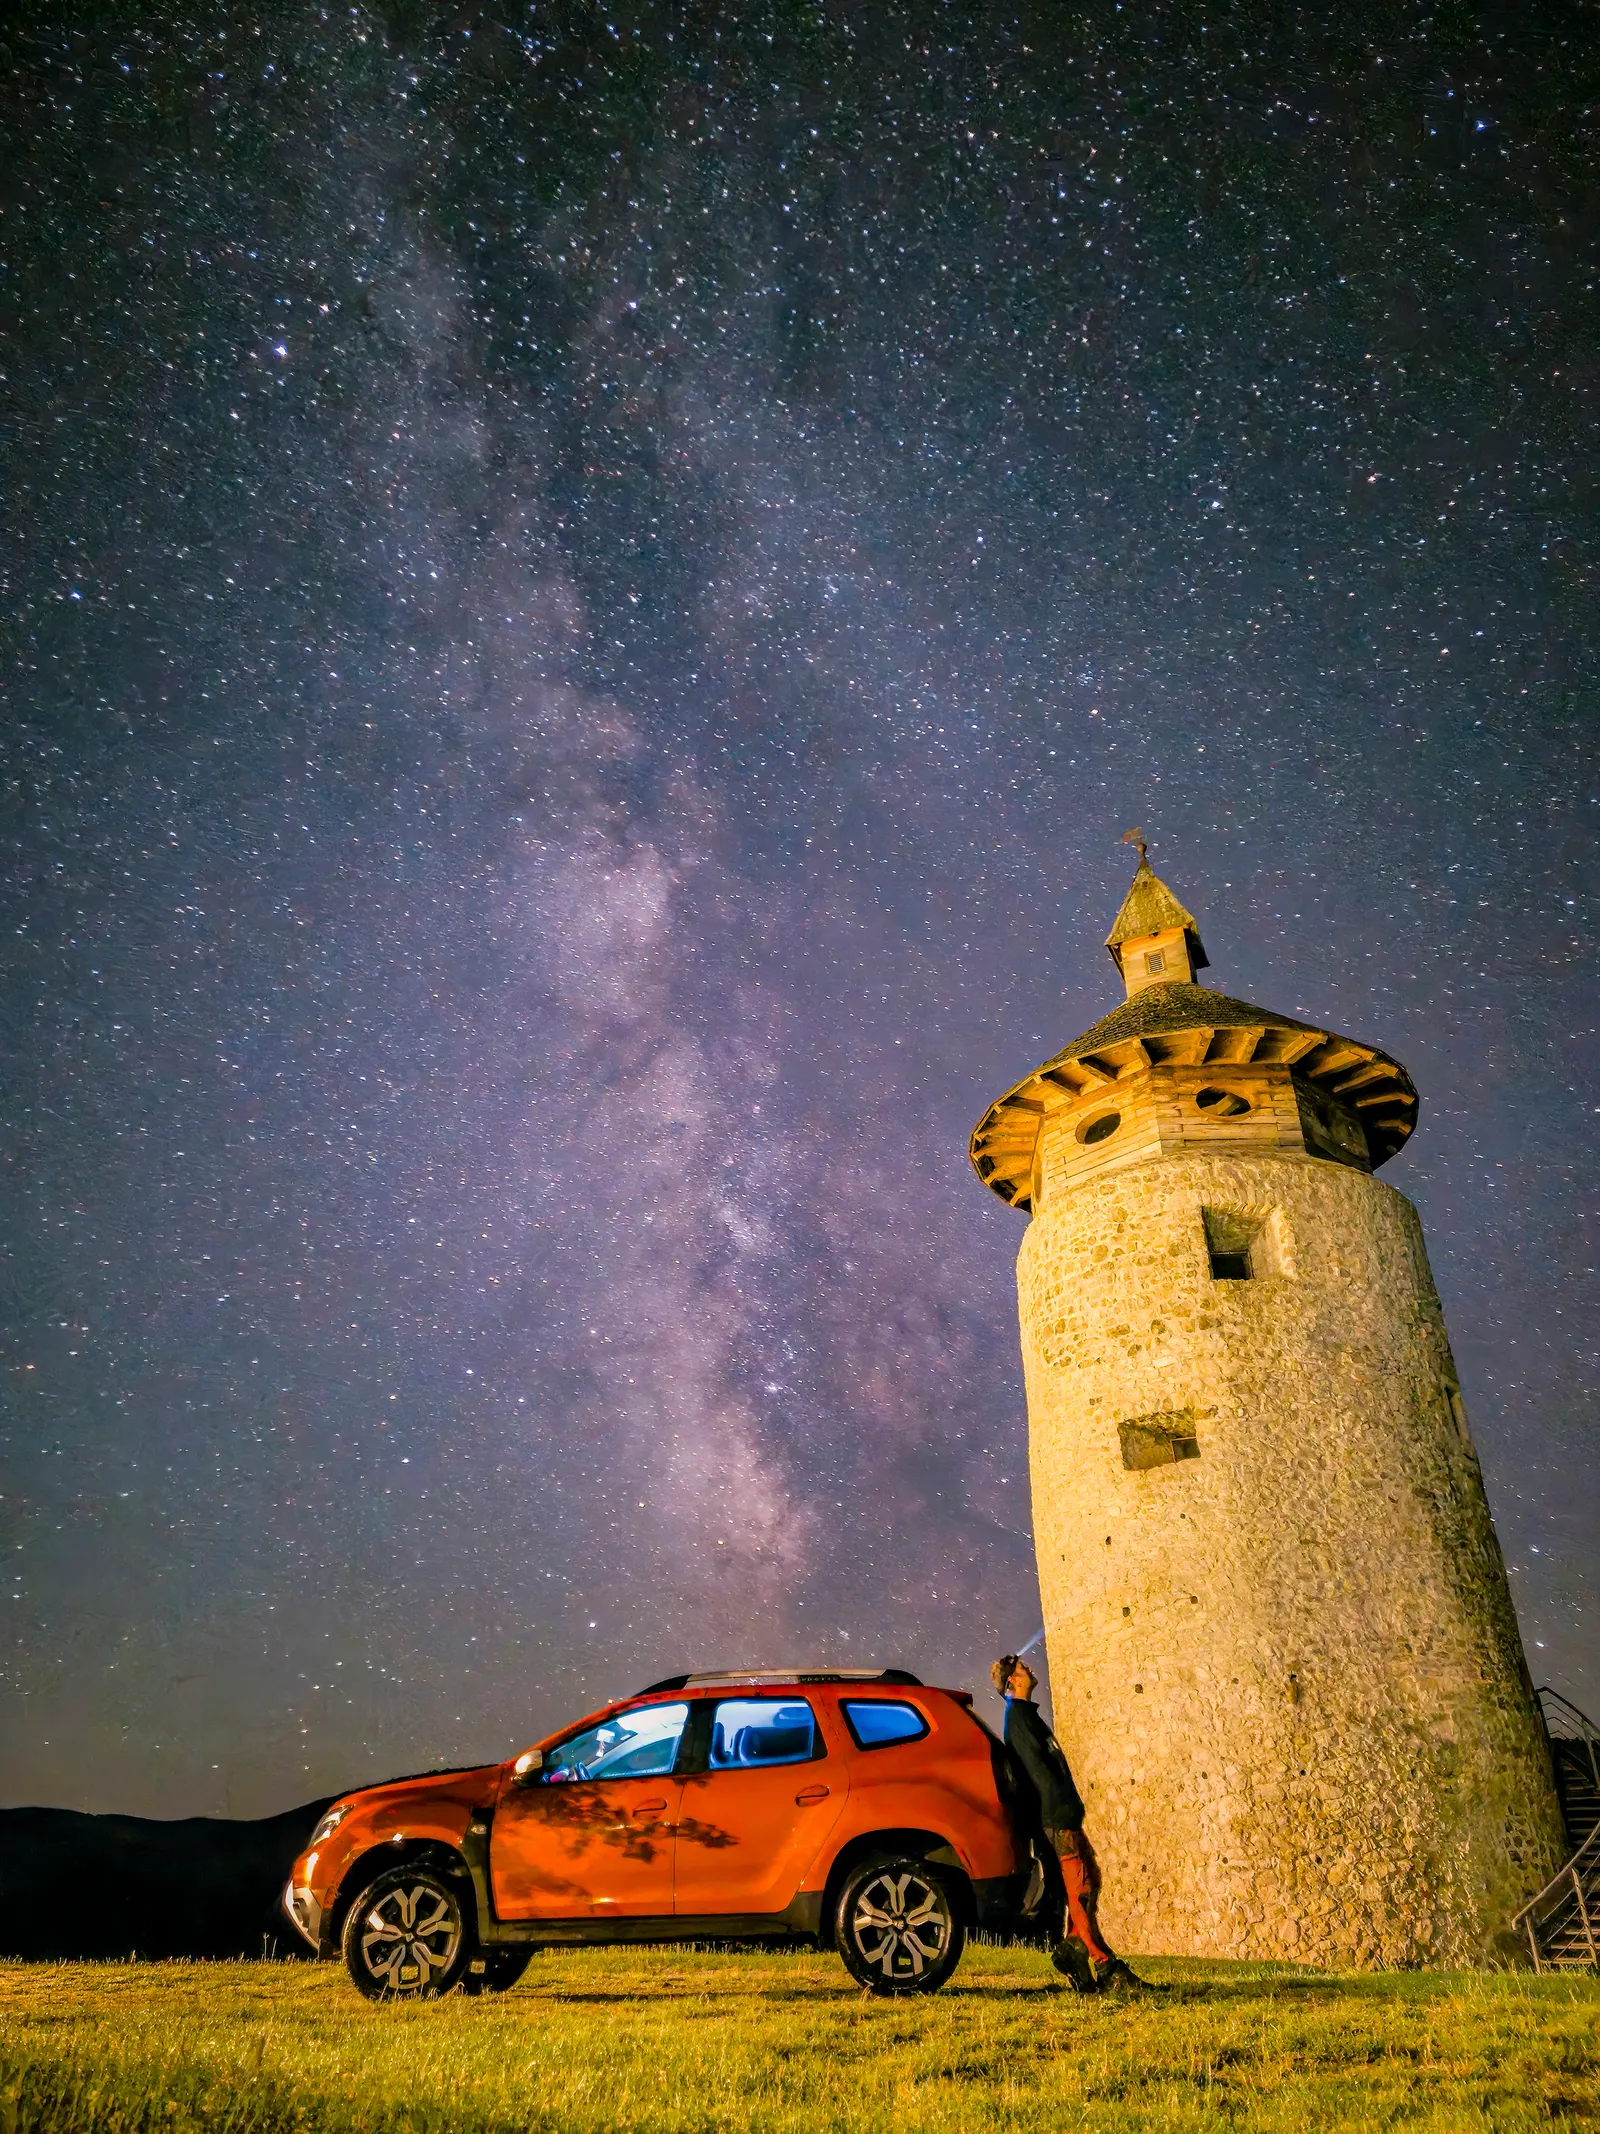 Samsung Galaxy S23 Ultra, Manual Mode via Expert RAW, 30s, ISO 1600. Photo: Branko Nadj, Smartphone Astrophotographer of the Year.
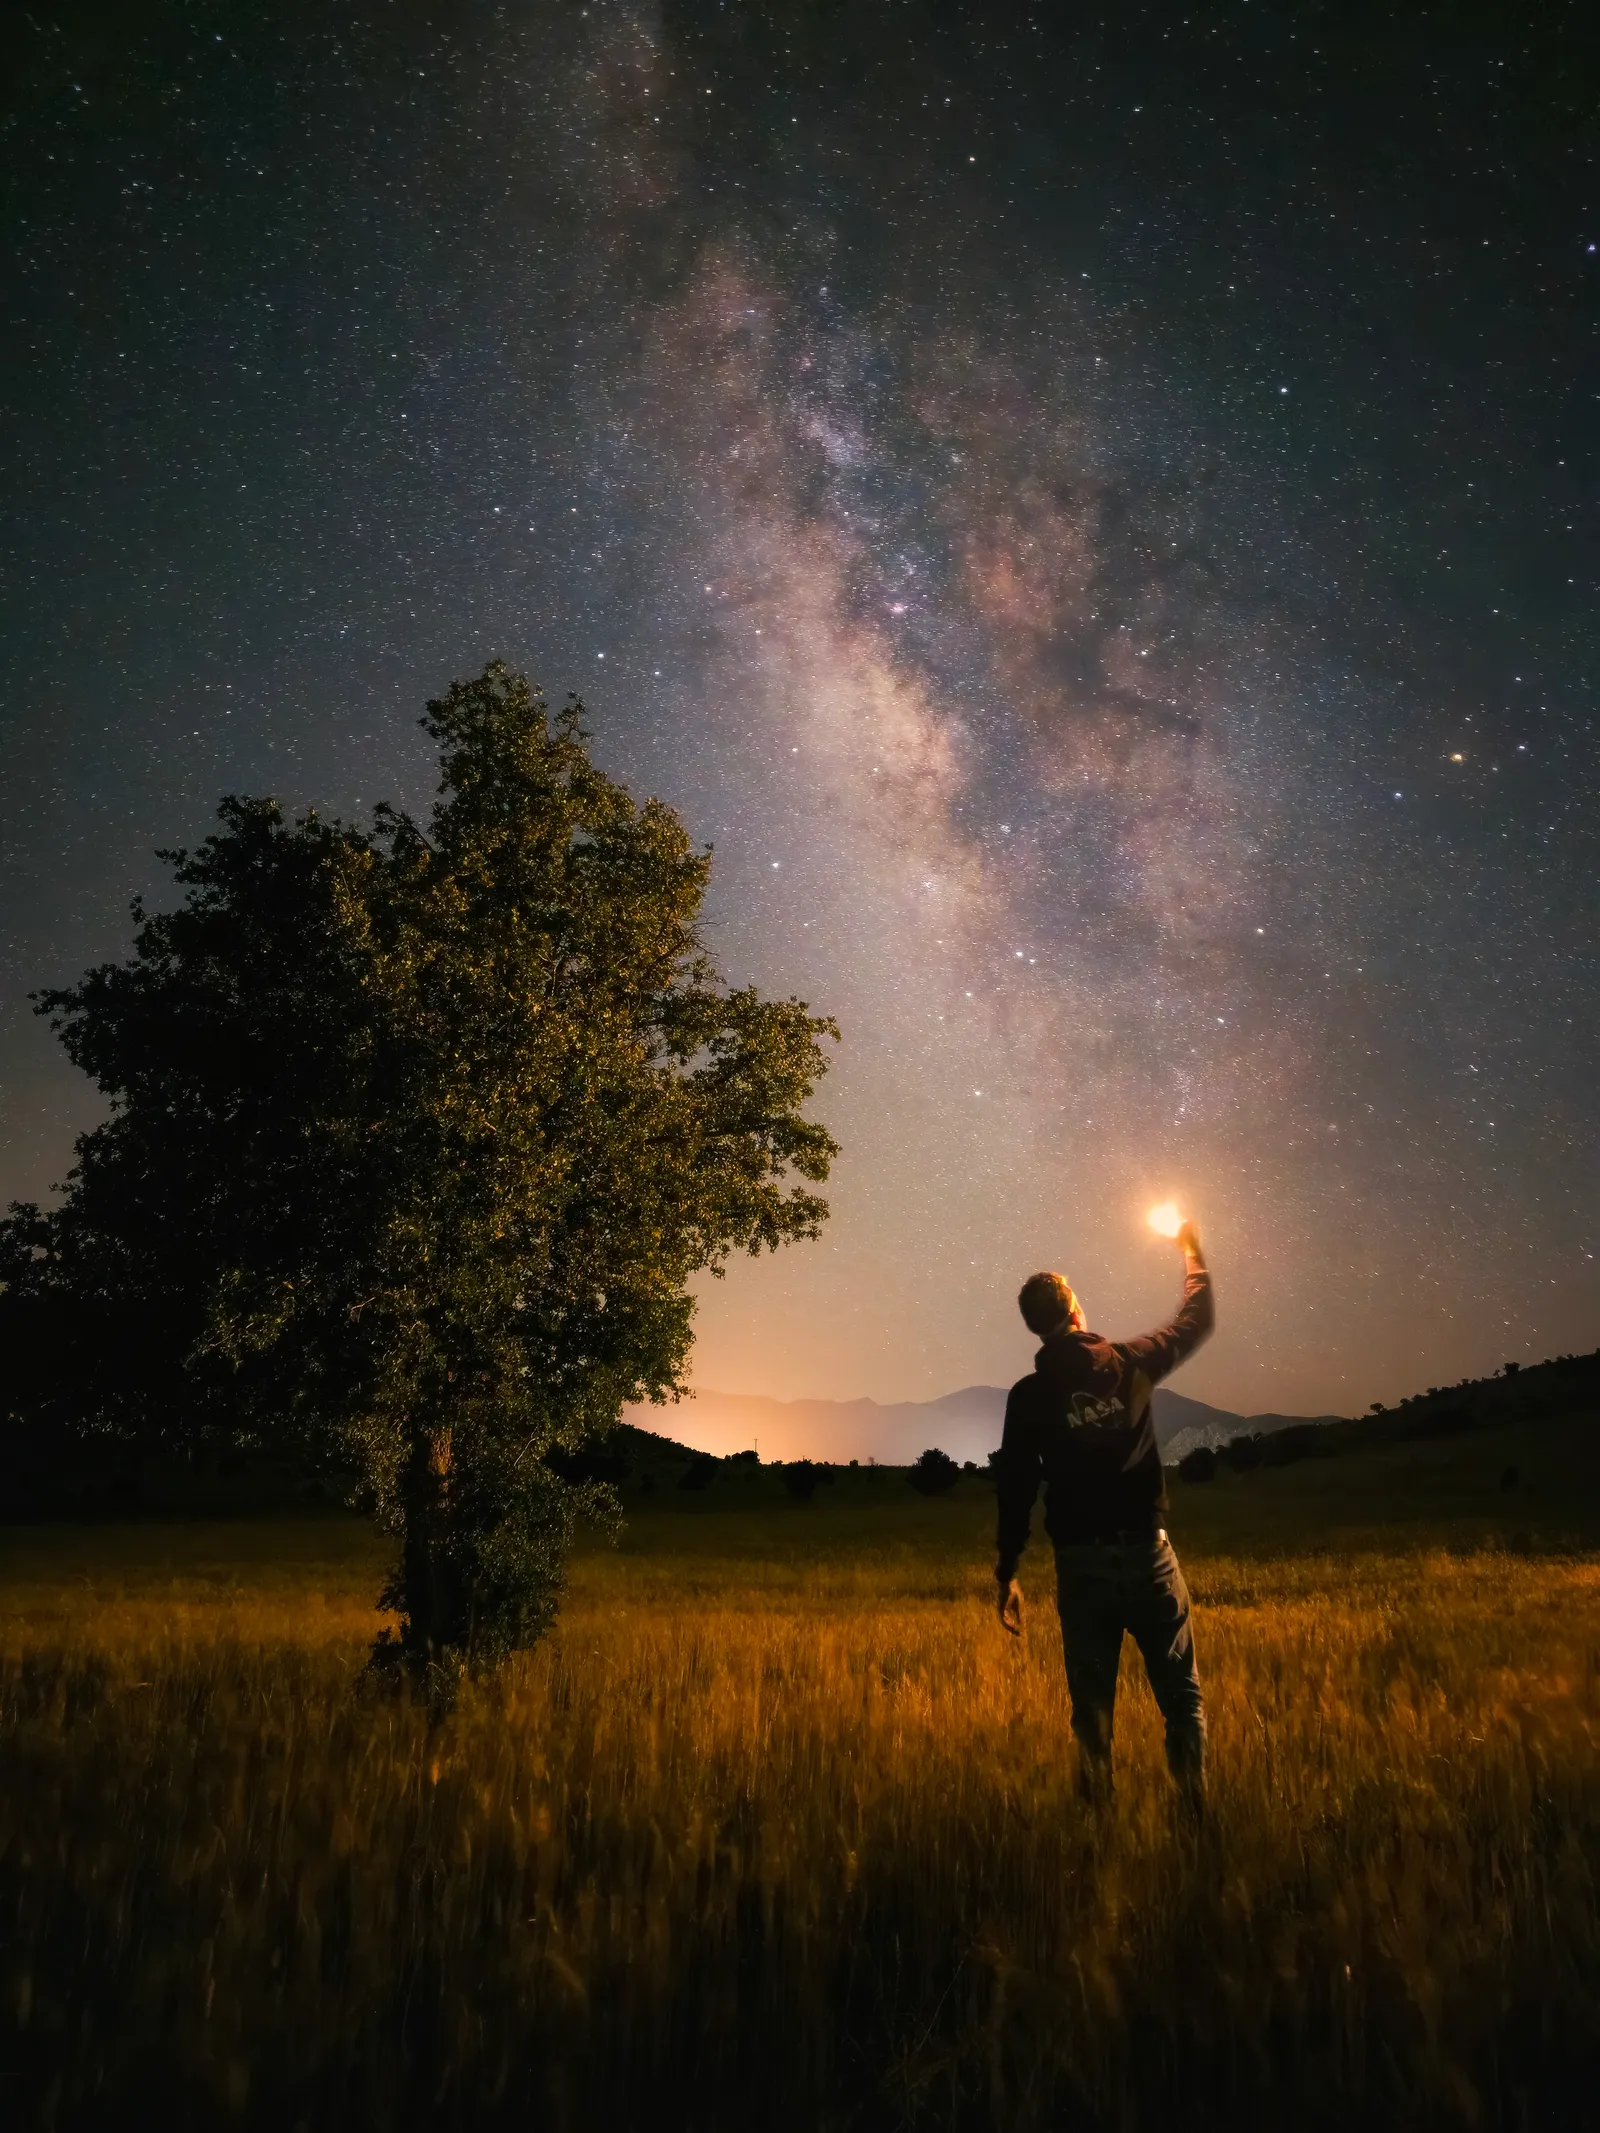 Samsung Galaxy S23 Ultra, Pro mode, 30s, ISO 1600. Photo: Sadeq Hayati, Smartphone Astrophotographer of the Year.
You can also combine both approaches: Astrophoto mode for the sky (where stacking helps most with noise) and a single 30-second Pro mode exposure for the foreground, then blend them in editing.
Editing your Samsung Galaxy Milky Way shot
In Lightroom Mobile or Snapseed:
- Reduce Highlights and Whites to recover the bright core
- Lift Shadows to bring up foreground detail
- Increase Texture and Clarity to add definition to the Milky Way
- Adjust White Balance slightly warmer if the image looks too blue
- Use selective adjustments to brighten the sky independently of the foreground if needed
Export as JPEG when you are done. Keep the original .dng. You can always go back to it.
FAQ
Which Samsung Galaxy models support Astrophoto mode?
Most Galaxy phones from the S20 series onwards with Expert RAW installed. The S22 Ultra, S23 Ultra, S24 Ultra and S25 Ultra all support it. Check your specific model by downloading Expert RAW and looking for the constellation icon.
Why is Astrophoto mode not in my Camera app by default?
Samsung ships Expert RAW as a separate download from the Galaxy Store. Once installed, it adds Expert RAW as a mode inside your standard Camera app, and from there you can access the Astrophoto toggle.
Should I choose 3, 6 or 12 minutes?
12 minutes whenever conditions allow. The longer capture stacks more exposures, which reduces noise and brings out more Milky Way detail. Use the shorter options if clouds are moving through or you need a quicker result.
My .dng file looks flat and dull. Is that normal?
Yes. RAW files are intentionally unprocessed. The data is all there, it just needs editing. Open it in Lightroom Mobile or Snapseed and work through the adjustments described above.
Can I use Expert RAW to shoot manually at 12MP?
Yes. Set your resolution to 12MP in Expert RAW settings rather than the maximum. Lower resolution performs better for night sky work because each pixel captures more light and the files are less noisy.
For the full guide to shooting the Milky Way on any smartphone, including dark sky planning, composition and timing, read how to photograph the Milky Way with a phone.
