You went out on a clear night, you pointed your phone at the sky, you pressed the shutter. And you ended up with a blurry, grainy, disappointing blob of nothing.
It is a frustrating experience, but almost always fixable.
I have seen hundreds of smartphone astrophotography images through running the Smartphone Astrophotographer of the Year competition, and the same handful of mistakes come up again and again. The good news is that every single one of them has a straightforward fix.
Here are the seven milky way phone photography mistakes I see most often, and exactly what to do about each one.
1. Not using a tripod (or anything to hold the phone still)
This is the single biggest reason people end up with blurry Milky Way photos.
Photographing the night sky means long exposures, often 20 to 30 seconds. Your phone needs to stay completely still for the entire duration. Even the smallest movement, including vibrations through the ground from someone walking nearby, will ruin the shot.
You cannot handhold a Milky Way photo. It will be blurred every time.
A tripod is the fix. It does not need to be expensive. A small, sturdy mini-tripod with a smartphone clamp works brilliantly. I personally use a compact pan-head model that fits in a jacket pocket. The lower and sturdier it is, the better.
If you do not have a tripod, prop your phone against something solid and pointing skyward. I once used a tub of Ben and Jerry’s ice cream on my car bonnet. It worked.
Important: if you are using a Pixel or Samsung astrophotography mode, these modes actually detect handholding and will refuse to run. You need to be on a tripod for them to activate.
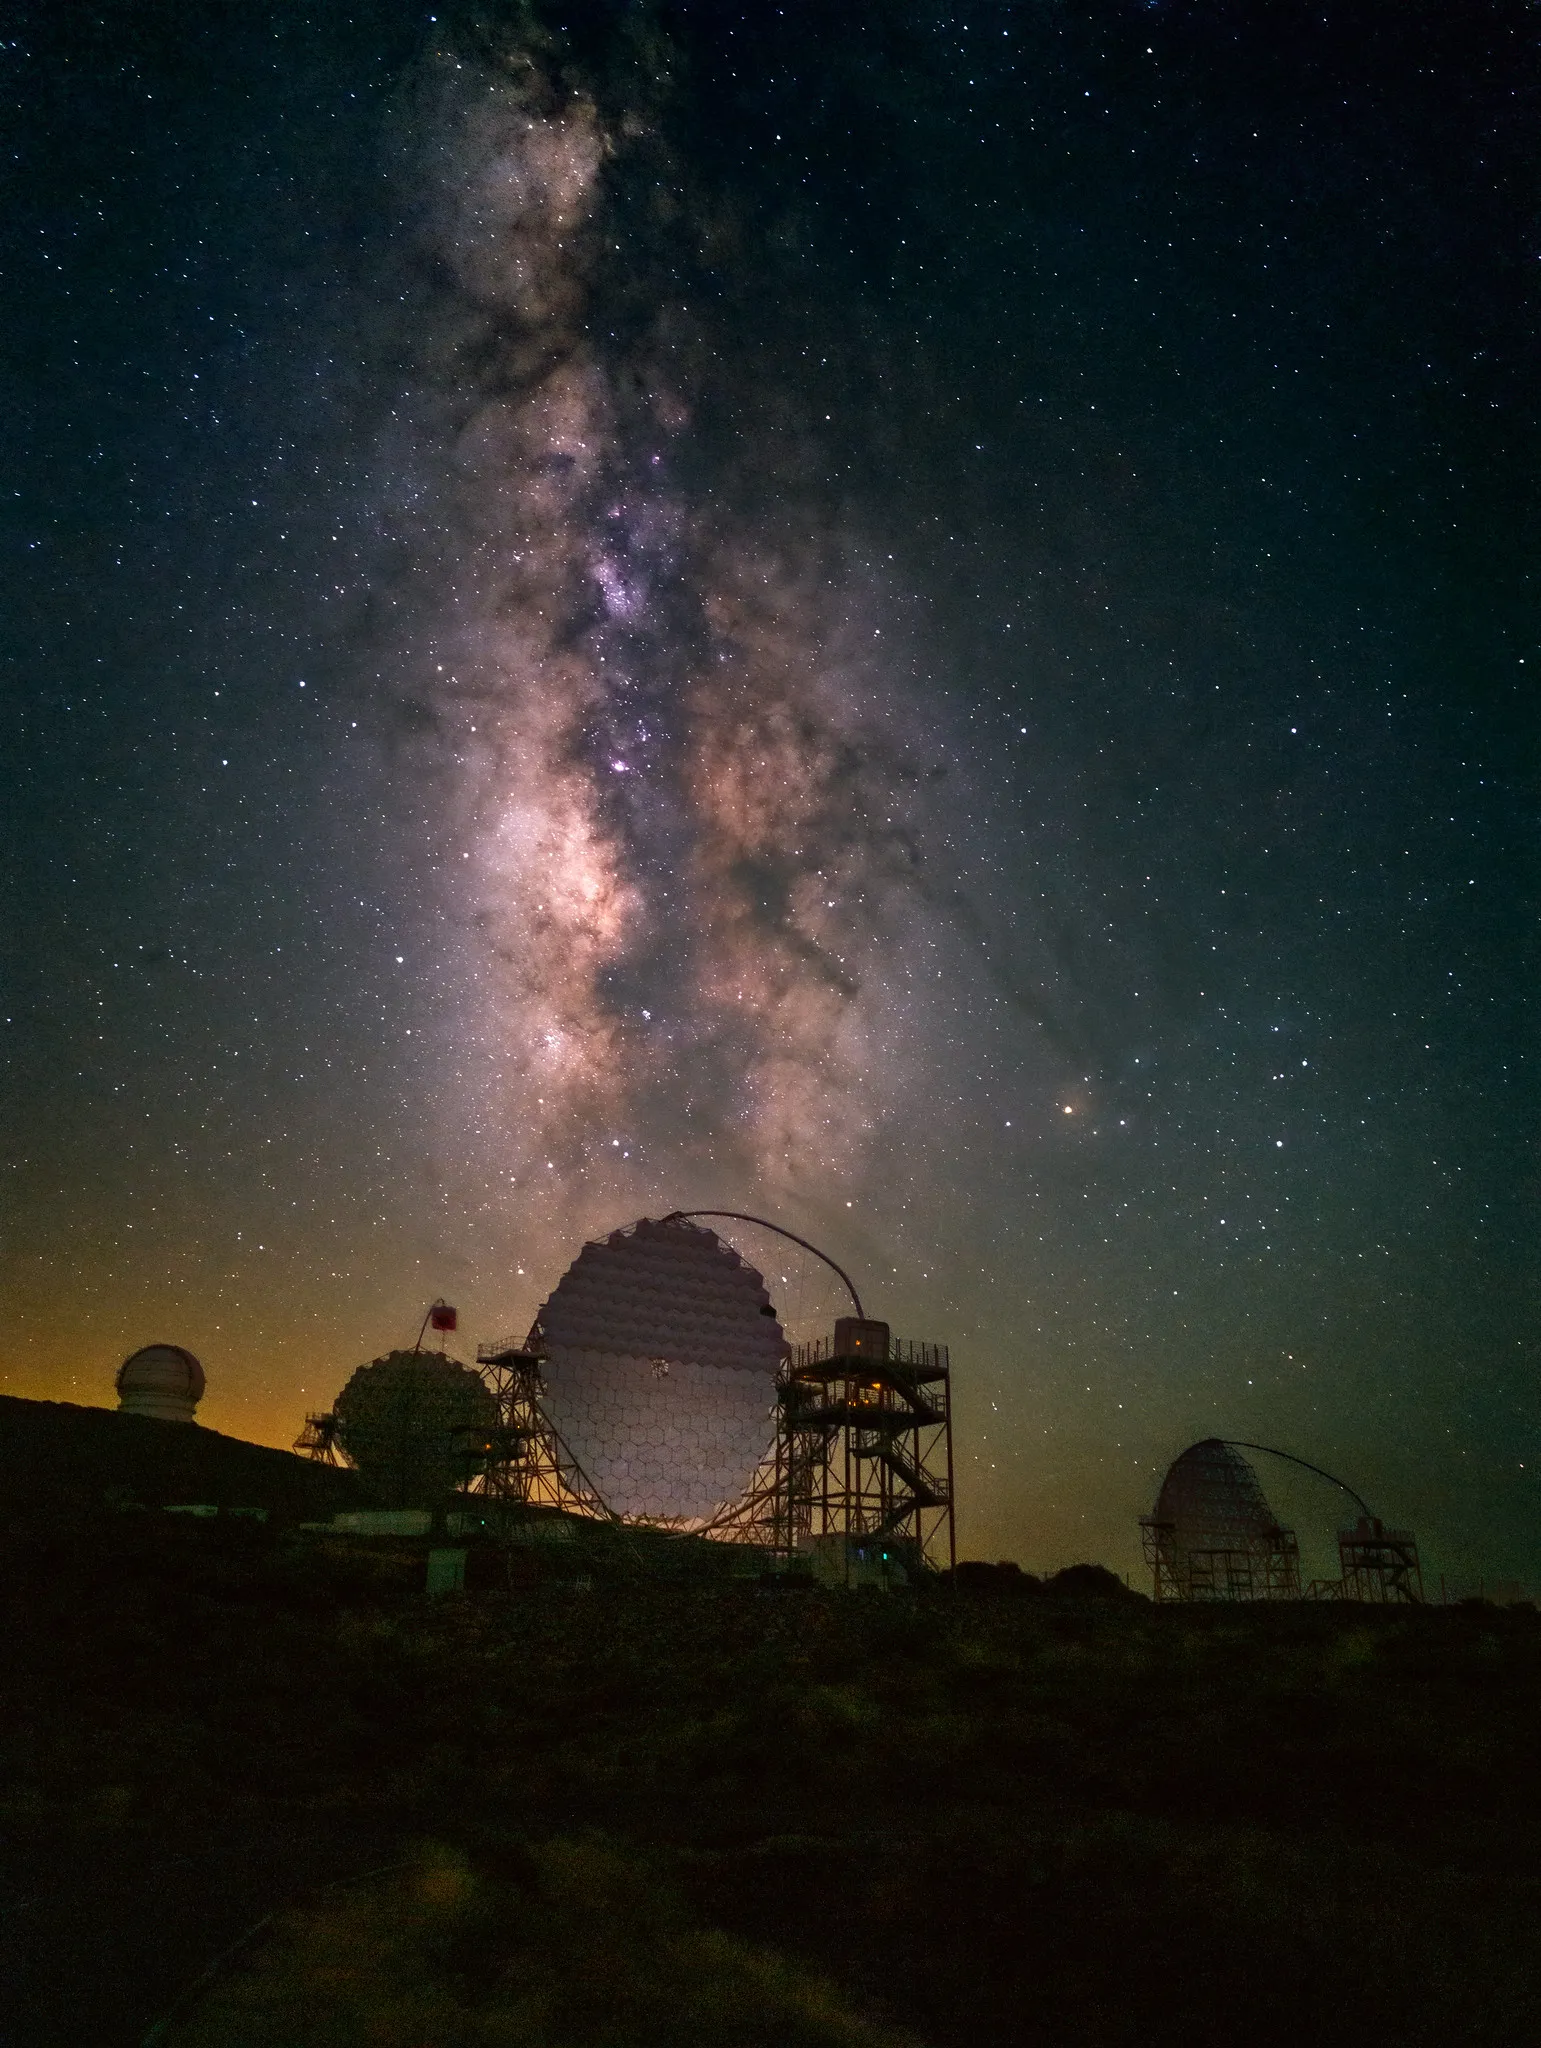
 Samsung Galaxy S23 Ultra, 30s, ISO 1600, Manual Mode via Expert Raw. Photo: Branko Nadj, Smartphone Astrophotographer of the Year.
2. Tapping the shutter button with your finger
Even with a tripod, pressing the shutter button physically can introduce enough vibration to soften the image.
The fix is to use your phone’s built-in timer, set to five seconds.
That short delay gives any wobble from your tap time to settle before the exposure begins. It costs nothing and takes two seconds to set up. Every shot I take uses it.
3. Shooting in the wrong season or at the wrong time of year
If you are in the northern hemisphere and you are shooting in November or January, the Milky Way core simply is not visible above the horizon at night. You could have perfect skies, a perfect location, and a perfect setup, and you still would not see it.
Milky Way season in the northern hemisphere runs from March to October, with June, July, and August being peak months when the core is brightest and in the sky for the longest. In the southern hemisphere it runs a little longer, from roughly February to October, with April to August at its peak.
Outside of season, you can still photograph a beautiful starry sky. You can even photograph what is called the winter Milky Way, which is fainter and narrower but still worth capturing. But if you want that arch of the galactic core, you need to be out during the right months.
4. Going out on or near a full moon
A bright moon acts like a spotlight that drowns out everything else in the sky. Shooting near a full moon will wash out the stars and make the Milky Way almost invisible.
The fix is to time your shoots around the new moon.
On a new moon the sky is at its darkest, which is when stars pop through most clearly. The actual new moon date is ideal, but the four days either side of it also give you good dark skies. That gives you a nine-day window each month to aim for.
A free app called Clear Outside shows the moon phase clearly alongside weather forecasts. It is available on iOS and Android and is worth having on your phone.
5. Going somewhere too bright
This one is less obvious but just as important. Light pollution from towns and cities creates an orange glow in the sky that makes it very hard to photograph the Milky Way, even with a perfect setup.
If the sky above you has an orange or greyish glow, you are in too much light pollution.
The fix is to find a darker location using a tool like Light Pollution Map (lightpollutionmap.info). The scale used is called Bortle. You ideally want to be in a Bortle 4 or lower, which means getting away from town. Even driving 30 to 40 minutes outside a city can make a dramatic difference.
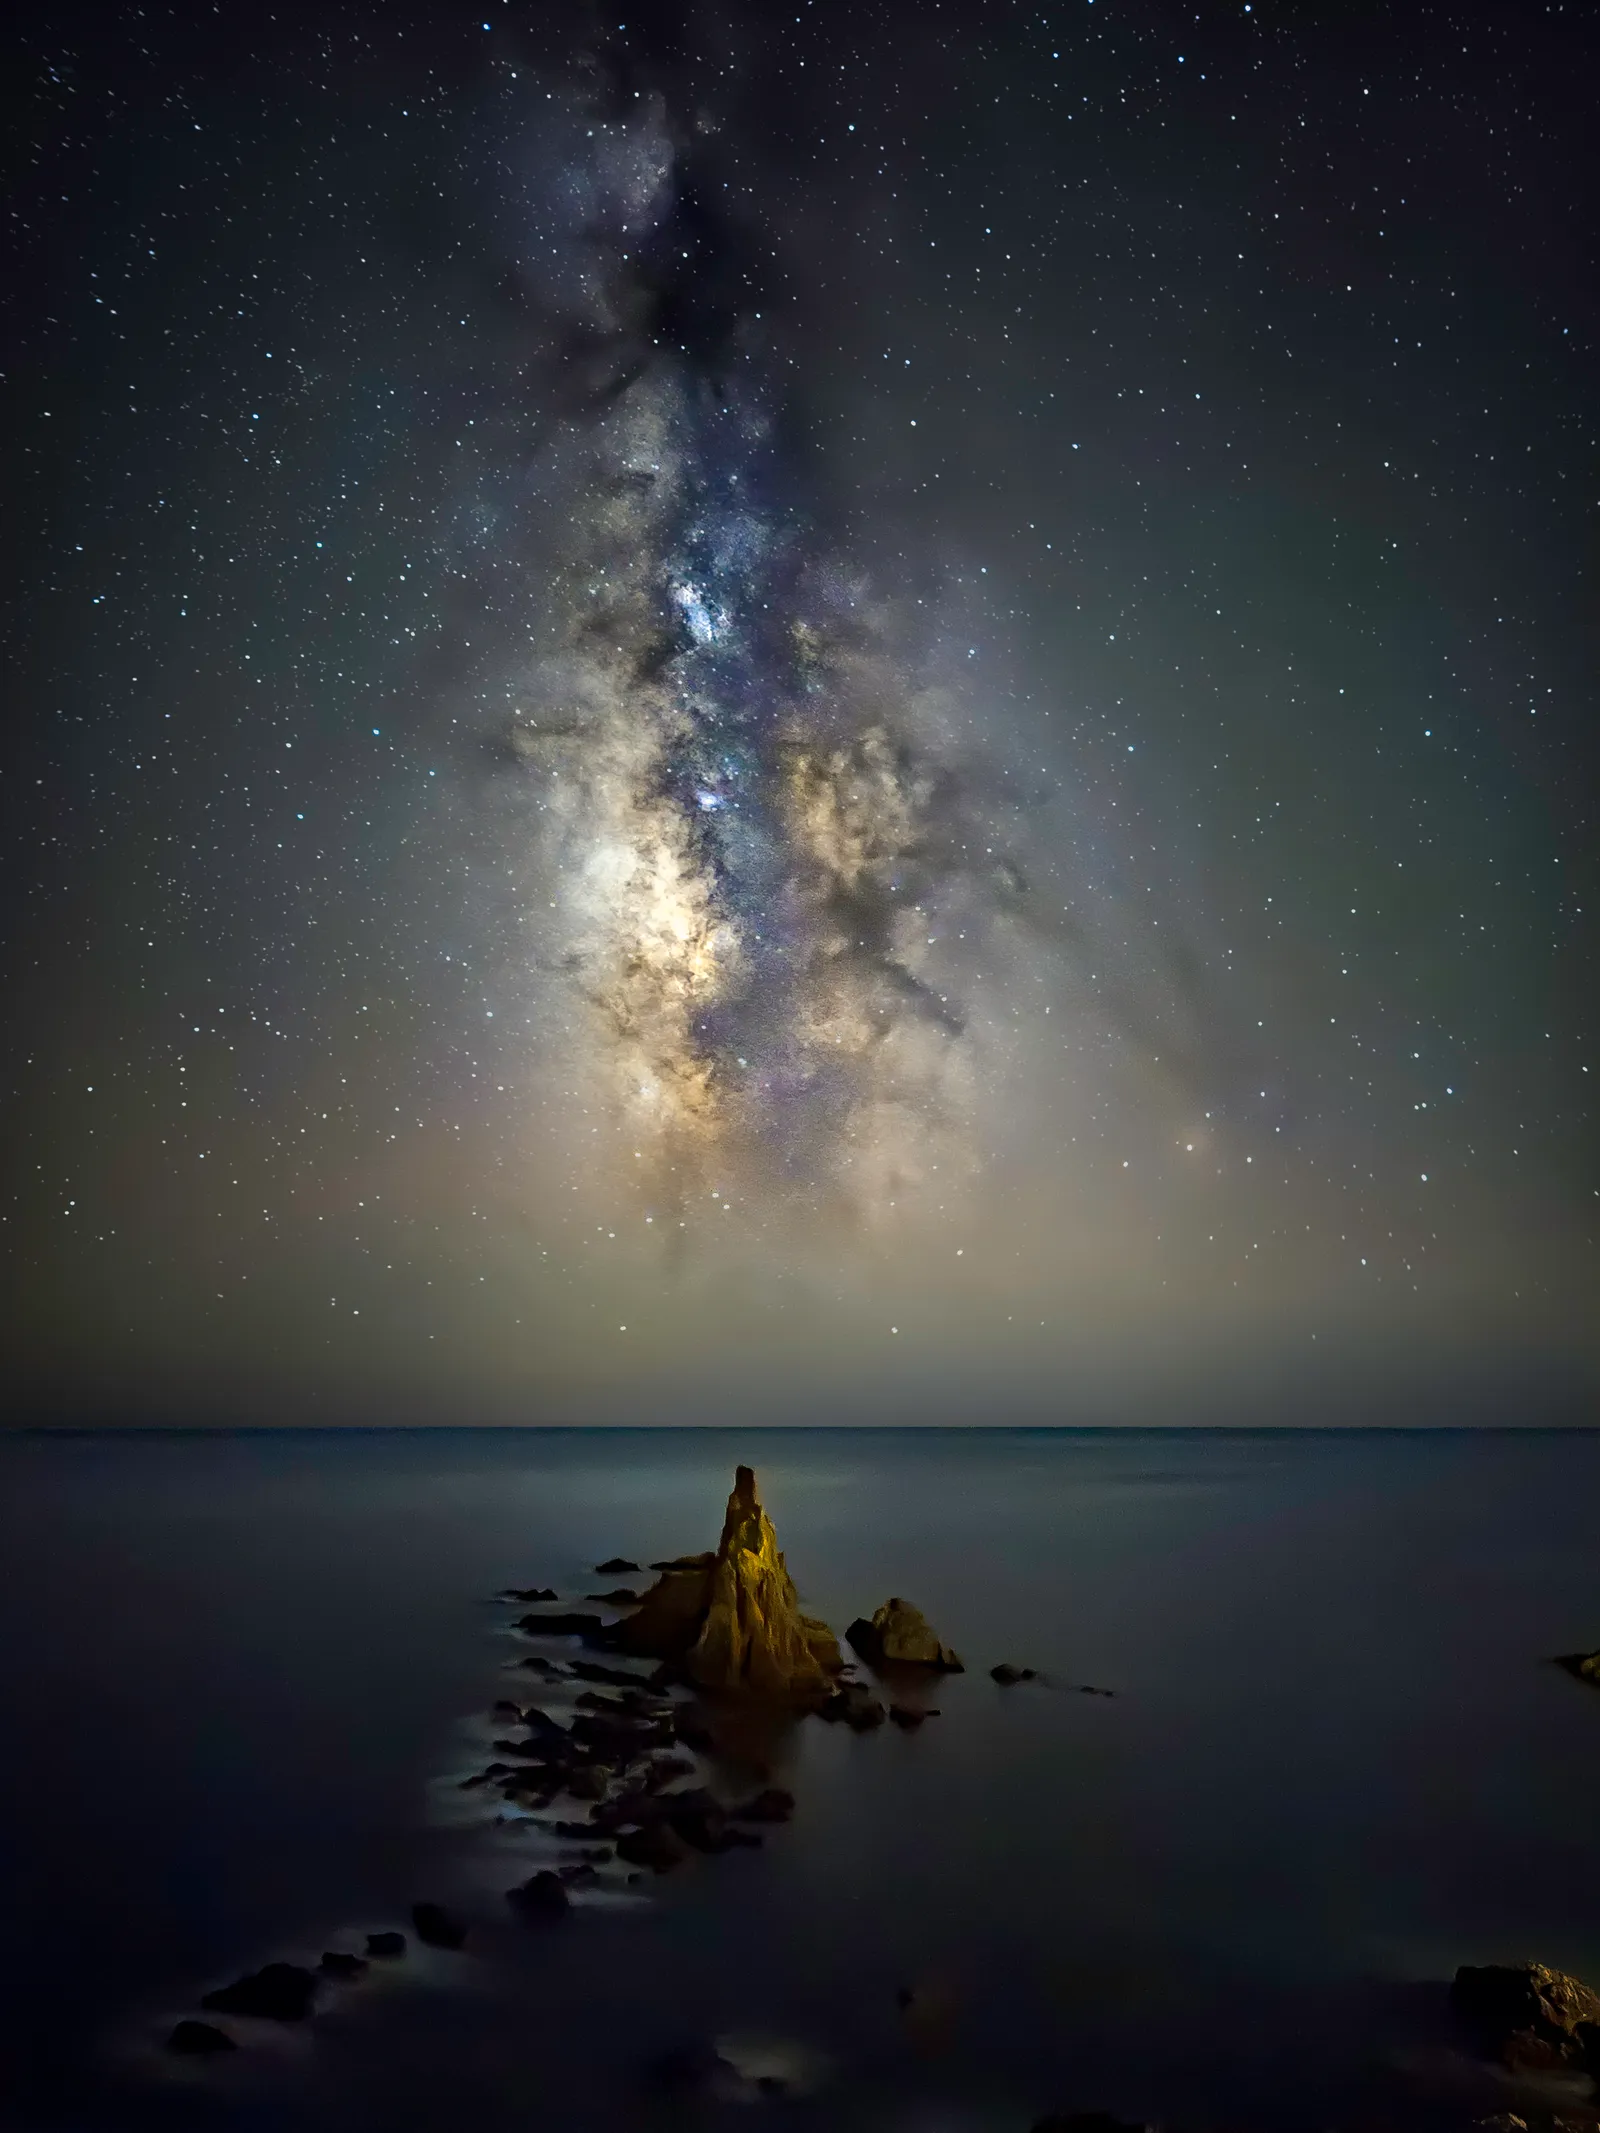
 Google Pixel 8 Pro, ISO 3200, 16s, Manual Mode, 20 stacked frames. Photo: Evgeni Tcherkasski, Smartphone Astrophotographer of the Year.
For more on planning where to shoot, read the full guide on how to photograph the Milky Way with a phone.
6. Exposure too long so the stars are trailing
If your stars look like short dashes or streaks rather than sharp points of light, your exposure is too long.
Stars appear to move across the sky as the Earth rotates. At 30 seconds, most phones will start to show trailing, particularly on wider lenses. It depends on your phone and focal length, but if you are seeing it, pull the exposure down to somewhere between 15 and 20 seconds.
When shooting manually, start at 30 seconds and check. If you see trailing, reduce it.
It is one of the main reasons people ask “why are my Milky Way photos blurry” when actually the stars are not blurry at all. They are sharp but they have moved.
7. Skipping the edit
This one surprises people, but it is probably the most impactful fix on this list.
Of the 177 images entered into Smartphone Astrophotographer of the Year, 95% had some kind of processing applied. Virtually all of the top Milky Way images were shot in RAW and processed manually.
An unedited photo straight from your phone, especially a JPEG, will look flat and underwhelming compared to what the scene actually looked like. A few minutes in a free app like Lightroom Mobile or Snapseed, adjusting the shadows, highlights, and clarity, can transform the result.
Equally important is shooting in RAW in the first place. By default, your phone saves compressed JPEGs that discard data during capture. Switching to RAW preserves everything so you have much more to work with in the edit.
To turn on RAW on a Pixel, go to the settings cog inside the camera app, then Pro, then select Raw or Jpeg+Raw. On iPhone, go to Settings > Camera > Formats and toggle on Apple ProRAW. On Samsung using Expert Raw, it should save in RAW by default.

A quick demonstration of how processing transforms a flat RAW file in Lightroom Mobile.
 iPhone 16 Pro, Night Mode, 30s. Photo: Alvaro Ocaña, Smartphone Astrophotographer of the Year.
The short version
Most Milky Way phone photography mistakes come down to the same things: no tripod, bad timing, too much light, and skipping the edit. Fix those and you will be most of the way there.
For a complete walkthrough from planning to processing, read the full guide: How to Photograph the Milky Way with Your Phone.
Frequently asked questions
Why are my Milky Way photos blurry?
The most common cause is camera shake. Even on a tripod, tapping the shutter physically can introduce movement. Use the five-second timer instead. The second most common cause is stars trailing due to a too-long exposure. Try dropping the shutter speed to 15 to 20 seconds and see if that sharpens the stars up.
Why are my Milky Way photos grainy?
Grain, or noise, is usually caused by a high ISO setting. ISO needs to be raised in the dark to expose the image, but too high a value degrades the image. A starting point of ISO 1600 works well on most phones. Shooting in RAW and doing a noise reduction pass in editing also helps significantly.
Why can I not see the Milky Way in my photos?
There are three likely causes. First, it might not be Milky Way season. In the northern hemisphere the core is only visible from roughly March to October. Second, you might be in too much light pollution. Third, you might be shooting near a full moon, which washes out the sky. Sort those three things and it should appear.
Do I need to edit my Milky Way photos?
Yes, almost always. Your phone processes the image to produce a JPEG, but it is not optimised for astrophotography. Shooting in RAW and spending a few minutes in Lightroom Mobile or Snapseed will make a substantial difference to the final result. The good news is it does not take long once you know the basic adjustments to make.
Want to go deeper? Check out the full guide on how to photograph the Milky Way with your phone, plus a rundown of the best astrophotography apps for planning and processing.
