Here is something most people get wrong when they start out with Milky Way photography.
They spend hours reading about camera settings and apps and editing techniques, and then they walk into their back garden, point their phone at the sky, and wonder why their photo looks like a grey smudge with a few specks.
The problem was never the phone. It was the location.
Where you shoot from has more impact on your results than any other single factor, including how good your phone is, what settings you use, or how expensive your tripod is. The Milky Way is there. You just need to get away from the glow drowning it out.
This guide will show you exactly how to do that.
What is the Bortle scale?
The Bortle scale is a nine-point ranking system that measures how bright the night sky is at a given location, from heavily light-polluted to completely pristine.
It was developed by amateur astronomer John Bortle in 2001 and has become the standard shorthand for describing sky darkness.
Here is what each level means in practice:
Bortle 1 — True wilderness. The zodiacal light is visible and the Milky Way casts a faint shadow on the ground. Accessible only in genuine remote wilderness, high altitude deserts, or some parts of the open ocean.
Bortle 2 — Excellent, very dark skies. The airglow on the horizon is barely visible. You can see thousands of stars with the naked eye. Remote national parks and mountain ranges can reach this.
Bortle 3 — Rural sky. Some light domes on the horizon from distant towns, but the Milky Way core is bright and detailed. Very good for photography.
Bortle 4 — Rural/suburban transition. The Milky Way is still clearly visible overhead. Light pollution is obvious on the horizon but it does not dominate the sky.
Bortle 5 — Suburban sky. The Milky Way core is visible in good conditions but faint. Light pollution affects about half the sky. This is what many people in commuter-belt areas have access to within a short drive.
Bortle 6 — Bright suburban sky. The Milky Way is only visible near the zenith in very good conditions. Most photos from here look washed out without significant processing.
Bortle 7 — Suburban/urban transition. The Milky Way is barely or not visible. Some bright stars struggle to stand out.
Bortle 8 and 9 — City skies. Only the brightest stars are visible. The Milky Way is essentially invisible to the eye and the camera.
For Milky Way photography on a smartphone, you want to aim for Bortle 4 or better. Bortle 3 is excellent. Bortle 5 is workable if conditions are ideal, but results will be noticeably softer and you will need more processing.
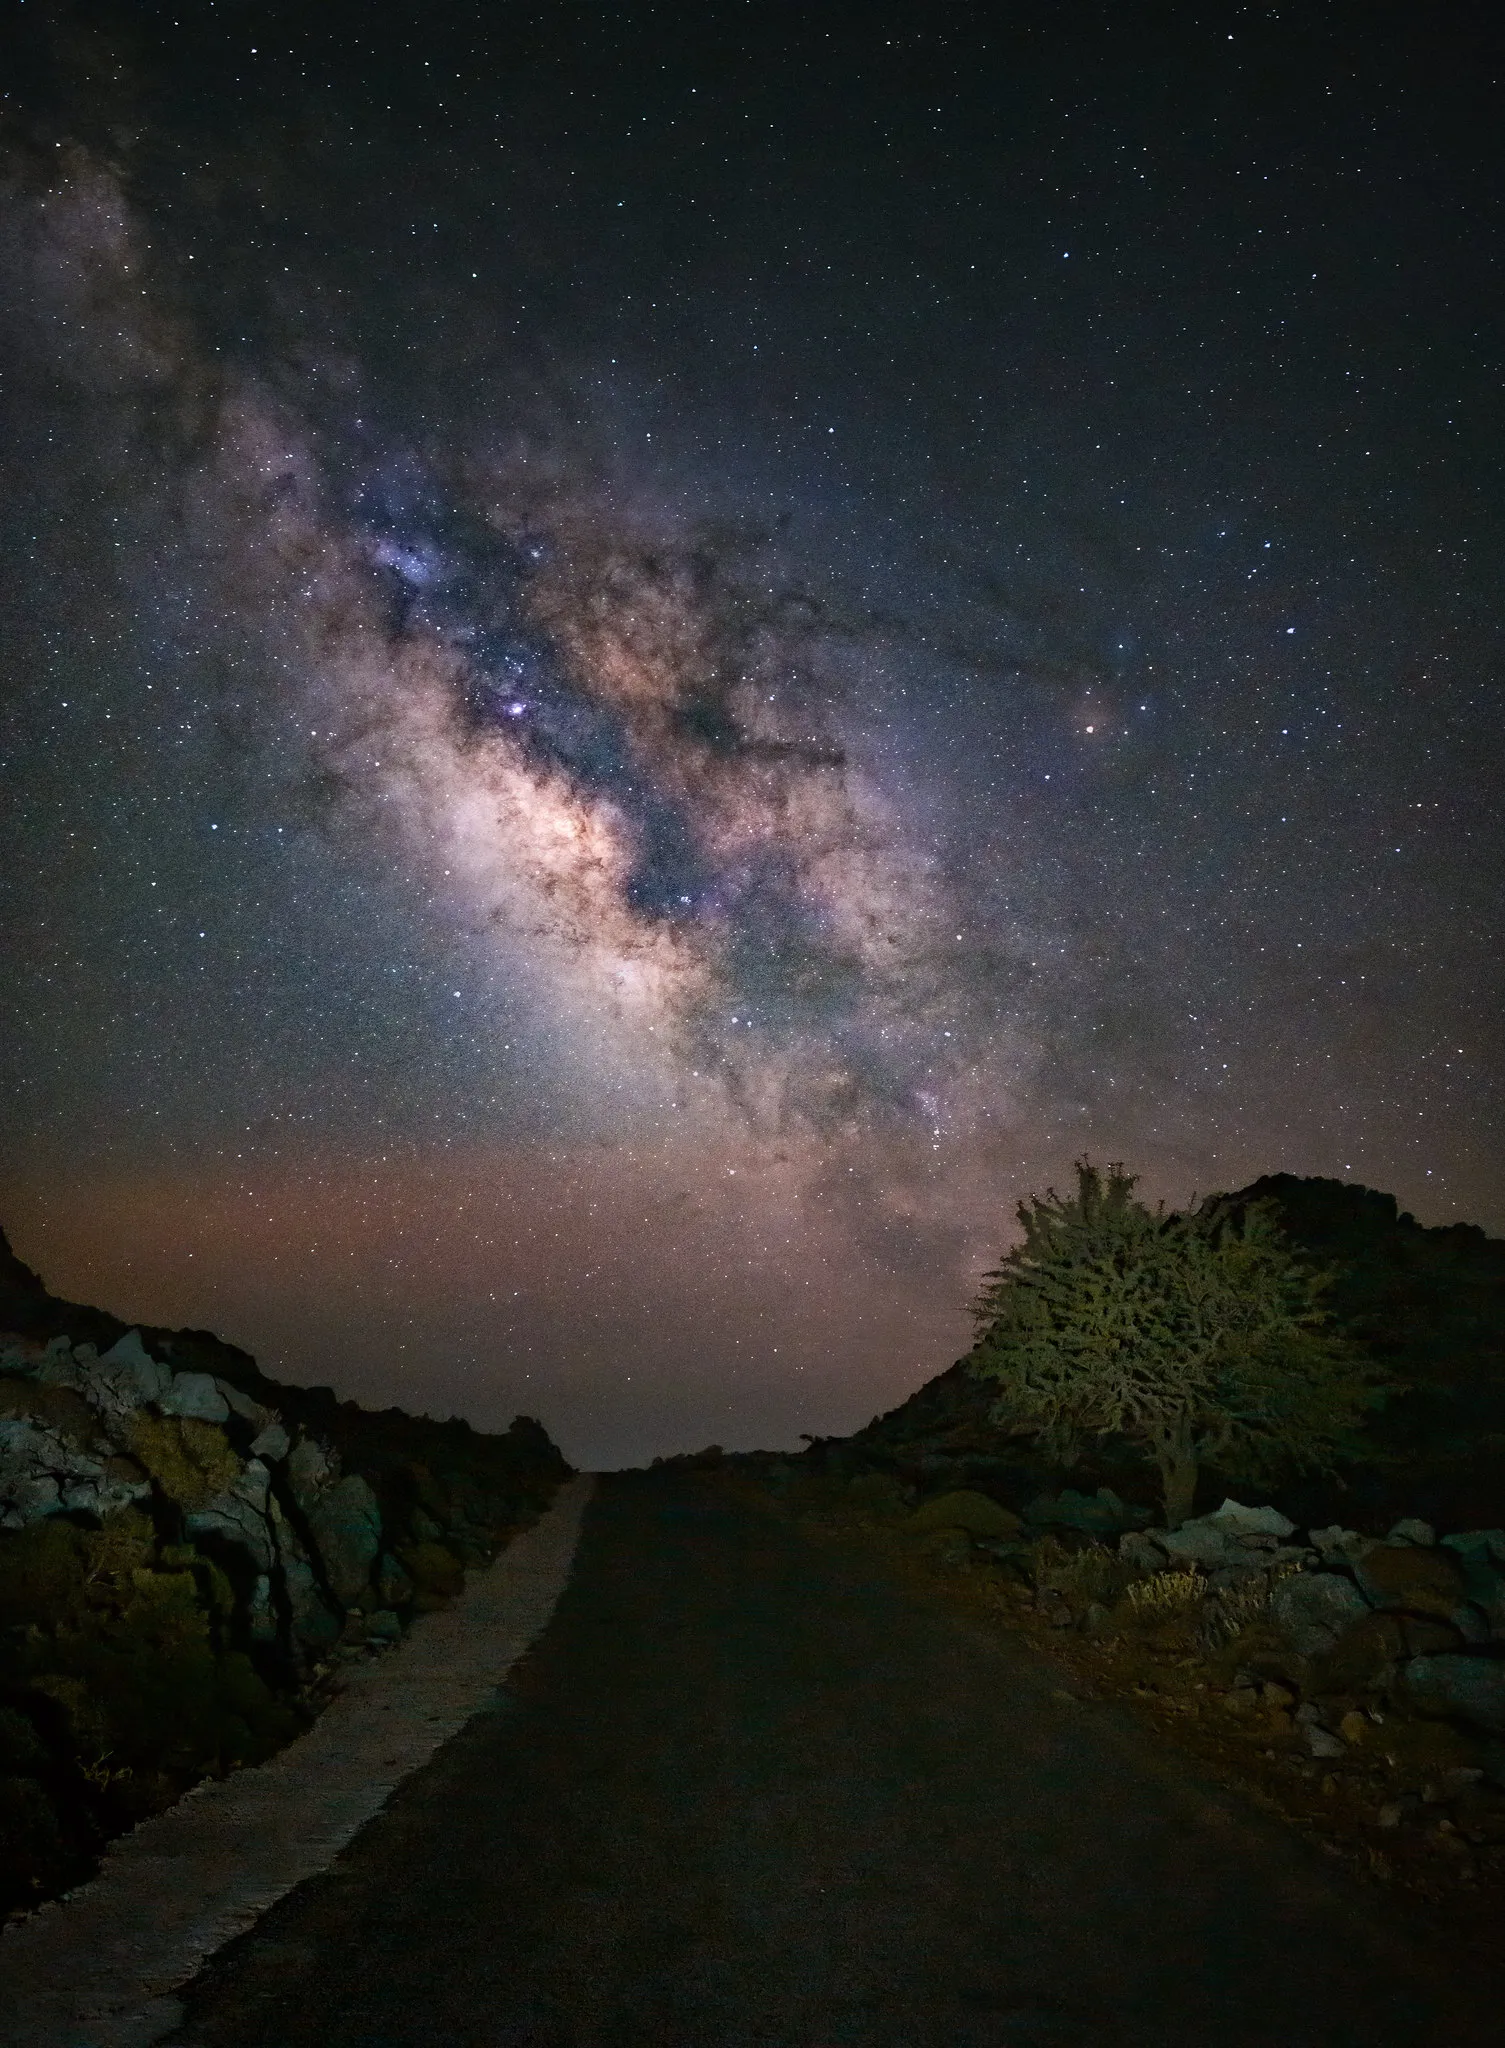 Google Pixel 8 Pro, ISO 3200, f/1.7, 16s, 25-frame stack. Photo: Evgeni Tcherkasski, Smartphone Astrophotographer of the Year.
How to use a light pollution map
The easiest way to check your local sky darkness is lightpollutionmap.info. It is free, it runs in any browser, and it covers the whole world.
When you open it, you will see a colour-coded overlay on top of a satellite map.
The colours roughly correspond to the Bortle scale:
- White and red — heavily light-polluted, Bortle 8-9 (city centres)
- Orange and yellow — significant light pollution, Bortle 6-7
- Green — suburban, Bortle 5-6
- Blue — semi-rural, Bortle 4-5
- Grey — rural, Bortle 3-4
- Black — genuinely dark skies, Bortle 1-2
Start by finding your home on the map. Then zoom out and look for where the colours shift to blue, grey, or black.
For most people living near a town or city in the UK, Europe, or the eastern US, the green and orange zones are immediately obvious around you. The good news is that blue and grey zones are often closer than you expect.
A 20 to 30 minute drive is often enough to shift two or three Bortle levels. That is a significant difference in what you can capture.
Finding a realistic spot near you
Once you have the light pollution map open, the next step is finding somewhere you can actually get to.
A useful method is to ask an AI assistant for suggestions. Open ChatGPT, Gemini, or whichever tool you prefer and try a prompt like this:
“I live in [your town or city]. Suggest some places I could get to within a 30-minute drive to find significantly lower light pollution, with good open views of the sky for night photography.”
Adjust the drive time to whatever suits you. The AI will suggest specific locations, nature reserves, reservoirs, hills, and similar spots that you can then cross-reference on the light pollution map.
Once you have a shortlist, check each location on Google Maps. Look at how you would actually get there, where you would park, how far you would need to walk from the car, and what the terrain looks like. A location that looks great on the light pollution map is no use if you cannot safely access it at night.
It is also worth thinking creatively about locations closer to home. Even moving from your street to a nearby field, park, or wooded area can remove the direct glow from nearby streetlights and make a noticeable difference.
One thing worth knowing: in many towns and villages in the UK, streetlights are switched off between midnight and around 5am. If you are shooting late, your immediate surroundings can be considerably darker than they are at 10pm. Worth checking for your area.
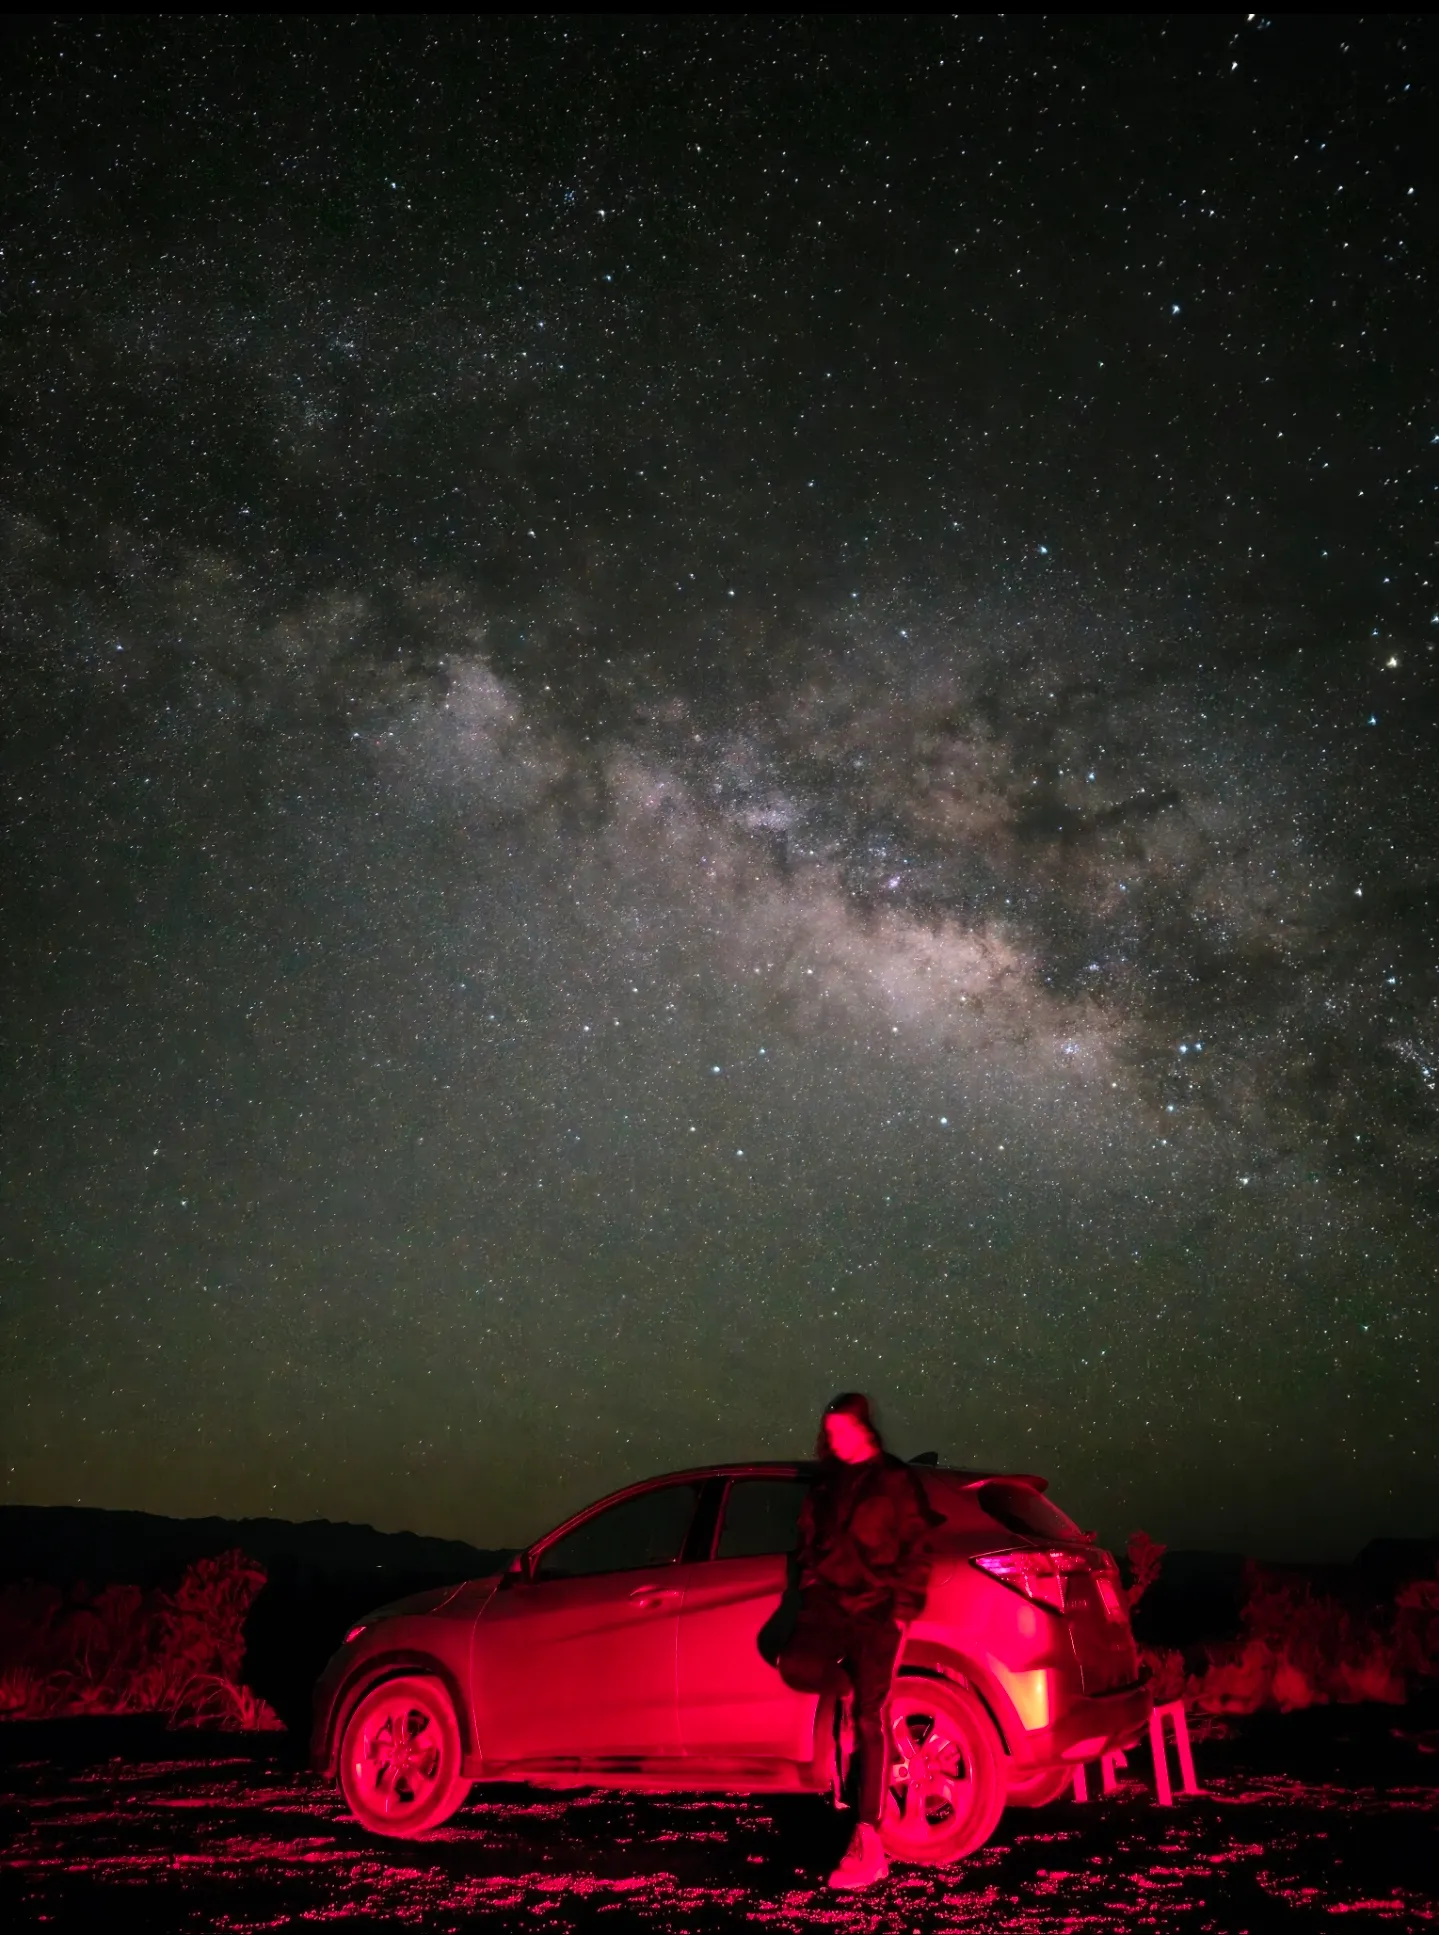 Samsung Galaxy S23 Ultra, ISO 1600, 20s, Expert RAW manual mode. Photo: Evyn Hernandez, Smartphone Astrophotographer of the Year.
Do not forget the moon
You can find a perfect Bortle 3 location and still come home disappointed if you go out on the wrong night.
A bright full moon washes out stars just as badly as urban light pollution. Even a half moon will significantly reduce the contrast you need to capture the Milky Way core clearly.
The best nights for Milky Way photography are on or around the new moon, when the moon is invisible. You have roughly a nine-day window centred on the new moon date where the skies are dark enough to get good results.
Four days before the new moon, four days after, and the new moon itself. That is your window each month.
You can find new moon dates by searching “new moon dates 2026” or checking a site like timeanddate.com. Mark the upcoming dates in your calendar alongside the Milky Way season months (late spring through summer in the northern hemisphere) and you will quickly see which nights offer the best combination of factors.
Apps like Clear Outside (free for iOS and Android) show moon phase alongside cloud cover and other conditions in a single view, which makes planning straightforward.
Staying safe at night
This is worth saying plainly: going out alone at night in remote areas carries real risks.
Tell someone where you are going and when you expect to be back. Take a charged phone and a torch. Wear appropriate clothing for the temperature, which drops significantly overnight even in summer. Check the terrain in daylight if you can, or at least study the satellite view on Google Maps before you go.
If a location feels uncomfortable when you arrive, leave. A slightly darker sky is not worth compromising your safety. Many photographers find that going with a friend makes the experience considerably more enjoyable as well as safer.
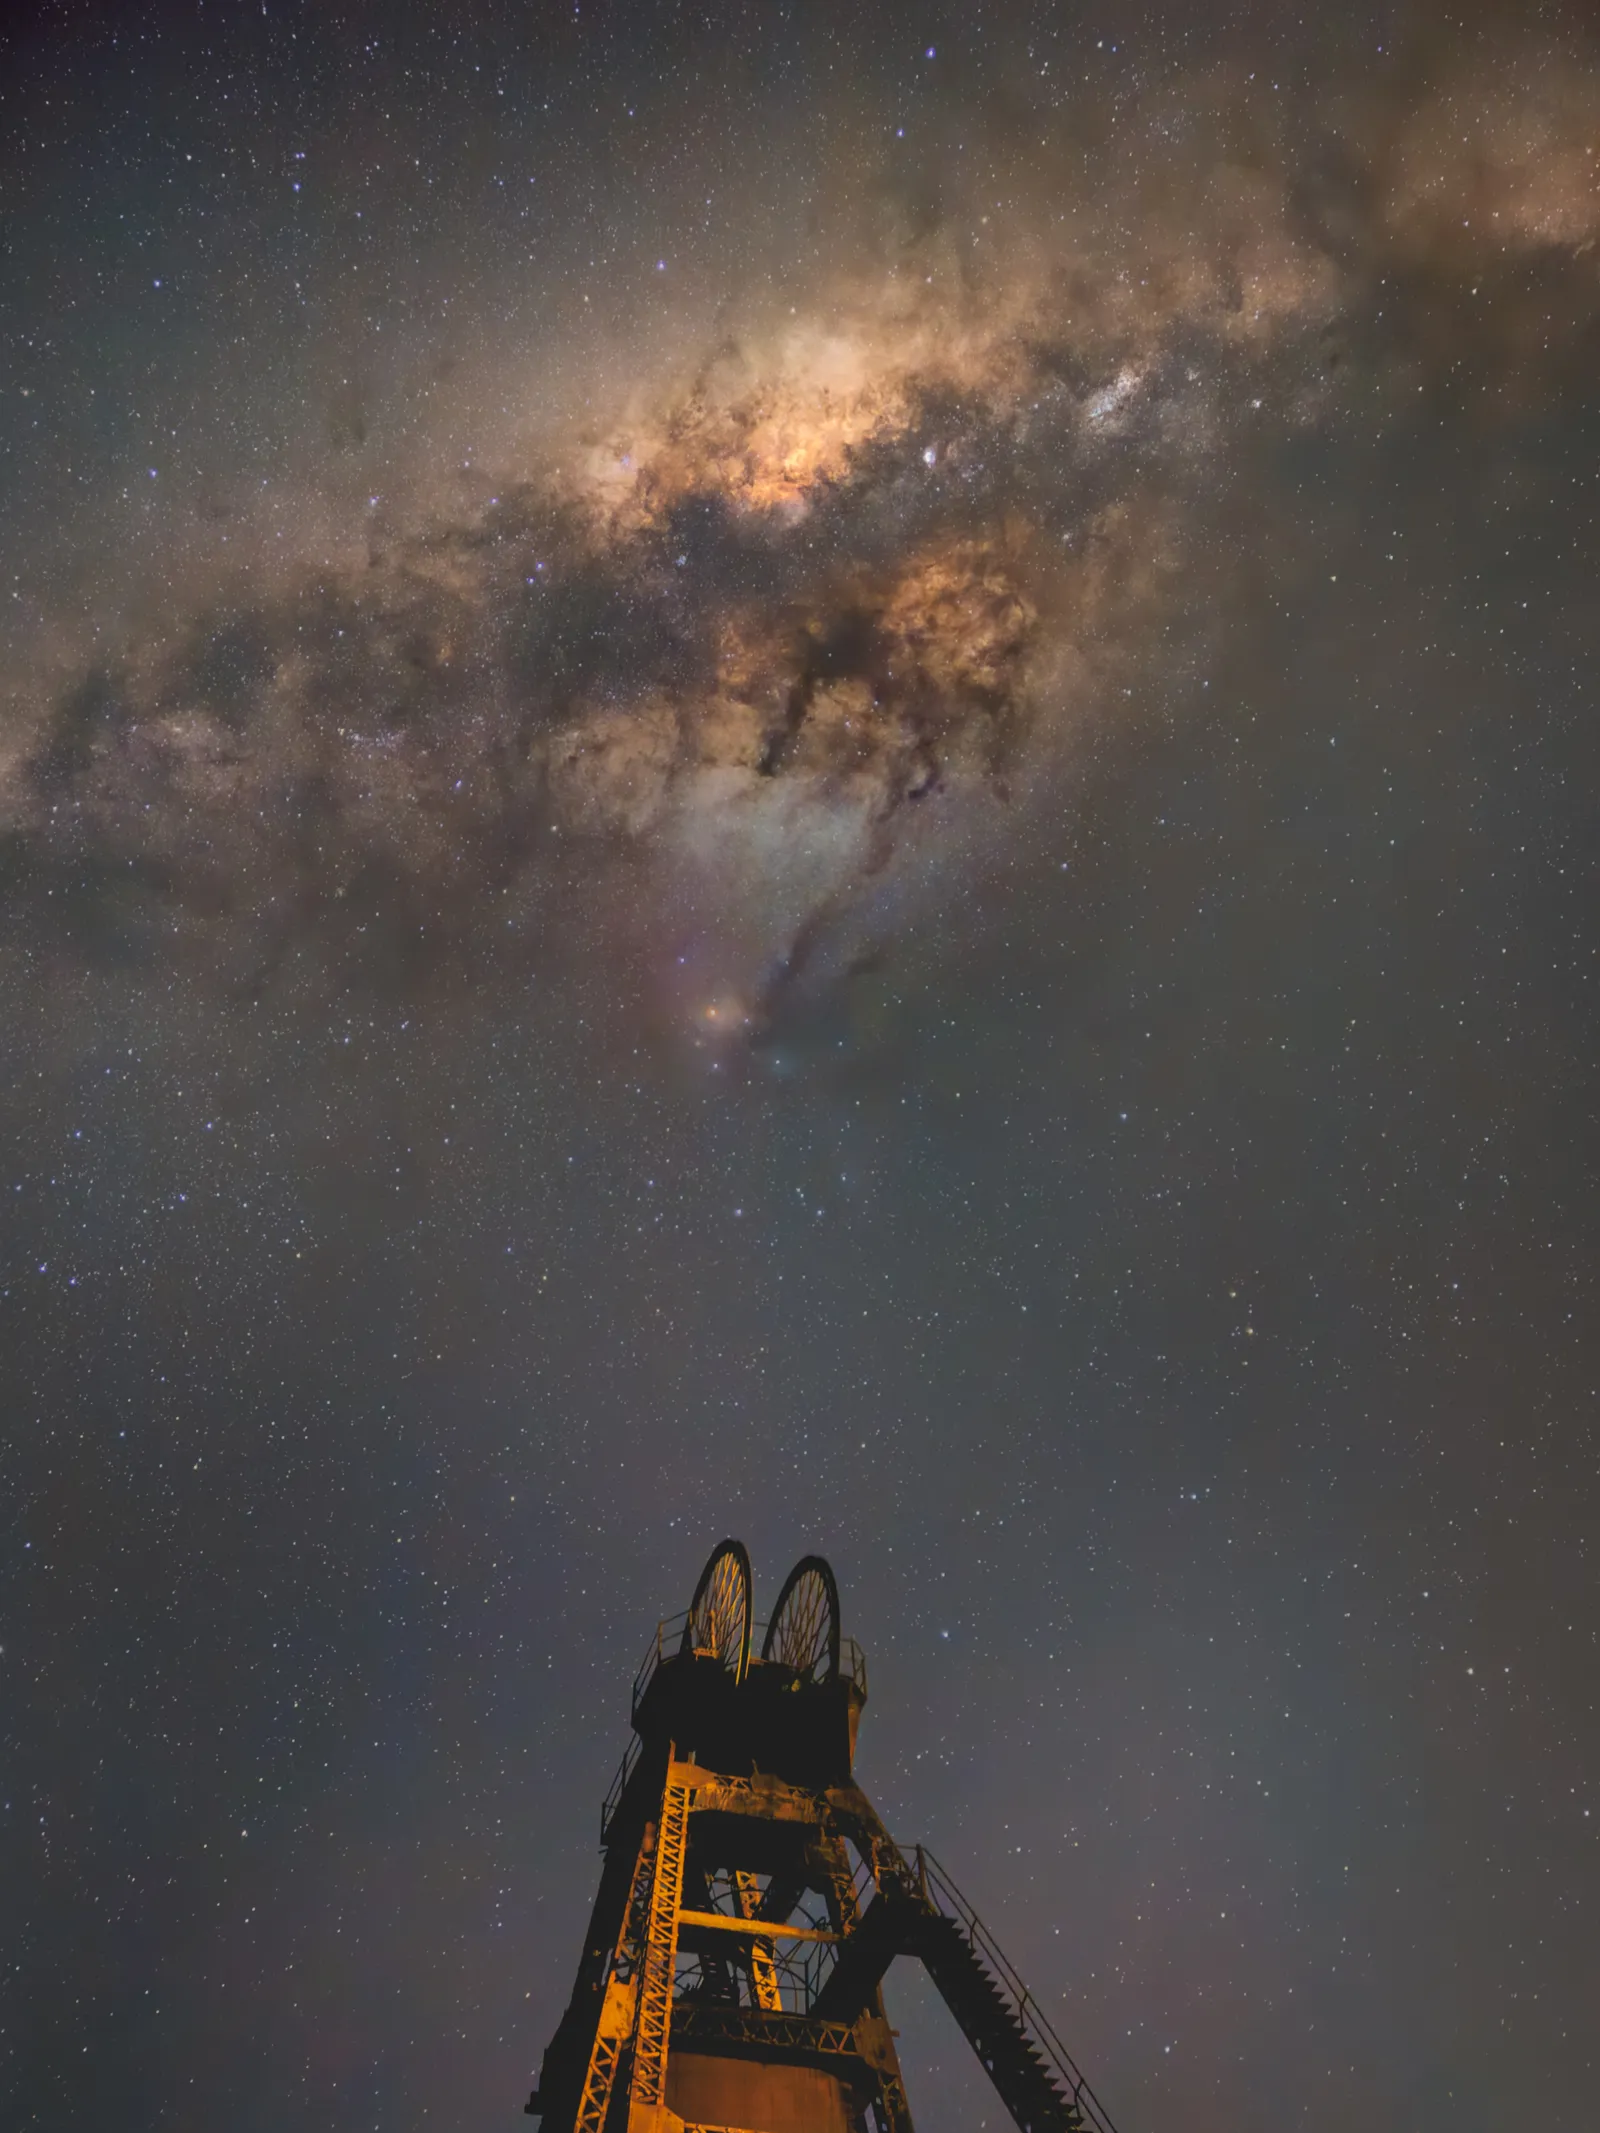 iPhone 15 Pro Max, ISO 10000, 10s, 6-frame stack. Photo: Debojit Chakrabarty, Smartphone Astrophotographer of the Year.
Putting it together
The process for finding your location does not need to be complicated.
Open lightpollutionmap.info and look for the nearest blue or grey zones within a drive you are comfortable with. Use an AI prompt to suggest specific spots in those areas. Check access and parking on Google Maps. Cross-reference with the new moon calendar to pick your night. Tell someone where you are going.
That is it. Once you have a shortlist of two or three locations within reach, you are ready to start planning your first outing.

Finding dark skies and planning a Milky Way shoot explained step by step.
To go further, read the full guide to photographing the Milky Way with your phone, or see the best astrophotography apps for planning and shooting.
FAQ
What Bortle number do I need for Milky Way photography?
Bortle 4 or lower gives you the best results. Bortle 3 is excellent and produces clear, detailed Milky Way shots. Bortle 5 is possible but you will need to work harder in processing and conditions need to be near-perfect.
Can I photograph the Milky Way from a city?
In most city centres (Bortle 8-9) it is not realistically possible to capture the Milky Way core. The light pollution is too severe for even long exposures to overcome. Moving to the outskirts of a city can help, but you will still get much better results by driving to darker skies.
How far do I need to drive to find darker skies?
This depends entirely on where you live. In densely populated areas like south-east England, the Netherlands, or the US north-east, you may need to drive 45 minutes to an hour to reach Bortle 4 skies. In less densely populated regions, 20 minutes can be enough. Use lightpollutionmap.info to check for your specific location before assuming either way.
What is the best free light pollution map?
lightpollutionmap.info is the most widely used and reliable free option. It draws on the same underlying dataset used by researchers and covers global coverage. Light Pollution Map (the app) and Clear Outside also include light pollution data if you prefer a mobile interface.
