
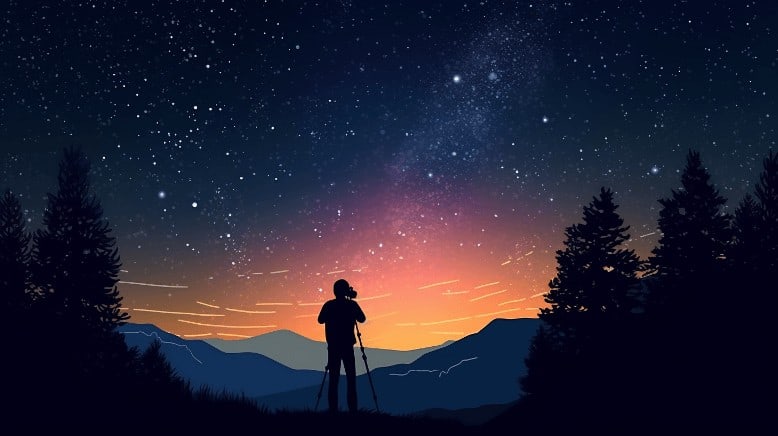
Photographing the Milky Way should be a bucket list item for anyone with a camera.
Pull it off and it’s incredibly rewarding and you end up with something extremely impressive to show off.
The good news is that it is surprisingly easy to do – the bad news is that it is also very easy to get wrong.
In this article, I outline how to photograph the Milky Way in five steps:
- Planning Your Photo
- Choosing Your Gear
- Setting Up Your Camera
- Composing Your Shot
- Processing Your Photos
Let’s get into it.
1. Photographing the Milky Way: Planning
Of all the advice on this page and elsewhere, the key to successfully photographing the Milky Way is planning – particularly with regard to timing.
Even with the greatest camera in the world, you won’t be able to capture the Milky Way if you get the timing wrong
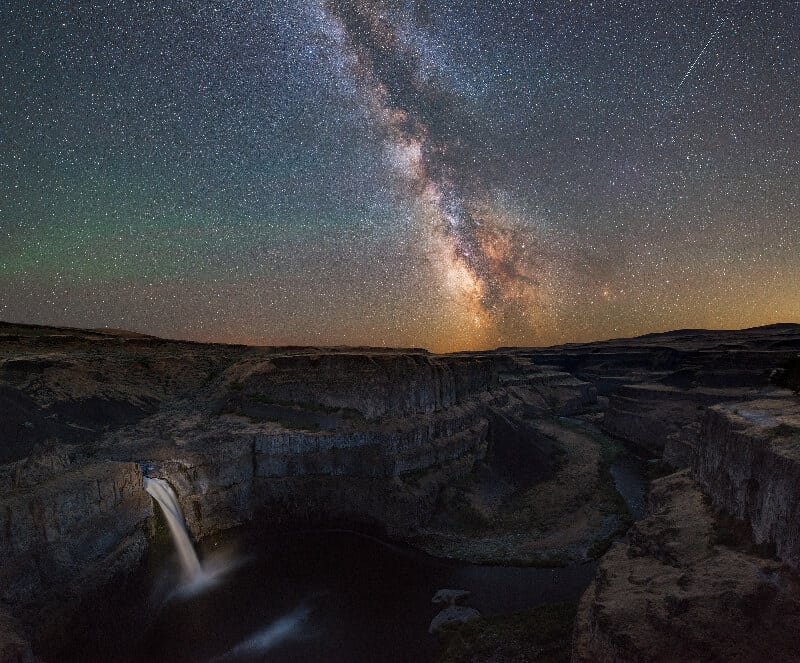
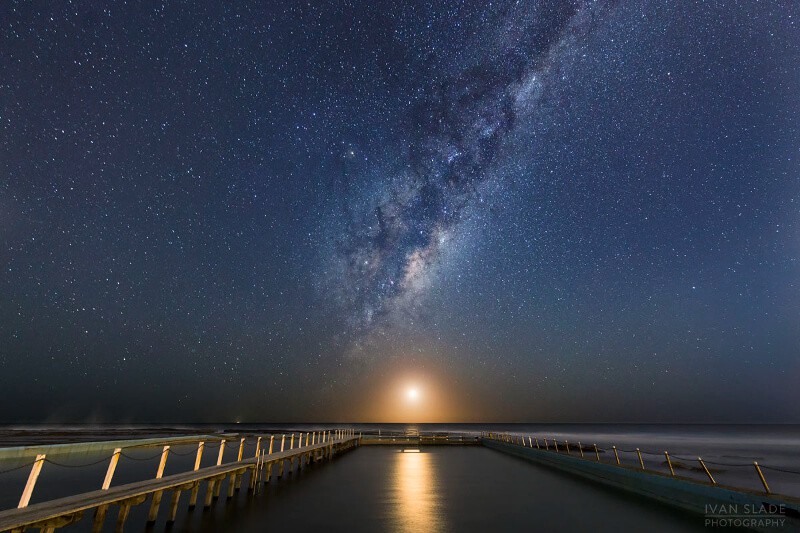
With regards to the photo below, photographer Ivan Slade told us:
This photo was a long time in the planning. It was a shot we had thought about and a location we had wanted to go to for quite some time. Being a 7-hour drive away meant the conditions had to be right as we were planning to do this as an overnight shoot.
There are five things to consider here:
- Milky Way Season
- The position of the Milky Way core in the sky
- The weather
- The light of the moon
- Location and light pollution
Milky Way Season
The period when the Milky Way is visible in the night sky, known as the Milky Way Season, only occurs during certain months of the year.
The timing of this is slightly different depending on what hemisphere you are in:
- If you are in the Northern Hemisphere, then it is visible in the summer months – from April to July, with June generally being the peak time.
- In the Southern Hemisphere, then the Milky Way core will be available for you to shoot from a slightly extended period of February to October, with July being the peak time.
So the first step is to make sure that you are shooting within these windows.
Best Time to Capture the Milky Way
Now we have established that it is Milky Way Season, we can move to looking at what time the Milky Way will be visible above us on our planned date.
There are several factors that must be considered when trying to photograph the Milky Way. One of these major factors is the location of the visible core.
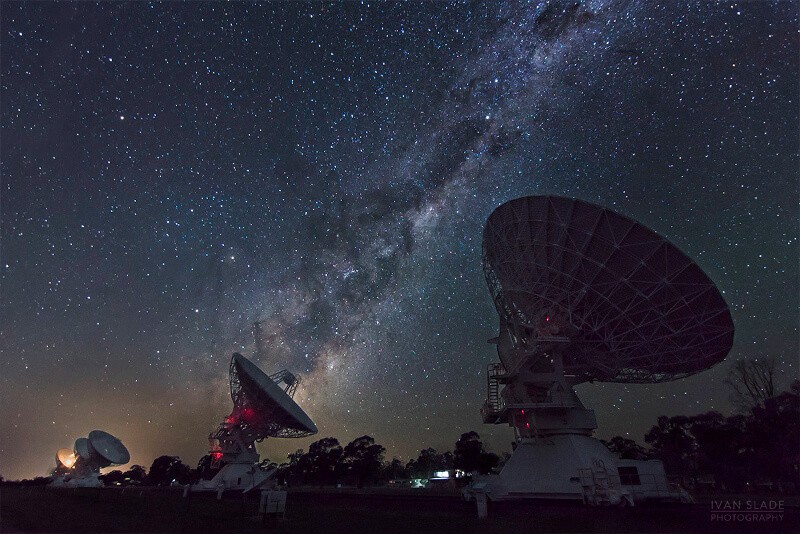
Marcus Cote
There are a number of great free apps and websites to use to do this.
One that I use is Stellarium – there is an app as well as the web version.
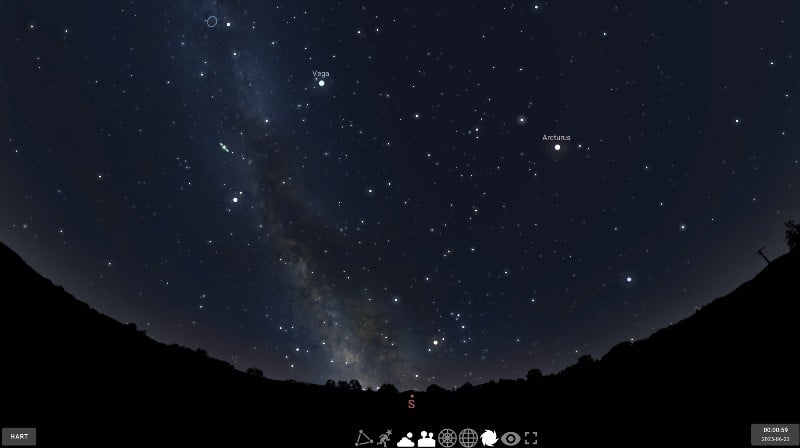
What you do is enter your location and then roll the time forward to see when the Milky Way core becomes visible. If you have atmosphere selected at the bottom it will also take account of what time the skies will get dark where you are.
You can see in the screenshot below that I can see that the Milky Way Core will become visible when facing south at around midnight tonight for my location:
For some other apps and tools, see our guide to the best apps for astrophotography.
The Weather
So, now we know that the Milky Way will be visible for us tonight. The next question is will the skies be clear and cloud-free?
This is very important as clouds will block out the stars and night sky.
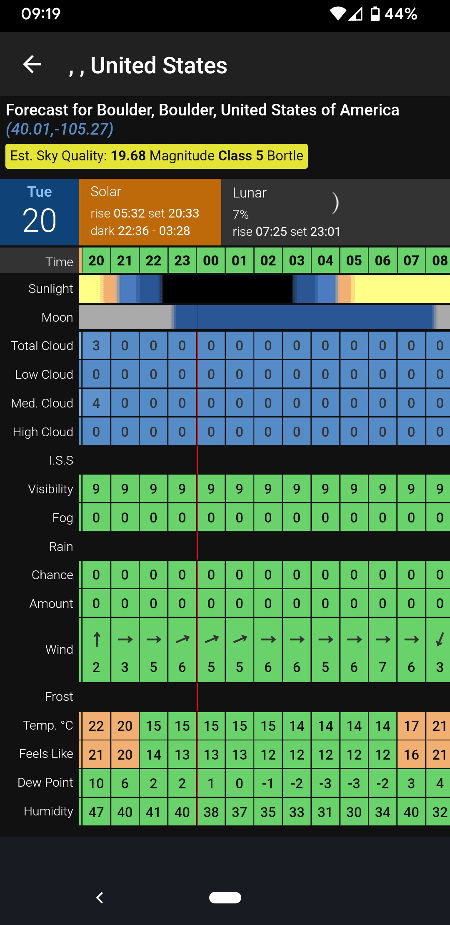
You can of course use regular weather forecasts for this, but for a more advanced overview the Clear Outside app is great.
Using this tool, you can input your location to access a detailed, hour-by-hour weather forecast for the upcoming days and weeks.
See in the screenshot below I can see that from my location the skies will have zero clouds from 8pm onwards and so perfect conditions for photographing the Milky Way:
The Light of the Moon
While the next factor is less crucial than the previous three, considering it will enhance your chances of capturing a star-filled night sky.
Essentially, a bright moon – with a full moon being brightest – lightens the whole night sky and makes astrophotography harder.
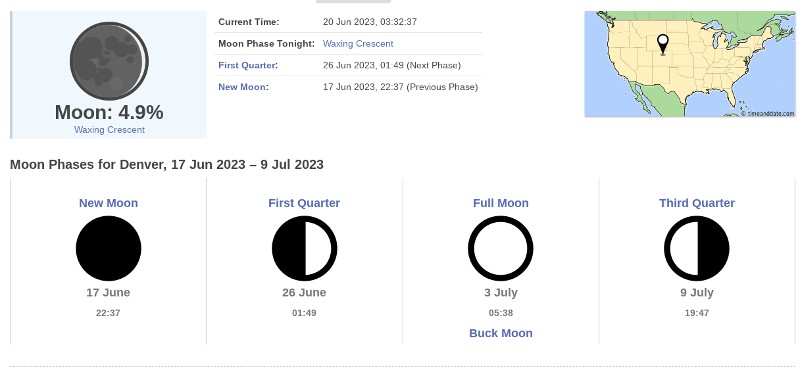
The moon is at its darkest around a new moon, so ideally this is when you want to be out shooting.
You can check an online moon phase calendar or – if you look at the screenshot above – the Clear Outside app also gives you this information.
Your Location and Light Pollution
Finally, the fifth aspect you should check is the level of light pollution from where you are planning to shoot.
In areas with high light pollution, it is harder to capture starry skies and the Milky Way:
- If shooting in low light pollution you can get a good photo in one shot with minimal post-processing.
- If shooting in an area with high light pollution levels then you are likely to have to do things like use a higher ISO setting, take multiple images to stack them, and/or do more post-processing.
Therefore, it’s not impossible to take great Milky Way photos in high light polluted locations, but it is harder.
Below is a screenshot taken from light pollution map, a free online tool, of the whole of the United States:

With this, you can input your location and zoom in to see the light pollution levels where you are and in the surrounding areas. This can help you highlight if there is a better spot to shoot from that you could feasibly reach.
To understand more about this, see our article on light pollution and astrophotography.
If you are planning to shoot from a heavily light-polluted area, then check out our guide to Astrophotography in the City for tips on how to make this work.
Milky Way Photography Timing Checklist
So bringing this all together, here is a checklist of things you need to consider before going out at night to try and capture the Milky Way:
- Is it Milky Way Season? This is pretty easy to check – see the dates above.
- Will the Milky Way core be above me tonight and at what time? This is essential for timing it right. You can use free apps and websites to check this.
- Will the night skies be clear of clouds? Again, essential so you don’t waste your efforts. Check a good weather app.
- What’s the phase of the moon? You want to aim for as close to a new moon as possible to give you the darkest skies. Not essential but will help you if you have as dark a sky as possible.
- Can you travel to a location with low light pollution? Again, not essential if you have steps 1-3 sorted, but will give you a better chance of getting a good photo.
Now let’s move into what camera and equipment you need.
2. Choosing Your Gear
There are three things that you need to photograph the Milky Way:
- A Camera
- A Lens
- A Tripod
Let’s now examine each of these to give you the best chance of success.
Cameras for Milky Way Photography
You don’t need a top-of-the-range model for your camera; any DSLR or mirrorless camera can suffice for Milky Way photography.
In fact, you can have success in photographing the stars with a smartphone. The key thing is that it will need to have a manual mode where you can alter the settings like ISO, shutter speed, and aperture.
That being said, the better your camera is the easier it will be to get great results.
We reviewed the cameras used in nearly 700 images shortlisted in astrophotography competitions and found that nearly all the Milky Way images were taken with:
- DSLR or Mirrorless cameras
- With full-frame sensors
- From either Nikon, Canon, or Sony
You can see this data and further analysis here in the Best Cameras for Astrophotography.
If you already have an older DSLR or similar camera then definitely give it a try with that first and see what you can get from it.
Pushing the limits of your camera is often a great way to learn photography and then fully understand what you really want if and when you decide that it’s time to upgrade your camera.
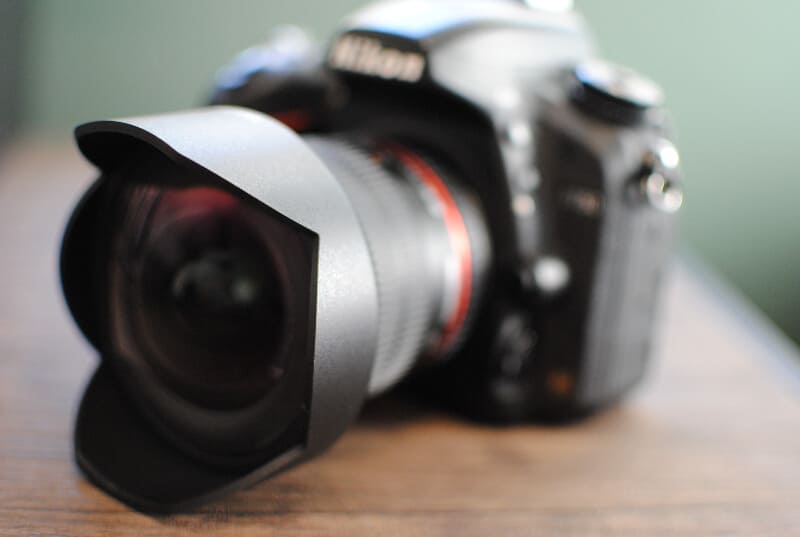
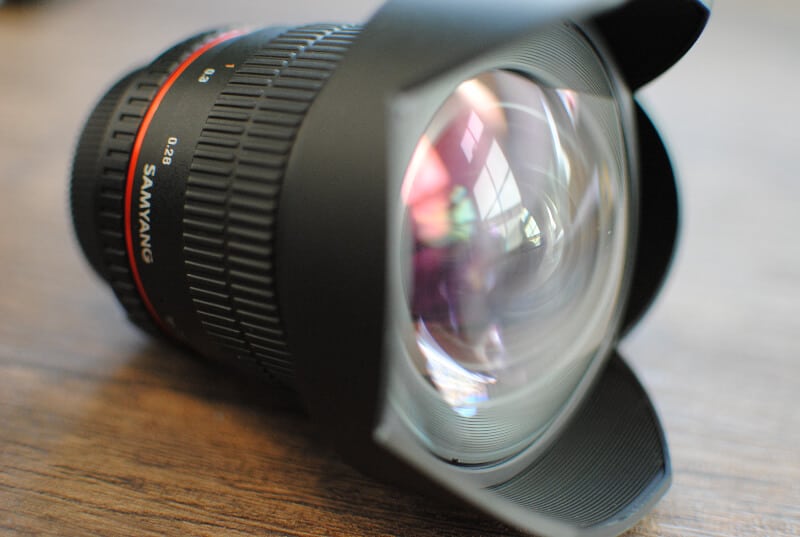
Lenses for Milky Way Photography
When taking pictures of the Milky Way, you should look for two characteristics in your lens:
- It should be wide-angle, so as to capture as much of the sky as possible
- It should have a fast aperture, this is indicated by a low F-number
For example, a 14mm F/1.8 lens is perfect.
See more information here on the Best Lenses for Astrophotography.
If you have a standard DSLR with an 18-55mm kit lens, then feel free to give that a go before upgrading. At 18mm it is wide-angle, but probably won’t have a very fast aperture.
Again though, always good to push the limits of the equipment you have before making any decisions to upgrade.
Tripods
A good, sturdy tripod is the third item you need for capturing the stars.
You need your camera to stay completely still when shooting, often whilst you are outside and there may be wind to contend with.
You need something fairly heavy-duty and with a ball head, which makes it much easier to quickly adjust the angles you are shooting at.
It’s worth going above most budget options for this, but you don’t have to spend too much more to get something much better that will last you a long time.
See the Best Tripods for Astrophotography for more on this topic.
Other Gear Useful for Photographing the Milky Way
There are two other things you might want to consider having in your gear bag:
- An intervalometer
- A Star Tracker
An intervalometer is a remote release that allows you to take your shot without touching your camera and causing it to shake which will impact your image.
It can also be used to set your camera to shoot on a timer and for multiple shots – i.e. press the button and wait 3 seconds and then take 5 images of 15 seconds each.
See the Best Intervalometers to find a model for your camera.
Secondly, a star tracker is a small motorized mount that sits under your camera on the tripod.
It rotates your camera to track the movement of the night sky whilst you are photographing it. This means that you can take much longer single exposures and have settings like ISO lower for better quality images.
This is not essential for a beginner and is more something you might invest in later once you have had a few goes at capturing the Milky Way without one.
See the Best Star Trackers for Astrophotography
3. Milky Way Photography Settings
Now that we’ve assembled our kit and planned our timing and location, it’s time to focus on getting the settings right for the day.
There are three main things to consider:
- Shutter Speed / Exposure Time
- Aperture
- ISO
Shutter Speed / Exposure Time
In Milky Way photography, Shutter Speed is likely the most important setting.
We want to shoot as long as possible to capture the maximum amount of light, but if we go too long then the stars will start to trail and be less sharp as the Earth rotates and they move.
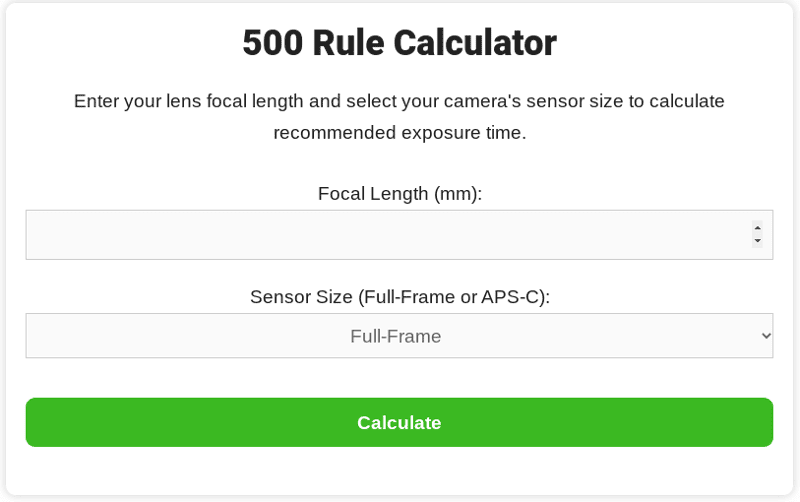
There are two good rules to enable you to calculate the maximum shutter speed you can use for your setup:
- The 500 Rule
- The NPF Rule
The 500 Rule says that if you calculate 500 divided by the focal length of the lens you get the maximum shutter speed that you can use.
So for example, with a 14mm lens your shutter speed can go up to 35 seconds (500/14 = 35.7).
With a 24mm lens it would be 20 seconds (500/24 = 20.8) and a 35mm lens it would be 14 seconds (500/35 = 14.3), and so on.
You can use our free 500 Rule Calculator to do this right now.
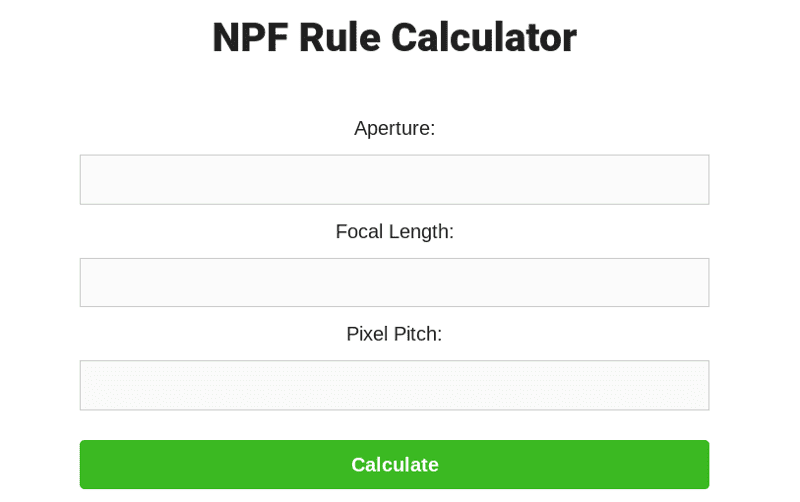
The NPF Rule is a more complicated calculation but gives you a more accurate figure and is better.
We also have a free NPF Rule Calculator that you can use on our website.
Aperture
Simply put, use the smallest F number that your lens has, as this represents the largest aperture and will allow the most light in.
ISO
Increasing the ISO on your camera will allow it to work better in low-light settings. It would, therefore, seem obvious to have this at the maximum then, right?
Unfortunately, it is not quite as simple as this. The higher the ISO the higher the amount of ‘noise’ you will get in your pictures.
If you are not familiar with this term it refers to a kind of graininess on the image that you will want to avoid.
This varies significantly between cameras, so you’ll need to experiment to find the lowest ISO that still allows you to capture the night sky without noise
For the ISO setting, you need to understand your camera sensor and whether it is ISO invariant or not. The Canon 6D, for example, is not ISO invariant and has a “sweet’ spot around ISO 6400.
The Sony A7RII is pretty ISO invariant – meaning the noise is pretty much the same regardless of the ISO (within sensible limits). This means you can use the ISO to influence how bright you want the scene.
Ivan Slade
You can “de-noise” pictures in post-production, but best to avoid it in the first place.
Further settings
RAW
Make sure to shoot in RAW. This captures more information in the photograph and gives you more possibilities to make the image the best it can be in post-production.
Timer / Remote Release
You will then want to change the settings so that your camera takes the picture on a short delay (i.e. 2-3 seconds after you press shoot) or via a remote release to avoid any camera shake.
Image stabilization
If your camera has a mirror lock-up function this can also be enabled to reduce camera shake but do turn off any image stabilization function as this can degrade the quality of your images when you know the camera is going to be still (i.e. on a tripod).
4. Composing Your Milky Way Shot
Now we have our settings right, it’s time to take our shot(s). There are two key things to look at here:
- Focusing
- Composition
Focusing Your Camera for Milky Way Photography
Achieving sharp focus is a critical aspect of photographing the Milky Way.
Due to the low light conditions of night photography, the camera’s autofocus system may struggle to find a point of focus, making manual focusing necessary.
There are two good ways to go about this (amongst others):
- Manual Focusing using Live View
- Utilizing Focus Peaking
Manual Focusing using Live View
- Switch to Manual Focus: The first step is to switch your camera to manual focus mode. This usually involves a switch on the side of your lens or in your camera’s menu settings. Make sure to disable autofocus to avoid any accidental changes in focus.
- Choose a Bright Star or Distant Light: Find the brightest star in the sky or a distant light source on the horizon. This will serve as your focal point.
- Use Live View: Turn on your camera’s Live View function. This displays the image sensor’s live feed on the rear LCD, making it easier to manually focus.
- Zoom In: Use the digital zoom feature in Live View to zoom in on your chosen star or light source. This magnified view will provide a clearer indication of when the star or light is in focus.
- Adjust the Focus Ring: Slowly adjust your lens’s focus ring until the star or light source appears sharp on the screen. It’s important to do this slowly and carefully, as even minor adjustments can significantly impact the focus.
- Confirm and Lock Focus: Once the star or light is sharp, confirm focus and avoid touching the focus ring. Some cameras or lenses have a focus lock feature, which can be useful to ensure the focus doesn’t change inadvertently.
Utilizing Focus Peaking
If your camera supports it, focus peaking is another useful tool for achieving sharp focus. Focus peaking is a feature that highlights the areas of the image that are in sharp focus.
- Enable Focus Peaking: Navigate to your camera’s settings and turn on the focus peaking feature. You can usually choose different colors for the highlighting, so pick one that stands out against the night sky.
- Adjust the Focus Ring: As with the Live View method, slowly adjust your lens’s focus ring. The areas in sharp focus will be highlighted by the focus peaking feature.
- Check the Stars: When the stars or your chosen light source are highlighted, this indicates they are in focus. Lock the focus at this point to ensure it remains consistent.
Keep in mind that focusing for night photography can be a challenging and somewhat time-consuming process. It may take several attempts to get it right, especially if you’re new to manual focusing.
Composition
To take a great Milky Way image, you are likely not just going to want the sky in the picture but also some element of the Earth’s landscape as this helps frame the image and make it truly great.
There are some things to experiment with here:
- Firstly, employing the rule of thirds can create a sense of balance in your image. Imagine dividing your viewfinder into a 3×3 grid and place the Milky Way along one of these lines, or where they intersect. This ensures the viewer’s attention is drawn to the galaxy and gives your photo a harmonious feel.
- Leading lines can also be an essential tool in your composition arsenal. Use natural or man-made lines in your scene, such as a winding road, a stream, or the shoreline, to guide the viewer’s gaze toward the Milky Way. This can create a visual journey from the foreground to the sky, adding depth and intrigue to your image.
- Foreground elements are another crucial aspect to consider. A strong foreground can anchor your shot and provide a sense of scale against the grandeur of the Milky Way. Incorporate elements like trees, mountains, or buildings into your composition to add depth and interest. Remember, these elements can become silhouettes against the night sky, forming dramatic contrasts with the glowing stars above.
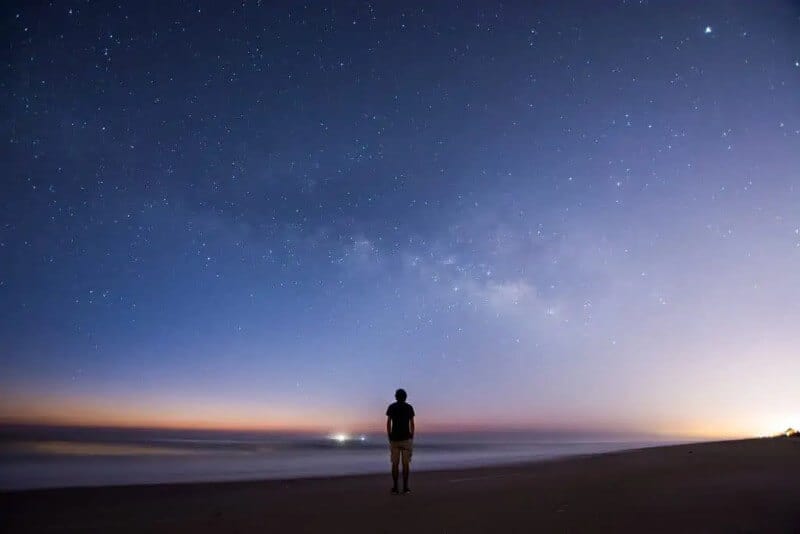
With regard to the photo below, photographer Talman Madsen told us:
I set up the tent in a place that was going to align perfectly with the Milky Way…I then placed my head torch in my tent facing upwards to illuminate the silhouette and provide a sense of scale to the scene.

Don’t be afraid to experiment with your compositions. Try positioning the Milky Way in different parts of the frame, or use landscape elements to create a frame within your frame. For example, you could position the galaxy between two trees or mountains.
Also, keep an eye on how the Milky Way’s position changes over the course of the night. As it moves across the sky, new composition opportunities will arise, allowing you to capture different perspectives.
There are a number of other techniques you can experiment with:
- Light painting is a fun technique to experiment with. Use a flashlight to illuminate your foreground elements during the exposure. This can add texture and detail to the foreground, contrasting with the soft glow of the Milky Way.
- Silhouettes offer another creative avenue. Position a person or an interesting object between your camera and the Milky Way to create a silhouette. This can add a human element to your image and create a sense of scale.
- Reflections can make your Milky Way photos even more eye-catching. Find a body of water, like a lake or a pond, and capture the reflection of the Milky Way on its surface. This can double the impact of your image, creating symmetry and adding an extra layer of beauty.
- Lastly, consider creating panoramas. A panorama can capture the vast expanse of the Milky Way stretching across the night sky, offering a view that a single frame simply cannot match. Use a wide-angle lens, capture multiple images across the sky, and then stitch them together in post-processing.
See Introduction to Landscape Astrophotography for more on composition.

5. Processing Your Milky Way Photos
When it comes to creating a stunning photograph of the Milky Way, the work doesn’t stop at the capture; post-processing plays a significant role in bringing out the best in your night sky images.
This phase can make the difference between a good and an outstanding photograph, enhancing the contrast, clarity, color, and sharpness of your Milky Way photos while minimizing noise and artifacts.
The Advantage of Shooting in RAW Format
It is important to shoot in RAW format when photographing the Milky Way. RAW files are uncompressed, meaning they contain all the image data your camera’s sensor captures.
Unlike JPEG files, which undergo in-camera compression and processing, RAW files do not result in a loss of detail and dynamic range, providing greater flexibility during the editing process.
With RAW files, you can make substantial adjustments to exposure, shadows, highlights, white balance, and colors without degrading image quality.
Choosing Your Post-Processing Software
There are several software options available for processing photos of the Milky Way. Here are a few:
- Adobe Lightroom: This is a popular choice for photographers. It offers a wide range of tools for adjusting exposure, contrast, color balance, and more. It’s also great for organizing your photos.
- Adobe Photoshop: Photoshop is a more advanced tool that’s excellent for detailed edits. It’s particularly useful for techniques like stacking multiple exposures to reduce noise.
- Capture One: This is another professional-grade photo editing software. It’s known for its color grading capabilities and also offers a variety of tools for exposure adjustment, noise reduction, and more.
- DxO PhotoLab: This software offers advanced noise reduction capabilities, which can be particularly useful for Milky Way photography.
- Affinity Photo: This is a more affordable alternative to Photoshop, but still offers a wide range of editing tools. It also supports working with RAW files.
- GIMP: This is a free, open-source photo editing software that offers a range of tools for photo manipulation.
- Sequator: This is a free software specifically designed for stacking astrophotography images, which can help reduce noise and bring out more detail in the Milky Way.
- DeepSkyStacker: This is another free software for stacking astrophotography images. It’s a bit more complex than Sequator, but offers more advanced options.
- StarStaX: This software is used for creating star trail images, but can also be used for stacking images of the Milky Way to reduce noise.
- Astro Pixel Processor: This is a comprehensive astrophotography software that includes tools for stacking, calibrating, and processing images.
The best software for you will depend on your specific needs, your budget, and your comfort level with photo editing.
Basic Steps in Post-Processing Your Milky Way Photos
Let’s now walk through some fundamental steps to enhance your Milky Way photos.
It’s important to note that these steps are a starting point – the amount and type of adjustments will vary based on your personal style and the specific conditions of each photo.
- Exposure & Contrast: Start by adjusting the exposure and contrast of your image. Increasing the exposure can help reveal the details of the Milky Way, while enhancing the contrast can make the stars and the Milky Way core stand out against the sky.
- Highlights & Shadows: Adjust the highlights and shadows to balance the image. You may want to reduce the highlights to prevent stars from becoming overexposed and lift the shadows to reveal more details in the darker parts of your image.
- Clarity & Sharpness: Increasing the clarity can make the details of the Milky Way more prominent. Be cautious, however, as pushing the clarity too high can introduce artifacts. Sharpness can also be increased slightly to enhance the stars’ distinctness, but over-sharpening can lead to noise.
- Color: Adjust the white balance and saturation to bring out the colors of the Milky Way. Often, a cooler white balance can help make the stars and Milky Way core appear more natural. Be careful not to oversaturate the colors, as this can make the image appear unrealistic.
- Noise Reduction: Finally, apply some noise reduction. Shooting in low light conditions at high ISOs, which is often necessary for Milky Way photography, can introduce noise. Most editing software has noise-reduction capabilities that can help minimize this. Be careful not to overdo it, though, as too much noise reduction can make your image look soft or lose detail.
There are lots of online tutorials on post-processing – both free and paid. This is something that you can do a little or a lot depending on your preference and is something you need to play around with.
The goal of post-processing is to enhance your Milky Way photos while preserving the natural beauty of the night sky.
Key Takeaways – How to Photograph the Milky Way
The article is our attempt at a comprehensive guide on how to photograph the Milky Way in five steps. The key takeaways are:
- Planning is crucial, especially with regard to timing and location. The Milky Way is visible in the night sky only during certain months, known as the Milky Way Season. The weather, light pollution, and the moon’s phase also play a significant role.
- The essential gear includes a camera, a lens, and a tripod. While any DSLR or mirrorless camera can be used, the lens should be wide-angle with a fast aperture. A sturdy tripod is necessary to keep the camera still during long exposures.
- Setting up the camera involves adjusting the shutter speed, aperture, and ISO. The shutter speed should be long enough to capture maximum light but short enough to prevent star trails. The aperture should be as large as possible (smallest F number), and the ISO should be set to balance between capturing the night sky and avoiding image noise.
- Composing the shot involves focusing and framing. Manual focusing is necessary due to low light conditions. The composition should include some elements of the Earth’s landscape to frame the image and make it truly great.
- Finally, post-processing plays a significant role in enhancing the contrast, clarity, color, and sharpness of Milky Way photos while minimizing noise and artifacts. Shooting in RAW format is recommended for preserving more details and dynamic range.
Like all photography, shooting the stars will take time to master. So, keep practicing, even if it doesn’t work out perfectly the first time (or times).
You’ll learn from trying and there are many factors at play, but persist and there is no reason you can deliver some mind-blowing Milky Way photography. Good luck!
Related content:


Getting helpful
What star tracker program do you prefer to use? I live in Central Texas and am searching for low light pollution locations and attractive composition suggestions.
Hi Karen, the Photopils app is great for planning your shots. Good luck!